Sunday, 19 May 2013

Pixies Crafty Snippets Playground - Week 73

Yikes, I only just managed to finish my snippets card quite late yesterday so this week might well be a very quick canter:


I used:

- 5.5" x 5.5" square white card stock with one edge punched using MS 'Lace Heart' border punch with a little straight snippet of 'Perfect Plum' patterned card on the back half of the card - snigger, which you can't see in the photo

- pink card from the snippets folder - checking against my SU card swatch it's 'Pink Pirouette'

- snippets of patterned 'Perfect Plum' card stock, chopped into squares and popped onto the pink card, some showing the reverse of the card

- LOTV 'Born to Shop' stamped image (I used Memento 'Grey Flannel' as it's softer than black), coloured with Pro Markers, a tickle of Ranger Glossy Accents on the sunspecs and a touch of pink chalk on the bear's cheeks - a tip I got from Jules - it looks much more natural than trying to blend a pink Pro Marker

- the image is backed with a snippet of plain SU 'Perfect Plum' card stock, die cut with a Nesties scalloped square die

- sentiment is LOTV from their 'General Greetings Small' set, stamped using SU's 'Perfect Plum' and die cut using a 'Crealies text tag', as is the 'Perfect Plum' frame round the sentiment

- a snippet of pink spotty ribbon (I have about two inches left so it's in a little poly bag with other ribbon snippets ready for a trip to Hobbycraft to stock up)

- the finishing touch is a little handbag charm tied on with an irridescent cord bow (thank you Jules for sending me my own pack of assorted charms to play with!)

Right, am now up to a gallop - and here are some picks of the week:
I think you'll agree that Sandra H has used snippets brilliantly here - I LOVE all the greens!
A fabulous snippets card from Cathy R - sighing over the embossing folder here and a lot of little snippets used too.
Such a vibrant card made by Lynn - using the joy fold which is such a great way to use little snippets as well as being a real change.
Sam (aka Hettie) brought this stunning Christmas album to show - using shed loads of snippets I saw this album partially made last year and it really is breathtaking!
Mags B is another playmate who made a joy fold card this week - using one of my favourite LOTV images.
And Karen P brought this beautiful Wedding card - showing devotion to snippets! You really ought to go and read just how she squirrels her snippets.

Sorry that was such a fast whizz through - remember you can still go and check out all the lovely snippets makes from last week by going here.

So, last week's prize, donated by Jules - those lovely charms and the cord:
Mary didn't seem to have the vapours over the charms and the cost of using them on cards to post in the USA - in fact I rather think she loved them! I agree, why spoil a card if you feel that a charm is a nice finishing touch?! Well done Mary - they will be in the post to you ASAP.

And, now for this week's prize - which is a real little medley of goodies to play with. And my snippets card is a BIG clue.

This is what we have:
- first of all, the super cute LOTV stamp called 'Born to Shop' plus a pack of A6 embossed cards - kindly donated by Viv

-two 'Crealies Text Tag' dies from me. The white stuff is Eazi foam which you add to the die before using it the first time - I love that these dies will also cut a nice contrasting border as I used on my card today

- a set of LOTV 'General Greetings - small' stamps. These are almost my very favourite 'go to' set of sentiments and I use mine LOADS - I just checked and most of them fit inside one or other of the dies too. LOTV don't exactly inspire by including images of the stamps you're buying but I guess that keeps costs down, however I always stamp my LOTV images for reference and this is the slightly crumpled piece of paper I keep inside the packet with my own 'separated and trimmed' set of these sentiments:
A real little selection box this week girls!

The Playground is open all of this coming week, will close on Saturday 25th May  at noon UK time and Mr Linky is below as usual. Just enter a snippets make into the Playground this week and I'll do a draw after the Playground closes next Saturday.

Maximum of three entries and please say 'No thank you' in a comment if you wish to still play but not be a winner of this weeks prize.

Have a great week! 

Di
x

Saturday, 18 May 2013

Pretty Potties

That's the name of the Pink Petticoat stamp set that was a recent giveaway with Quick Cards Made Easy magazine. There is a potty, also the watering can that I used for today's card and a couple of wheelbarrows - each one filled with flowers, excellent for a giveaway (if you forget that you have to buy the magazine to get a freebie). But, QCME is always so full of inspiration I think it's excellent value for money:
I used:

- 5" x 5" square white card stock

- a snippet of pink card and a snippet of SU's Baja Breeze' card stock

- a snippet of white card stock, stamped with the Pink Petticoat watering can image, coloured with Pro Markers, a touch of glossy accents on the heart and a few teensy pearls on the flower centres

- I die cut round the image using a new Nesties die (Floral Flourishes I think) and almost lost the will to live. What a job getting the card out of the die - mental note for future reference, use that greaseproof paper!

- the blue background was embossed using Couture Creations' 'Breeze' embossing folder - ha, a bit of a breezy card then. What's lovely about this folder is that half of the design is embossed and the other half is 'debossed'

My original intention was to use Pink Petticoat backing paper but it was way too busy.

Hope you're all set for a good weekend - whatever the weather throws at us.

A Spike the hedgehog update - he's out and about every evening now from about 10:30 pm. The other night we hadn't yet taken the little pottery bowl from over the top of his fresh food when he arrived. Undaunted he actually managed to get his snout underneath it, nosed the bowl up and to one side and tucked in - ha, and then promptly left two little calling card to express his opinion of bad 'room service' :)

He still isn't posing for photos though, despite me lurking outside in the dark some evenings waiting for him to trigger the outside lights :( I think the men in white coats might turn up before long 'cos (much to Len's amusement) my ears are really tuned to hearing him (Spike not Len!) rustling round in the bushes and I stand there whispering 'C'mon out Spike and pose - pretty please'.

Di
x

Friday, 17 May 2013

Wish upon a star

The current theme over at Craftyhazelnut's Christmas Challenge is 'Seeing Stars'. This is my second card of the week - mostly as it was the card front I originally had in mind to 'upcycle' - right under my nose hiding in the box where I couldn't see it first time round:
I used:

- 6" x 6" square white card stock

- silver mirri card, behind the patterned paper and then with the main image from the card mounted onto a piece and the trimmed sentiment added below

- blue patterned paper, with teensy silver stars on by Craftwork Cards (had it for years!)

- a couple of Josy Rose silver star nail heads at either end of the sentiment

This is also for Craftyhazelnut's Christmas Challenge Extra - where the theme is always 'anything goes'.

I still need to get a wiggle on after those pesky bookmarks are finished and do some batches of Christmas cards. It's either that or fall out with a few folk before Christmas!

Di
x

Thursday, 16 May 2013

Off to the 19th hole?

Time for a card for a 'chap' - never top of my list - and it's for the current challenge over at Allsorts, where this week's challenge is 'Any Sport' - perhaps heading determinedly towards the 19th hole still counts as part of the sport :)
I used:

- 6" x 6" square white card stock

- pre-coloured image from LOTV's 'Vintage Boys' pad, die cut with a 'Wonky Square' Nestie and mounted onto a hand cut larger piece

- plain SU backing card - 'Midnight Muse'

- card from DCWV's 'The Juniper Berry Stack' - half of the sheets come with foil/glitter, and this particular sheet cried 'Pick me, pick me' when it saw the image :)

- plain 'Midnight Muse' label punched with a label punch (Hobbycraft's own brand) and topped with a smaller white label, which was stamped using a label stamp from Elzybells 'Mini Tag Set' and TH 'Faded Jeans' ink pad. Sentiment is from LOTV's 'Small General Greetings'

- then I just punched a hole in the assembled label and tied it round using baker's twine

Wahoo, I just found a new monthly challenge over at LOTV and this month's theme is 'Boy Oh Boy' - so I'm entering this card :) 

OK, back to those bookmarks here, sigh.

Di
x

Wednesday, 15 May 2013

WOYWW 206

Super fast WOYWW from me - almost didn't join in but, as it's only a couple of weeks until Week 208 and the ATC swop, it didn't seem right not to play as I do hope to take part:
The usual cup of coffee - almost cold, as usual. The makings of a card, those Radley dog buttons still waiting to be played with - and a whole load of panic here. This is why:
Looks pretty innocent I know - but there's 250 bookmarks lurking in there. All are at least printed, chopped to size and the fold scored, 50 or so with the corners already rounded (punch, punch, punch), pretzel bags trimmed down to size for packing before little 'Flip over the page Magnetic Bookmarks' labels are added to seal the bags.

The reason, it's only just over two weeks until my old school reunion and these will be little table favours on the Saturday evening when we have our riot posh dinner/dance.
And this is what they'll look like once the magnets are added. Harrumph though, still smarting here 'cos the weekend is the same one as the WOYWW crop :(

That's me - need to finish the card and then get back to punching off bookmark corners - only 800 corners left to punch, sigh.

To see what everyone else is up to, with a LOT more sense (as well as much smaller mouths when asked what they can come up with for table favours),  hop over to Julia's and then onto see who else linked in :)

Happy WOYWW! Punch, punch. punch :(

Di
x

Oh to be relaxing

....on a beach just like this one. Just off the South of Phuket lies an island called 'Lone Island' and we used to love going there for the day. Just the two of us to a very private beach, no tourists, a picnic lunch and our own boatman. Total bliss! So, when I recently won some stamps from Flonz, one stamp in particular stamp jumped into my shopping basket right away - thank you again Hazel! I do think they have some unusual stamps at very good prices, even though they have to travel from New Zealand. Lots of vintage ones too girls!

This week's challenge over at Less Is More is to use a coloured card blank, and it's one layer at that - bit of a double whammy there for me but I think I got there in the end:
I used:

- SU 'Tempting Turquoise' card stock, cut to A6 size in a tent fold, with the left hand corners rounded

- the stamp from Flonz is called 'Landscape with Palms, Moon and Lake' - looks more like the sea to me, stamped using Memento 'Tuxedo Black' with some colouring on the moon and white gelly roll ink on the breaking waves

- sentiment is by Stampendous called ''Feel Sand', also stamped in Memento 'Tuxedo Black'

- before stamping (me not totally stoooopid) I embossed the square frame and then pricked round the frame right at the end of making the card - using a Dovecraft ruler with pricking holes in and my lovely TH Tonic Studios paper pricker/pokey tool (thank you again Sam, I love it!)

And here's one of the beaches on 'Lone Island' which I did find on the Internet for speed rather than search through our own photos - in fact, that could even be our little 'long tail' boat :) I sure feel Thailand calling to me this year.
 

Di
x

Tuesday, 14 May 2013

Follow that star

A very quick card today, made for Hazel's Crafty Hazelnut's Christmas Challenge  where the theme is 'seeing stars' this week - and also for her Craftyhazelnut's Christmas Challenge Extra for May.

Hmmm, I spent ages looking for the perfect backing card in my goodies and found one with just the right shades of red and orange - then look what the camera did to it:
It only went and turned it pink! Sigh.

Anyhow, I used:

- A5 cream card stock with gold foiling around the edges

- the front of another upcycled Christmas card, sliced into three and popped onto gold mirri card

- red/orange backing card which I think is by Kanban, swirls and little stars

- a couple of strips of ribbon, one gold stripes and the other is red

- three shiny gold card candi dots

I'm gonna see if the light is better for another photo today, but I suspect it's one of those cases where the backing card won't wanna play!

Di
x

Monday, 13 May 2013

A 'corking' idea from Katina

This month's Quick Cards Made Easy magazine had another great article by Katina, using cork on cards. I practically CASE'd one of Katina's lovely cards and made this:
I used:

- 6" x 6" square white card stock

- turquoise card from the snippets folder and a snippet of yellow card for the sun, punched with a round punch

- cork backing and a little house made from cork - the house shape was just a 2" x 2" square with another square the same size, sliced diagonally for the roof, plus a snippet from the other triangle I was left with for the chimney (it's already cut at the same angle so that reduced some fiddling about. The cork is DCWV adhesive cork and I bought mine from EBay where the seller had just six sheets in packs - a nice amount to play around with

- the roof, windows and door are all cut from snippets of Pink Petticoat 'Wild Blossoms' collection paper - the door was actually punched using SU's 'Modern Label' die with a bit trimmed off the bottom

- a snippet of KanBan'Green Grass' card along the bottom with a white die cut border using La La Land's 'Tulip Border' die. I then die cut more of the border using another paper from the 'Wild Blossoms' collection and  snipped the heads off and glued them to the flowers - plus a few along the bottom...........really need to get out more!

- the sentiment is an Elzybells one, stamped with Brilliance Pearlescent 'Sky Blue', then punched out with SU's 'Large Oval' punch and matted onto a cork oval which was punched with SU's 'Scallop Oval' punch

- hand drew the birds and then fished a teeny scrap of cork outta the waste basket and using about an eighth of an inch hand punch just punched little centres for the flowers along the bottom of the card - and a door knob :)

Looking at the amount of snippets I used, this would have been more suited to yesterday's Snippets Playground post!

There's another card in the same article I'd like to play around with, using die cut flowers. While the cork is still on the desk that could my next little venture - in between making those reunion bookmarks :) Mind you, I did make a bit dent in them yesterday which is a relief 'cos I do now know it's achievable without sitting up half the night for the next couple of weeks.

Di
x

Sunday, 12 May 2013

Pixies Crafty Snippets Playground - Week 72

And it's another week of lovely makes in the Snippets Playground! I do apologise for slamming the gates shut 12 hours early - my fault entirely, I did re-open them for another four hours as soon as I realised. And, if you did get shut out you can always back link by a day or so for this coming week. I hopped onto the naughty step - had to get a few of you to move over to make room for me!

Here's my snippets card:
To be honest, only the green card, a little bit of white card and the pink  'cobweb' ribbon are snippets but I did so want to try out using a doily as shown in this month's Quick Cards Made Easy magazine by the very talented Katina. I love the doily idea - a quickfire way to giving a vintage look.

I used:

- A6 white card stock

- snippets of SU's  'Always Artichoke' card behind the patterned paper and also the sentiment

- patterned paper from Wild Rose Studio's 'Letters from Paris' paper pack

- a little white doily, run through the Xyron and then folded around the right hand side of the matted green card and patterned paper

- a snippet of sugar pink 'cobweb' ribbon, wrapped round and tied in a bow. Tip: it's quite wide ribbon so I folded in in half length ways, did a half knot and then fanned the ribbon out to its full width before tying the bow. In this instance I tied the bow by doing it on the 'spine' of the topper and gently working it across the card by slightly 'bowing' the card to make some leeway.

- the topper was then stuck onto the A6 card and a little dragonfly charm added, using pearlescent cord tied on a bow round the cobweb bow

- the sentiment is from Whimsy's 'Friendship Tickets Sentiments set, stamped onto a snippet of white card using Brilliance 'Pearlescent Orchid' then punched using SU's 'Word Window' punch

- another green snippet was punched using SU's 'Modern Label' punch, the sentiment was added and just a couple of small self adhesive pearls

I'd like to enter this card into the current challenge over at  Pan Pastel, where this week's theme is In The Pink.

Well, we did have some excitement here yesterday girls. I had an excited text from Hettie (aka Sam) saying that decopatch was being demo'd and sold on Create and Craft TV. I love decopatch, it's so relaxing to do, so I raced and put the TV on whilst making breakfast. The first thing that caught my eye was a mahoosive cow all covered in decopatch - not unlike this one:
I suggested to Sam we could have one for the Playground, which started a little series of 'What would we call her' emails - then Sam pointed out it was a bull 'cos it has horns. Someone needs to tell her about the birds and the bees 'cos I don't think she noticed the rear end and the 'milking gear' in all the excitement :) By the way, you can buy this here - at under £180.00 even!

OK, so who's been doing what this past week then?
First into the Playground was Cathy, with this really super little row of pots and flowers.
And how about this for another one from Cathy - a rainbow of one eighths of an inch diameter dots! I think this week's gold star for the teeniest snippets goes to Cathy!
Jules really stole the show for ingenuity here - and unable to find her fine knitting needles she actually did the knitting straight onto the cocktail sticks :) OMGosh - I just properly noticed the backing paper - now how totally cool is that?!
 
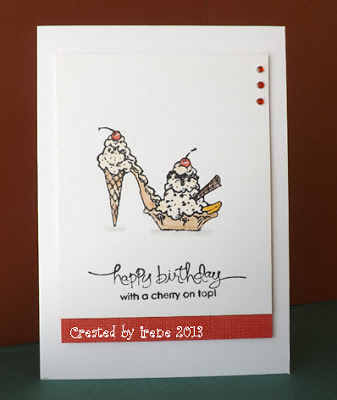
Just a red snippet here from Irene, although perhaps the white background is also a snippet - but I really thought you ought to drool over the amazing shoe! :) I neeeed that stamp, it's brilliant.

A really fast show and tell this week - but to see more of course you can still use the links from last week, there are loads of super makes to get inspiration from.

Now for the draw for that fabulous 'Water Droplets' stamp (plus the fish one). Ryn popped in to say 'Hi' during the week - and is interested to know the outcome of the draw so, with no more ado, it's:

Well done Karen, I just know you'll love the water droplets stamp. Do drop me an email with your snail mail address (to di_wray@hotmail.com) and the stamp (plus the fish one) will be in the post ASAP.

And now to this week's prize, which has been donated by our lovely Patron and Founder, Jules. As Jules is the Queen of using charms in card making it's totally appropriate, and so kind - thank you Jules:
What a gorgeous selection - I thought I had quite a few charms but Jules seems to have a secret source 'cos I haven't seen most of these little beauties before - and of course there are a few hearts!! In fact, spookily, I do have the dragonflies - and even more spookily I already used one of mine earlier in the week when I made today's snippets card. And that was not even knowing what a lovely little package for the 'Playground Toybox' was about to drop through the letter box at the end of the week! The cord is fabulous too - Jules uses it loads and I picked the trick up from her - in fact I do blame Jules for a lot of my spending :)

The Playground is open all of this coming week, will close on Saturday 18th May  at noon UK time and Mr Linky is below as usual. I'll make sure I get it right this week! Just enter a snippets make into the Playground this week and I'll do a draw after the Playground closes next Saturday.

As usual I am asking for a snippets make please, maximum of three entries and please say 'No thank you' in a comment if you wish to still play but not be a winner of  the lovely charms and cord donated by Jules.

Have a great week - and no bringing a mahoosive decopatch cow/bull or whatever to the Playground please, it might scare the ducks!

Di
x

Saturday, 11 May 2013

Christmas Wishes for You

I know, I know - it's AGES yet! But, I had to make this card as I love the image so much - it's upcycled from one we were sent last Christmas. The effect of the monochrome leaves and stems of the holly with the bright red 'pop' of the berries really caught my eye when it arrived Bet you could stamp a lovely monochrome image and just add the red - oh, and it came with 'frosting' already on too:
So easy 'cos the work was mostly already done for me :)

I used:

- 6" x 6" square white card stock

- sort of 'elephant grey' Cord'inations card and red card from the Snippets folder to back the image (mostly so it didn't just look like I'd taken the easy option and just slapped an old card front onto a fresh one without taking any trouble at all)

- the sweet little tag and bow were already on the card

- not showing very well but there are some little red gems amongst the holly - one had dropped off en route to us and I added just a couple of extra ones while I had them out on the desk

Saturday is my morning to do the Snippets Playground roundup and I was out most of yesterday so this card sure came to the rescue :)

Hope you have a lovely weekend, whatever you have planned. I spent an hour yesterday trying to do a Snippets Playground grab button - managed to succeed but then realised that the image is too small 'cos I over-reduced the pixels. You'd need a magnifying glass :( Watch this space though - I'll let you know when it's done! Snigger, if I can find the flipping tutorial again :(

Di
x

Friday, 10 May 2013

A very pink Fairy card

As you just might suspect, I adore pink - especially what I'd call the 'bluer' shades such as a pale crisp pink without even a tinge of peach,  and of course fuchsia:
I used:

- 6" x 6" square white card stock - tent fold

- fuchsia pink backing card

- image from LOTV's 'Fairies' Art Pad - pre-coloured, die cut using Nesties Labels Eighteen and then popped onto my usual 'traced and hand cut' slightly larger border of more fuchsia pink. Added a tickle of Ice Stickles 'Cherry Ice' to the wings 'cos fairies have sparkly wings - at least all the ones I've ever met have

- backing paper from a favourite paper pad by Prima called 'Firefly' - I angled the image so as not to obscure the flowers :)

- a bow made using pure silk fuchsia ribbon, topped with an' ivory flower shape flat back 12mm pearl' - both from Wild Orchid Crafts

- self adhesive pearls top and bottom

This card reminds me of one of our little grand daughters - who would like to be a ballerina when she grows up, unless she can be a fairy or Barbie!

I'd like to enter this card into the current challenge over at Simon Says Stamp - where the current them is 'Things with wings'.

Anyone been having trouble uploading photos by the way? I've had trouble all week with slowness but yesterday Blogger refused to even get off its rear end and so much as try :(

After some searching on the internet I discovered it's a current 'known problem' - which Blogger are taking their time sorting out. The crux of it is that both Firefox and IE (Internet Explorer) can be affected - so if you're suffering, do as I did and try Google Chrome.

Bingo, Chrome works perfectly. I much prefer Firefox, it's more secure for a start which might be part of the issue, but until it's resolved (and many Bloggers are screaming for Blogger to extract a digit and sort it out) I'm happy to keep hopping to and fro - using Chrome when writing a post and Firefox otherwise. At least it's better than gawping at the upload drop-down box which just seems to sit there leering and doing sweet nothing!! 

Friday once again - sheesh three weeks until my school reunion and I have to make 240 or so magnetic bookmarks by then. I know, I know, I'll never learn to keep my big mouth shut :)

Di
x

Thursday, 9 May 2013

Playing with THAT landscape die again and making snow globes

The other day I posted a card using a Memory Box 'Modern Landscape' die and one comment really set me thinking. ScrappyMo said '....I saw this die on pinterest with your blue sparkly background card forming the sky and just a bit of the die with the house...all set inside a snow globe die'. Sooooo, I looked for the card on pinterest and couldn't find it but I did stumble across Memory Box Snow globe dies for sale.

Pardon me if you already have a snow globe die but it struck me that the dies were not much more than a circle plus a basic stand for the globe - and I could save some pennies so this is my take on a snow globe:

And this is how I did it:

First I selected one round die and two oval dies - they're Nesties and the oval dies are the 'next but one' in a set to give enough 'chunkiness' to the stand. Circles would be too 'rounded' - and in fact even bigger ovals would give a gentler curve. The Memory Box 'Modern Landscape Border' die is also poised to be die cut.

The oval dies lined up on silver mirri card, ready to cut, held in place with lo-tack tape. Snigger, and my paws reflected holding the camera!
The die cut oval 'frame' was then run through my SU 'Holiday Frames' embossing folder - any folder would do just as well, I just liked the scroll effect :)
I then cut the blue sparkly circles and the sticky backed landscape pieces. Now, here's a tale against me - two in fact! Firstly, when I struggled the other day I sure hadn't been patient enough 'cos by running the landscape border die back and forth through the Cuttlebug several times I did get a brilliant cut in the end - and the sticky backing peeled off perfectly.

Then I added the white card with the landscape border already cut onto the blue circles and ran them through the Cuttlebug, carefully lining up the circular die again. IF I'd been brave enough it would have been much quicker to adhere the white landscape to the blue sparkly before going anywhere near with the circular die - but this way I got the exact positioning I wanted, and can use that for future reference.
 And now you see why I did two 'globes'. The silver oval will yield two stands :)
Like so - just by halving the oval and then snipping a bit from each side - probably about an inch at most but that depends on what sized globe you have of course:
And back to how the final product turned out:
I used:

- A6 white card stock

- blue sparkly and shiny sticky back paper and silver mirri card for the globe and stand

- white card, backed with double sided sticky sheet (just ordinary)

- sentiment stamped using Personal Impressions'Many Greetings' by Kirsty Wiseman and Brilliance 'Mediterranean Blue' ink pad

- 'Frosted Lace' Ice Stickles on the trees, house roof and along the 'horizon line'

- and, 'cos a snow globe should have realistic snow, some 'Polar White' Flower Soft as well - glue'd on with Crafter's Pick 'Incredibly Tacky Glue'. It's great stuff and (shame on me) I'd forgotten I even had it until I discovered that the Pinflair glue had gone solid (from years of neglect since I had a craze using Flower Soft). It's made in the USA but is available over here.

If I'd had more dies, or more patience, then am sure the stand could be improved upon - but it's not really a million miles away from the Memory Box die set :)

Plus, imagine stamping little scenes instead - I can see some fun times ahead :)

Edit: I woke up in the middle of the night, thinking that another solution for the stand might have been staring at me from a shelf all day yesterday:
Word Window Punch - by Stampin' Up!

Yup, it's Stampin' Up's 'Word Window' punch. Obviously you'd have to slice part of the 'globe' off so it looked as if it's on a flat surface - but I just hopped out of bed here, ran into the craft room and held the little template from my punches swatch over the card above. It would work I'm sure - and be faster!  Wahoo - something else to try :) 

Di
x

Wednesday, 8 May 2013

Boy or girl - it could be either

Last year, on holiday in NM, I bought some gorgeous trim with 'unisex' baby cards in mind. It came from JoAnn's when Len and I were there with Kay - this is the first outing for it:
I used:

- 6" x 6" square white card stock

- pale blue pearlescent card. In fact I used an A6 sized card for the backing and just made sure the fold in the card was where it would be covered by the trim at each side before chopping it to size

- the stamp set is Woodware's 'Baby Patch Elephant', stamped using Memento 'Grey Flannel' as it's softer than pure black. Paper pieced the elephant, letters and hearts then mounted the image onto more pale blue pearlescent  card

- all papers came from a free pack which came with a magazine, it's called 'Emma's Garden' - such a pretty set too

- a band of the pink, blue and lemon fluffy trim

- and as a final touch, a little 'googly' eye on the elephant - which suddenly brought him to life! He's watching you :)

Poor Len took the trim through the check out at JoAnn's to maximise the vouchers I had - he was terrified the assistant would ask what he intended to use it for. But not so, she was much more interested in our 'quaint' English accents :) Another memory of a wonderful holiday, which was made totally perfect by meeting and spending time with Kay.

I'd like to enter this card into two challenges that are new ones for me:

Simply Create Too - 'All about Babies'

and

Ladybug Crafts Inc - 'Oh Baby!'

Di
x

Tuesday, 7 May 2013

And this was meant to be a simple card

Sigh, it turned out to be trickier than I thought:
My undoing was choosing the really luscious blue self-adhesive backing, which is sparkly under a very shiny surface, and then deciding to back the white card with Woodware double sided sticky sheet before die cutting. Mostly 'cos my little trials with umpteen glues here on a snippet of the shiny blue showed it was hard to get card to stick properly and evenly. Trust me - it was like a glue sniffer's dream in here - phew.

Then it was a real battle to die cut the image properly and carefully remove the backing without wrecking it :( Got there in the end but I wanna make another three the same and am not sure me nerves can stand it!

I used:

- A6 white card stock

- blue sparkly and shiny sticky back paper

- white card, backed with double sided sticky sheet (just ordinary, not the Ultra sticky one - I suspect that would have been even more of a nightmare), then die cut with a Memory Box 'Modern Landscape' die. Had the die, still unused, since last Christmas - shame on me

- more white card, just cut to form another hill

- sentiment stamped using Funstamps F-J13 'Small Merry Christmas' stamp and Brilliant 'Mediterranean Blue' ink pad

'Crystal Ice' Ice Stickles

One done, only another three to go - sigh.

This card is for Craftyhazelnut's Christmas Challenge, where this weeks challenge is to use a sentiment on the front of your card - and it's also for  Craftyhazelnut's Christmas Challenge Extra, May, where it's always anything goes.

Di
x

Monday, 6 May 2013

A zingy splash of Spring or even Summer

........so put your sunspecs on:
In this month's Quick Cards Made Easy magazine there's an article about making 'paper pops', which I always thought were called rosettes. Eager to give my new toy of a Hougie board a road test I had a play the other day - and for goodness sakes - HOW did I manage for so long without a decent score board?! I LOVE it to pieces.

I used:

- 6" x 6" square cream card stock

- plain SU 'Summer Starfruit' card for the main backing

- papers from a lovely selection sent to me a while ago by Kay - I tend to check these out first as there's a lovely variety. I used two co-ordinating floral papers plus a plain pink one

- the 'paper pop' was fun to make - I used three 1" wide strips of 6" long paper and scored at 1cm intervals. Then the strips are joined (mountain into valley) with extra sticky tape into a total round and then mounted onto a circle of card by pressing and 'popping' the rosette down. That was almost my undoing, to keep the circle of card still I stuck it onto the glass cutting mat with a removable strip or two of tape runner - set up the glue gun, and then wished I STILL had three hands. It's do-able but you do have to work fast - ha, extra sticky glue might have been better but I did follow the magazine instructions so that as you squeeze the round of scored paper down the outer part flattens and the inner part becomes just a little circle and the 'pop' obeyed in the end. Wahoo, quick run round the room to celebrate - actually it was more like a hobble at that point during the week

- the 'belly band' (that term still tickles me Elizabeth!) was a teeny snippet of SU 'Certainly Celery' card punched using Martha Stewart's 'Daisy Dot' edge punch. Here's a neat trick, born out of the fact that I didn't have enough to go right across the card and was determined to use the little snippet. I split it in half lengthwise and punched two little borders - they don't meet in the middle but that's hidden - and also, by doing that, I could make sure each side ended with a whole daisy

- more 'Summer Starfruit' card was used to cut a doily using Marianne Creatables LR0130 die and also the Whimsy corners

- a quick rummage through the button box, a piece of doubled bakers twin just knotted and hey presto, all done

I have no idea if you managed to follow how the 'pop' is done - I hope so 'cos a hunt online for a decent tutorial was unproductive. You can also punch one edge before scoring the paper, I think that would look good but let's just take one step at a time :)

STOP PRESS: Spike the Hedgehog reappeared on Saturday evening - I caught him raiding a ground level bird feeding station at about 10:30 pm, in the absence of a dish of his hedgie food of choice - which is called 'Spike's Dinner' - I kid you not!

Di
x