The current challenge over at Merry Monday is to include a Santa hat (or more than one) on your card. I have loads of Penny Black stamps with critters wearing Santa hats, but this one is my all-time favourite:
Yay, it's Spike all dressed ready and waiting for Santa to arrive :)
I used:
- 6" x 6" square white card blank
- Penny Black 'Santa's hat' stamp, stamped with Memento 'Tuxedo Black' ink pad and coloured with Pro Markers before being cut using a die from the Spellbinders 'Labels 8 - Decorative' set
- plain dark green card and dark red holly paper from Wild Rose Studio's 'Annabelle's Christmas' paper pack
- dark green organza ribbon tied in a bow
- sentiment stamped using Memento 'Northern Pine' ink pad and a little tag from LOTV's 'Set 32 - Christmas Sentiments Tags' stamp set. There are 35 little sentiment tags plus one blank one in the set - I can see it being used a lot here. The tag was then trimmed, a hole punched in the top and then it was tied to the green organza bow with a piece of red metallic cord
- four dark green Josy Rose nail heads to finish off
I'd also like to enter this into the current Jingle Belles challenge, where you have to use red and green.
And another one for the box towards Christmas 2014.
Di
x
Friday, 13 June 2014
Thursday, 12 June 2014
Darnell's NBUS Challenge
Our lovely and very talented blog buddy, Darnell, has hit the magic number of 500 followers and there are BIG celebrations over at the Playhouse. Darnell has a fabulous giveaway and to join in all you have to do is to use some NBUS (Never-before-used-schtuff) from your craft goodies. If you can work the theme of Friendship into your card that's even better - so why wait? I bet every single one of us has NBUS just waiting for a first outing.
Sheesh, I was horrified at how spoilt for choice I was - need to put the brakes on buying new stuff before the walls of this place suddenly explode outwards. I found goodness knows how many unused goodies but one kept coming to the top of the pile - a stamp set I've had for over 20 months, ever since I saw it in a magazine article. I spent bally ages quite a while planning and making this card so I hope it gets the Darnell seal of approval :)
I used:
- 5" x 7" white card blank
- blue card stock
- all the stamps are from the Hero Arts stamp set called 'Kiss for the sun' (strange as the sentiment uses 'from' the sun)
- first of all the grass was die cut using Marianne's Creatables Icicle die (LR0135) and a snippet of green card
- the branch, birdies and clothes were stamped onto the blue background and then paper pieced. The branch, leaves and pegs were stamped onto thin white card then coloured using Whispers markers before being cut out and popped onto the card. The clothes and birdies were paper pieced by stamping onto snippets of Raspberry Road's 'Love Lives Here' paper pad (free with QCME magazine last year sometime) - since taking the photo I've given the little birdie on the left some feet so he isn't levitating!
- the sun was stamped onto the card and topped with a big yellow button threaded with bakers twine
- the clouds were die cut from a snippet of white card using dies from MFT's 'Cloud Trio' set
- the sentiment comes in one long strip, I just masked it to stamp in two parts in the space earmarked (too cowardly to snip it apart - yet!)
- all that was left was to add some foliage and flowers to the bottom of the card. I used a snippet of green card and the Memory Box 'Fresh Foliage' die, which I just cut into pieces to suit. The flowers/daisies were punched using a sweet little Tonic punch and snippets of white card - then little domed self-adhesive centres were added
And that, after a few hours worth of planning and making, is my first entry for Darnell's NBUS Challenge #1. Then I went and had a lie-down!
Di
x

I used:
- 5" x 7" white card blank
- blue card stock
- all the stamps are from the Hero Arts stamp set called 'Kiss for the sun' (strange as the sentiment uses 'from' the sun)
- first of all the grass was die cut using Marianne's Creatables Icicle die (LR0135) and a snippet of green card
- the branch, birdies and clothes were stamped onto the blue background and then paper pieced. The branch, leaves and pegs were stamped onto thin white card then coloured using Whispers markers before being cut out and popped onto the card. The clothes and birdies were paper pieced by stamping onto snippets of Raspberry Road's 'Love Lives Here' paper pad (free with QCME magazine last year sometime) - since taking the photo I've given the little birdie on the left some feet so he isn't levitating!
- the sun was stamped onto the card and topped with a big yellow button threaded with bakers twine
- the clouds were die cut from a snippet of white card using dies from MFT's 'Cloud Trio' set
- the sentiment comes in one long strip, I just masked it to stamp in two parts in the space earmarked (too cowardly to snip it apart - yet!)
- all that was left was to add some foliage and flowers to the bottom of the card. I used a snippet of green card and the Memory Box 'Fresh Foliage' die, which I just cut into pieces to suit. The flowers/daisies were punched using a sweet little Tonic punch and snippets of white card - then little domed self-adhesive centres were added
And that, after a few hours worth of planning and making, is my first entry for Darnell's NBUS Challenge #1. Then I went and had a lie-down!
Di
x
Wednesday, 11 June 2014
Less is More - colours of your bedroom
Our bedroom is just about to undergo a complete makeover so I almost didn't play along with Less is More this week as I really don't like the current decor and we haven't agreed decided on a new colour scheme. However, this is what I came up based on the existing room colours - white, teal green, pale blue and even (surprise) a little bit of pink to add warmth - but not too much lest it seems much too girlie :)
This is the card I came up with:
I used:
- 6" x 6" rose pink card blank, with an oval aperture die cut using a Spellbinders Nestie
- the stamp is made by Personal Impressions and it comes with just the number 'P1431M'. Stamped onto a snippet of white card using Memento 'Tuxedo Black' ink pad and coloured with Pro Markers - after adding the image behind the aperture then backed the inside of the card front with another piece of rose pink card
- the sentiment is from a Hero Arts set called ''Live Life', stamped using Memento 'Tuxedo Black' - I do think that hat is rather full of joy!
I opted for the rose pink card blank to make up for the lack of pink in real life :)
Di
x
This is the card I came up with:
I used:
- 6" x 6" rose pink card blank, with an oval aperture die cut using a Spellbinders Nestie
- the stamp is made by Personal Impressions and it comes with just the number 'P1431M'. Stamped onto a snippet of white card using Memento 'Tuxedo Black' ink pad and coloured with Pro Markers - after adding the image behind the aperture then backed the inside of the card front with another piece of rose pink card
- the sentiment is from a Hero Arts set called ''Live Life', stamped using Memento 'Tuxedo Black' - I do think that hat is rather full of joy!
I opted for the rose pink card blank to make up for the lack of pink in real life :)
Di
x
Labels:
challenge,
Die cutting,
less is more,
Pro markers,
snippets
Tuesday, 10 June 2014
Rev up the fun - one for Cuttlebug Mania
Suddenly realised I needed a card for a teenager in a mad panic hurry - and a new SU stamp set came revving to the rescue.
I used:
- A6 white card blank
- SU 'Real Red' card stock for the backings
- dark grey Core-dinations card stock, embossed using SU's 'Chevron' folder
- SU's 'Rev Up the Fun' stamp set and SU's 'Real Red' and 'Smoky Grey' ink pads
- a die that I've had for years and keep returning to, think it's a Sizzix one
I'm entering this card into the current Cuttlebug Mania Challenge which is 'Transport' - I used the Cuttlebug for both the embossing and die cutting. Vroom, vroom :)
Di
x
I used:
- A6 white card blank
- SU 'Real Red' card stock for the backings
- dark grey Core-dinations card stock, embossed using SU's 'Chevron' folder
- SU's 'Rev Up the Fun' stamp set and SU's 'Real Red' and 'Smoky Grey' ink pads
- a die that I've had for years and keep returning to, think it's a Sizzix one
I'm entering this card into the current Cuttlebug Mania Challenge which is 'Transport' - I used the Cuttlebug for both the embossing and die cutting. Vroom, vroom :)
Di
x
Monday, 9 June 2014
Christmas card for a child
..... or a grown-up for that matter :) I think Forever Friends bears are suitable for either so when I spotted Craftyhazelnut's Christmas Challenge theme for this week is 'For a Child' I whipped a card out of the 'upcycling' box and this is the end result:
I used:
- 7" x 5" white card blank
- the front of a 6" square Christmas card sent to us in 2013, just trimmed to shape by using a Spellbinders Labels 8 die, even the sentiment was included within the die outline - easy peasy
- SU's 'Real Red' card stock to add backing to the patterned card - which is Kanban's 'Festive Holly - Blue' - I liked that it's pale blue as is the image upper background, plus the holly leaves aren't dissimilar to the one on the sentiment
- the image was then layered onto a surround cut using SU's 'Real Red' and a Spellbinders 'Labels 8 Decorative die'
Again, used the new Spellbinders Tool 'n One gadget to remove the little pieces of waste card from the decorative die - becoming one of my favourite little helpers.
And this is also for Craftyhazelnut's Christmas Challenge Extra for June of course.
Di
x
I used:
- 7" x 5" white card blank
- the front of a 6" square Christmas card sent to us in 2013, just trimmed to shape by using a Spellbinders Labels 8 die, even the sentiment was included within the die outline - easy peasy
- SU's 'Real Red' card stock to add backing to the patterned card - which is Kanban's 'Festive Holly - Blue' - I liked that it's pale blue as is the image upper background, plus the holly leaves aren't dissimilar to the one on the sentiment
- the image was then layered onto a surround cut using SU's 'Real Red' and a Spellbinders 'Labels 8 Decorative die'
Again, used the new Spellbinders Tool 'n One gadget to remove the little pieces of waste card from the decorative die - becoming one of my favourite little helpers.
And this is also for Craftyhazelnut's Christmas Challenge Extra for June of course.
Di
x
Sunday, 8 June 2014
Pixie's Snippets Playground - Week 128
Crumbs, we're up to Week 128 since I took the Playground over from Jules - how time flies when you're having fun. A mixed bag of weather this week but still loads of you came to play, which is lovely!
Here's my snippets card for this week:
I promise the card isn't 'bowed', everything is lined up and that the sentiment is much more of a vivid red the same as the red card - the vagaries of cameras huh? In fact, I can see the optical illusion that makes it look as if the patchwork panel is split in three, paler on the left and the part on the red background is really standing forward - spooky!
I used:
- 5" x 7" white card blank
- snippets of paper tucked into the back of a Papermania Capsule Collection paper pad plus a snippet of black card and one of red (SU's 'Real Red')
- just punched some 1" squares from the black and white patterned papers and some of the black card and halved all bar two across the middle diagonally
- then took one piece of Woodware double sided adhesive sheet, peeled one side off and stuck the little snippets down in what I hoped was a bit of a patchwork pattern
- the design was then stuck onto a snippet of black card and trimmed
- the sentiment was stamped using SU's 'Real Red' and a stamp from Woodware's 'Double Birthdays' clear stamp duo
- then it was just a matter of sticking the snippet of red card and the 'patchwork' panel onto the card blank
This was a really therapeutic way ofwasting whiling away a bit of time building the patchwork design - even though it only made a little dent in the snippets here!
Now for this week's 'picks' - I do fret over this bit :(
The striking blue butterflies and the lovely clean design of this card made by Cathy really caught my eye.
Meg set me off with the giggles when she brought this fabulous Christmas card - I love how the background snippets go so well with the absolutely brilliant coloured image. So true Meg, those geese do look a tad worried - are they in disguise as Christmas lunch approaches :)
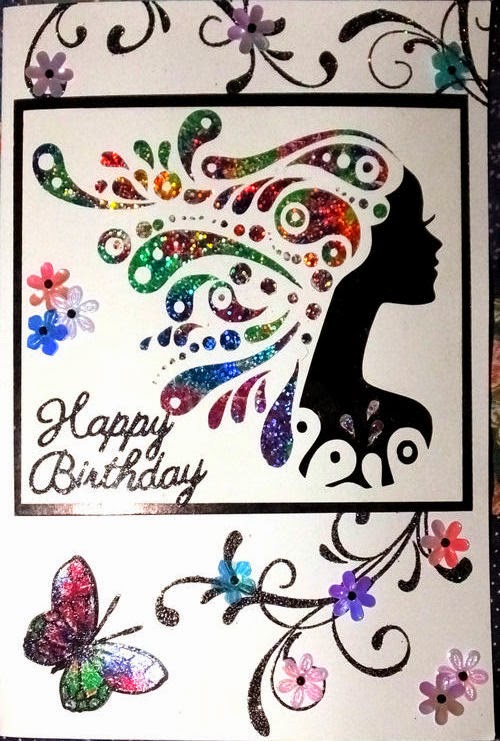
This fabulous card was made by Kate, and she made a second equally gorgeous one. I love the name of the image - 'Rainbow Hair'.
You know when you see a card that sticks in your mind for ages? Well, this card made by Pat is just one such card I reckon. It's brilliant and even the belt was made using the 'faux leather technique'. Pat always explains exactly how she makes her fabulous cards - there's no mysteries to get you wondering.
Greta really rocked her white snippets here, using different textures to such fabulous effect. Absolutely beautiful!
And another bit of hilarity with this terrific card, made by Carol L. I'm saying nuffin' - it's your minds girls!
Sorry that was a really quick scamper through, yesterday was a busy day with other things going on, so time spent writing this was a bit limited.
But we can't forget our two new playmates:
'Fit Kitty' came to play with this brilliant stepper card.
And Spyder (aka Lyn) finally came to play as well showing a gorgeous Birthday card for her Mum - I think we've followed one another almost since I first began blogging - so what kept you Lyn ? :)
Hope to see both of you playing again really soon!
As is almost always the case, the prize for this coming week is linked to my snippets card:
First of all it's an 8" x 8" Papermania Capsule Collection paper pad (very similar to the one I used on my snippets card) plus a packet of 36 silver on white sentiments tags - also by Papermania. Both were kindly donated by Viv, thank you!
Plus, from me, a stamp set (Woodware's 'Double Birthdays') the same as the one I used today. These are lovely big sentiments, about 1" x 3.5" - perfect I think for bolder and/or masculine cards.
The usual snippets challenge will run for one week and the Playground gates will close at 11am UK time on Saturday 14th June and will open again at midnight UK time on the same day. Maximum of three entries and please say 'No thank you' in a comment if you wish to still play but not be the winner of the prize. As always, you can opt for just one part of the prize - let me know in a comment and if your name is picked by the Random Number generator then I'll do a second draw for whatever it is you don't want.
Plus, remember it's the second week to try for the Spellbinders 'Shell Beauty' embossing folder. You can see how to qualify in more detail here - but basically you just need a TOTAL of three entries over this coming week and last week. So if you didn't join in last week you can still qualify for the draw this week with three entries - do pleas let me know when you add your third entry, either by adding a 3 after your name on the link or even just a comment. Makes my life much easier as I won't have time to trawl through two weeks entries checking.
Mr Linky is below - please let me know if you have any problems linking, I can sort it out for you quite quickly and am always happy to do so.
Have a lovely week - hope to see you in the Playground!
Di (and a wave from Parsnip)
x
Here's my snippets card for this week:
I promise the card isn't 'bowed', everything is lined up and that the sentiment is much more of a vivid red the same as the red card - the vagaries of cameras huh? In fact, I can see the optical illusion that makes it look as if the patchwork panel is split in three, paler on the left and the part on the red background is really standing forward - spooky!
I used:
- 5" x 7" white card blank
- snippets of paper tucked into the back of a Papermania Capsule Collection paper pad plus a snippet of black card and one of red (SU's 'Real Red')
- just punched some 1" squares from the black and white patterned papers and some of the black card and halved all bar two across the middle diagonally
- then took one piece of Woodware double sided adhesive sheet, peeled one side off and stuck the little snippets down in what I hoped was a bit of a patchwork pattern
- the design was then stuck onto a snippet of black card and trimmed
- the sentiment was stamped using SU's 'Real Red' and a stamp from Woodware's 'Double Birthdays' clear stamp duo
- then it was just a matter of sticking the snippet of red card and the 'patchwork' panel onto the card blank
This was a really therapeutic way of
Now for this week's 'picks' - I do fret over this bit :(

Sorry that was a really quick scamper through, yesterday was a busy day with other things going on, so time spent writing this was a bit limited.
But we can't forget our two new playmates:

Hope to see both of you playing again really soon!
As is almost always the case, the prize for this coming week is linked to my snippets card:
First of all it's an 8" x 8" Papermania Capsule Collection paper pad (very similar to the one I used on my snippets card) plus a packet of 36 silver on white sentiments tags - also by Papermania. Both were kindly donated by Viv, thank you!
The usual snippets challenge will run for one week and the Playground gates will close at 11am UK time on Saturday 14th June and will open again at midnight UK time on the same day. Maximum of three entries and please say 'No thank you' in a comment if you wish to still play but not be the winner of the prize. As always, you can opt for just one part of the prize - let me know in a comment and if your name is picked by the Random Number generator then I'll do a second draw for whatever it is you don't want.
Plus, remember it's the second week to try for the Spellbinders 'Shell Beauty' embossing folder. You can see how to qualify in more detail here - but basically you just need a TOTAL of three entries over this coming week and last week. So if you didn't join in last week you can still qualify for the draw this week with three entries - do pleas let me know when you add your third entry, either by adding a 3 after your name on the link or even just a comment. Makes my life much easier as I won't have time to trawl through two weeks entries checking.
Mr Linky is below - please let me know if you have any problems linking, I can sort it out for you quite quickly and am always happy to do so.
Have a lovely week - hope to see you in the Playground!
Di (and a wave from Parsnip)
x
Labels:
challenge,
pixie's crafty snippets challenge,
snippets,
SU,
techniques,
woodware
Saturday, 7 June 2014
Saturday Supper - Creamy tomato, courgette and prawn pasta
It's a few weeks since I posted a recipe here - this is a fast and fresh tasting supper dish.
Creamy tomato, courgette and prawn pasta
Serves 4 (but see my notes below)
Creamy tomato, courgette and prawn pasta
Serves 4 (but see my notes below)
1 tbsp olive oil
2 fat garlic cloves, thinly sliced
2 large or 400g baby courgettes, sliced
400g orecchiette pasta, or any other small pasta shape
2 x 400g cans cherry tomatoes
good pinch of sugar
200g raw prawns, peeled
100g half-fat crème fraîche
small pack basil, leaves only, torn
Add the tomatoes, sugar and seasoning to the pan, stir and simmer, uncovered, for about 10 mins while the pasta cooks.
Add the prawns to the sauce and bubble until they just turn pink. Drain the pasta and add to the sauce with the crème fraîche. Simmer for another 1-2 mins, then add the basil and serve.
2 fat garlic cloves, thinly sliced
2 large or 400g baby courgettes, sliced
400g orecchiette pasta, or any other small pasta shape
2 x 400g cans cherry tomatoes
good pinch of sugar
200g raw prawns, peeled
100g half-fat crème fraîche
small pack basil, leaves only, torn
Heat
the oil in a large pan, add the garlic and sizzle for a few minutes, then
add the courgettes and cook for a few minutess more until they start to
soften. Cook the pasta following pack instructions.
Add the tomatoes, sugar and seasoning to the pan, stir and simmer, uncovered, for about 10 mins while the pasta cooks.
Add the prawns to the sauce and bubble until they just turn pink. Drain the pasta and add to the sauce with the crème fraîche. Simmer for another 1-2 mins, then add the basil and serve.
Things I do: OK, so (IMHO) I think the balance of ingredients here isn't quite right - prawns versus everything else, you'd really be searching for a prawn if you used the quantity suggested. So I almost doubled the amount of prawns (I used 360g, same amount as I would for a stir fry) and kept all the other recipe quantities the same.
We struggled to finish the dish - not surprising as it certainly would feed three and perhaps four at a push. Next time I think I'll try still using 360g prawns and perhaps half the rest of the ingredients :) But, it really is yummy and very easy to make too.
Enjoy!
Di
x
Friday, 6 June 2014
Wax crayon resist technique
A little while ago Sarn made this gorgeous card using wax crayons to resist water based inks - it was a weekly 'pick' in the Playground too. So, being me, off I trotted to buy a packet of wax crayons, just the ones that kids use (Crayola from Sainsbury's). Then I started to look at how to use the crayons and found a slightly different twist here shown by Meryl Holland - but still based on the principle that the wax resists the water based inks.
This is what I made:
I used:
- A6 white card blank
- snippets of black card for matting/layering
- a snippet of patterned SU card from the snippets folder
- a piece of Clarity White Coated/Silk card, an Anita's stamp which is many years old and just happened to be on a shelf right in front of me and an Adirondack Black Archival ink pad (Stayzon would work as well). Stamped the image onto the piece of card and left it to try - you can speed things up with a heat gun, which you need for the next step anyhow.
- wax crayon, happened to pick a red one but in truth the colour doesn't matter as it won't show in the final article. Then coloured in the hearts on the stamped image using the crayon and making sure the hearts had a really good coating just as if you were doing normal colouring in
- then took a fairly stiff bristled paintbrush and whisked off any stray speckles of wax which had just crumbled and gone onto the remainder of the image before gently heating it with a heat gun to melt the wax where I'd coloured the hearts (any melted stray pieces of wax would leave you with speckles at the end of the whole process of course)
- then I used a makeup sponge to whisk TH 'Tumbled Glass' and 'Milled Lavender' Distress inks over the whole image - just picking the ink up from ink pads, although you can use daubers and of course you can use colours as strong as you like to get better contrast
- lastly, I took a paper tissue and rubbed all over the image - that lifted any red colour from and left the hearts clear white
- oh, then I trimmed the image and assembled the card of course
If what I just said is as clear as mud, the link to Meryl's tutorial is at the top of this post - I do like that she's so down to earth.
Of course, am now looking at other stamps to check out possibilities and still want to try Sarn's wax resist technique :)
Len sometimes says that the time will come when there's nothing new to try - how wrong can you be?!
Di
x
This is what I made:
I used:
- A6 white card blank
- snippets of black card for matting/layering
- a snippet of patterned SU card from the snippets folder
- a piece of Clarity White Coated/Silk card, an Anita's stamp which is many years old and just happened to be on a shelf right in front of me and an Adirondack Black Archival ink pad (Stayzon would work as well). Stamped the image onto the piece of card and left it to try - you can speed things up with a heat gun, which you need for the next step anyhow.
- wax crayon, happened to pick a red one but in truth the colour doesn't matter as it won't show in the final article. Then coloured in the hearts on the stamped image using the crayon and making sure the hearts had a really good coating just as if you were doing normal colouring in
- then took a fairly stiff bristled paintbrush and whisked off any stray speckles of wax which had just crumbled and gone onto the remainder of the image before gently heating it with a heat gun to melt the wax where I'd coloured the hearts (any melted stray pieces of wax would leave you with speckles at the end of the whole process of course)
- then I used a makeup sponge to whisk TH 'Tumbled Glass' and 'Milled Lavender' Distress inks over the whole image - just picking the ink up from ink pads, although you can use daubers and of course you can use colours as strong as you like to get better contrast
- lastly, I took a paper tissue and rubbed all over the image - that lifted any red colour from and left the hearts clear white
- oh, then I trimmed the image and assembled the card of course
If what I just said is as clear as mud, the link to Meryl's tutorial is at the top of this post - I do like that she's so down to earth.
Of course, am now looking at other stamps to check out possibilities and still want to try Sarn's wax resist technique :)
Len sometimes says that the time will come when there's nothing new to try - how wrong can you be?!
Di
x
Thursday, 5 June 2014
let it snow...let it snow...let it snow and a neat little trick to try
The current challenge over at Craftyhazelnut's Christmas Challenge is '3 of something'. I went through all options, three cards, three Wise Men, three colours - than I remembered a pre-loved stamp with three 'snow people' I bought fairly recently. And this card (two exactly the same in fact) was born:
I used:
- 6" x 6" square white scalloped edge card blank
- pale blue backing card
- Kraft coloured 'snowflakes' backing paper from LOTV's 'Krafty Christmas' paper pad
- Penny Black 'Snow Family' stamped using Memento 'Tuxedo Black' ink and coloured with Pro Markers. Then die cut using a Nesties Labels Eighteen die and popped onto a pale blue backing, made by drawing round the outside of the die and just hand cutting
- the sentiment is an Elzybells stamp, stamped using SU's 'Bashful Blue' (which shows up much better in real life) then mounted onto a strip of pale blue card and finished off with a coffee coloured pearl at either end
- then I just added some little dots of 'White Opal' Liquid Pearls around the image
And here's a great little trick. I only found it online recently and can't recall where otherwise I'd give credit 'cos it works a treat! I know it's probably the way I do it, although I have read that some newer pearl liquids are much better at 'settling' and mine are pretty ancient, but I always seem to end up with little 'peaks' - sigh. The trick however is as soon as you've finished applying the liquid pearls, just lightly tap the card on your desk (facing upwards of course!!), it 'settles' those little peaks beautifully :)
And this card is also for Craftyhazelnut's Christmas Challenge Extra of course.
Di
x
I used:
- 6" x 6" square white scalloped edge card blank
- pale blue backing card
- Kraft coloured 'snowflakes' backing paper from LOTV's 'Krafty Christmas' paper pad
- Penny Black 'Snow Family' stamped using Memento 'Tuxedo Black' ink and coloured with Pro Markers. Then die cut using a Nesties Labels Eighteen die and popped onto a pale blue backing, made by drawing round the outside of the die and just hand cutting
- the sentiment is an Elzybells stamp, stamped using SU's 'Bashful Blue' (which shows up much better in real life) then mounted onto a strip of pale blue card and finished off with a coffee coloured pearl at either end
- then I just added some little dots of 'White Opal' Liquid Pearls around the image
And here's a great little trick. I only found it online recently and can't recall where otherwise I'd give credit 'cos it works a treat! I know it's probably the way I do it, although I have read that some newer pearl liquids are much better at 'settling' and mine are pretty ancient, but I always seem to end up with little 'peaks' - sigh. The trick however is as soon as you've finished applying the liquid pearls, just lightly tap the card on your desk (facing upwards of course!!), it 'settles' those little peaks beautifully :)
And this card is also for Craftyhazelnut's Christmas Challenge Extra of course.
Di
x
Labels:
challenge,
Die cutting,
Elzybells,
LOTV,
Penny Black,
techniques
Wednesday, 4 June 2014
Merry Monday - #111
The current challenge over at Merry Monday #111 is to use aqua, white and a touch of colour(s) on your card. I opted to add just some red to the aqua and white, like this:
I used:
- 5" x 5" square white card blank
- a rectangular snippet of pearlescent aqua card for the bottom part of the card
- the top white piece of card part was die cut using a Spellbinders Borderabilities die from the 'Curved Borders One' set then layered onto a snippet of SU's 'Real Red' red card stock which was die cut using another one of the Spellbinders 'Curved Borders' dies - to be honest, that was the trickiest bit of the card, making sure everything lined up fine. Tee, hee, the card did start out planned as 6" x 6" but a few adjustments along the way put paid to that :)
- the sentiment was die cut from a snippet of white card (left after chopping the main card down in size) using Britannia word dies
- the 'skelton' flower and leaves were made using red and aqua snippets and the Marianne Creatables LR0156 die set. The white poinsettia was die cut using a snippet of white card and Joanna Sheen's All Occasion 'Small Poinsettia' dies and just popped on top of the 'skeletons' with a thin sticky pad. Final touch, a red pearl in the centre of the poinsettia
I've finally started to catch up with Playground commenting but it's very busy in the Playground this week already, so many of you racing round the place - but that's lovely and makes me happy. 24 hours of taking it easy seems to have done the trick with the back twinge issue here, yay!
I'd also like to enter this card into the current Sparkles Christmas Challenge - use your 'Favourite Colour Combo'. Lately white and aqua have been used quite a bit here so that's a current favourite - and I do like a splash of red to make it pop!
And a 'Spike the hedgehog' update. The little perisher is around every night now - playing noisy football with his little stoneware feeding and water dishes. His table manners do leave something to be desired :)
Di
x
I used:
- 5" x 5" square white card blank
- a rectangular snippet of pearlescent aqua card for the bottom part of the card
- the top white piece of card part was die cut using a Spellbinders Borderabilities die from the 'Curved Borders One' set then layered onto a snippet of SU's 'Real Red' red card stock which was die cut using another one of the Spellbinders 'Curved Borders' dies - to be honest, that was the trickiest bit of the card, making sure everything lined up fine. Tee, hee, the card did start out planned as 6" x 6" but a few adjustments along the way put paid to that :)
- the sentiment was die cut from a snippet of white card (left after chopping the main card down in size) using Britannia word dies
- the 'skelton' flower and leaves were made using red and aqua snippets and the Marianne Creatables LR0156 die set. The white poinsettia was die cut using a snippet of white card and Joanna Sheen's All Occasion 'Small Poinsettia' dies and just popped on top of the 'skeletons' with a thin sticky pad. Final touch, a red pearl in the centre of the poinsettia
I've finally started to catch up with Playground commenting but it's very busy in the Playground this week already, so many of you racing round the place - but that's lovely and makes me happy. 24 hours of taking it easy seems to have done the trick with the back twinge issue here, yay!
I'd also like to enter this card into the current Sparkles Christmas Challenge - use your 'Favourite Colour Combo'. Lately white and aqua have been used quite a bit here so that's a current favourite - and I do like a splash of red to make it pop!
And a 'Spike the hedgehog' update. The little perisher is around every night now - playing noisy football with his little stoneware feeding and water dishes. His table manners do leave something to be desired :)
Di
x
Labels:
challenge,
Christmas cards,
Die cutting,
snippets,
wildlife
Tuesday, 3 June 2014
Buzzin' by to say Hi ..
The current challenge over at Less is More is to use two (at least) stamps on your card. At the WOYWW crop in May I coloured all of six images, yup, that's how much else was going on during the day :) Needing little cards to pop in with Snippets Playground Prizes I rustled up three of these the other day:
I used:
- 5" x 5" square white card blanks
- a stamp I'd wanted for ages by Penny Black called 'Gifts for you', stamped using Memento 'Tuxedo Black' ink, coloured with Polychromos pencils and Sansodor blending solution then just a tickle of clear Wink of Stella on the little bee's wing
- the sweet little sentiment is a discontinued (sorry!) Elzybells stamp, and I used SU's 'Certainly Celery' ink to stamp with
- then I just mounted the image onto a square of SU's 'Certainly Celery' card - job done!
I coloured a fourth one of these cute little images, but that's destined for a much more detailed card - watch this space :)
Di
x
I used:
- 5" x 5" square white card blanks
- a stamp I'd wanted for ages by Penny Black called 'Gifts for you', stamped using Memento 'Tuxedo Black' ink, coloured with Polychromos pencils and Sansodor blending solution then just a tickle of clear Wink of Stella on the little bee's wing
- the sweet little sentiment is a discontinued (sorry!) Elzybells stamp, and I used SU's 'Certainly Celery' ink to stamp with
- then I just mounted the image onto a square of SU's 'Certainly Celery' card - job done!
I coloured a fourth one of these cute little images, but that's destined for a much more detailed card - watch this space :)
Di
x
Monday, 2 June 2014
Summer at last?
The first salmon-pink poppy opened in the Playground, yesterday 1st June.
And there are well over 20 buds on the same plant waiting to follow suit - here's hoping it's a sign that Summer might truly be on the way!
I had a couple of back twinges yesterday, just after taking this photo, so kept away from the laptop, thus am behind with commenting on all your Playground entries - all being well I'll play catch up today though :) Oooooh, you've already been so busy too.
Di
x
And there are well over 20 buds on the same plant waiting to follow suit - here's hoping it's a sign that Summer might truly be on the way!
I had a couple of back twinges yesterday, just after taking this photo, so kept away from the laptop, thus am behind with commenting on all your Playground entries - all being well I'll play catch up today though :) Oooooh, you've already been so busy too.
Di
x
Sunday, 1 June 2014
Pixie's Snippets Playground - Week 127
And yet another week flew by, with lots of you making cards for both Sarn's Rudolph Day and the Playground. Plus, apart from the mad week when Sarn whipped you all up to hit 100 entries, we had 70 entries this week, fabulous!!
Here's my snippets card - as you can see, I didn't use a shed load of snippets but even just one snippet qualifies of course:
I used:
- A6 white card blank
- a snippet of SU's 'Real Red' card stock for the 'frame'
- Penny Black stamp called 'Missed You!', coloured with Faber Castell Polychromos pencils and blended with Sansodor
- the flag pole was made with a little strip/snippet of white card, just with black bands added using a Whispers marker and the flag was punched from a little snippet of SU's 'Real Red' using SU's 'Petite Pennants Builder' punch
- the sentiment was stamped in Memento 'Tuxedo Black using a sentiment from the Stamendous 'Happy Messages' set
As always, I use my card swatch to check which SU card snippets I use from the snippets folder, that's how I know the names of the colours.
The idea for the card design came from Susan, over at 'My Little Sanctuary'. I did email Susan asking if I could CASE it and had a very sweet 'by all means' in response :-)
Onto this weeks picks now - and they're getting more and more difficult to pick as the weeks go by. This week was trickier than ever.
Val made this really pretty card, cleverly using an embossing folder and sentiment which came free with a recent craft magazine - I love all the extra birdies and flowers.
I know that lots of you really loved this card, made by Maarit. Fabulous background and the half daisy is so clever!
This card made by Anne really caught my eye (eek, no pun intended there!), very clever use of a great image and lots of lovely layers. Like the way the two red hearts really 'pop' too.
I know, it's a pink card and there are flowers so this card made by Eve really caught my eye too - I particularly love how the image and the papers go together so well, even though they're made by different companies. I think that one of the secrets when using papers with an image is to pick out what snippets/papers you want to use before embarking on colouring.
This is such clever use of little ribbon snippets, made by Laura. It's one of a set of canvases she's been working on and I love that it's so different. I admit to throwing little snippets of ribbon away here :(
Grin, I suspect that Sam (aka Hettie) would have the vapours at the idea of throwing ribbon snippets away! This is a 'leaving' album for a work colleague and, oh my, plenty of ribbon there plus the little feathers to echo the chicken theme. A beautiful album! I was lucky enough to handle Sam's Christmas 2013 album last weekend at the WOYWW Crop and photos truly don't do them justice - every page contained little secrets, tags, opening flaps, you name it!
Quite apart from the great 'is that bump a baby boy or girl?' image, I love the background that Mary Anne made here - just by using up the contrasting single strips from the edges of individual sheets of designer papers.Clever!
That was a really super fast scamper through some picks, as I said earlier, every single entry was fabulous so do please check out last week's Mr Linky if you haven't already done so.
And we have one new playmate this week:
Meg came to play for the first of what I hope will be many times. And what a beautiful Christmas card this is - so fresh and clean and beautifully made.
OK, so onto the winner of last week's prize, Christmas stamp and die:
Well done Linby! It was lovely to read your comment, just now when I checked that you hadn't said a 'No thanks', saying you love the stamp but haven't got round to owning it yet - Mr Random just put that right for you, along with the ivy corner die :) I also checked back and I think your last weekly win was in week 54 back in January 2013 so you were well due for it to be your turn. Can you please let me have your address (di_wray@hotmail.com) and I'll post the goodies off to you this week.
And of course, this next week's prize is connected to my snippets card:
Yup, it's a stamp the same as the one I used today - Penny Black's 'Missed You!'
AND, to celebrate hitting 70 entries I'm also doing one of the 'two week' things. Most of you will already know this, but to be in with a chance of being picked by Mr Linky you have to enter a total of three times over the next two weeks. Not three per week, just a total of three over the two weeks so you can do three in one week, or split it between one and two over the two weeks. Just so long as you have a total of three entries - but of course you can still enter three times each week if you want to. DO please try to remember to add the number 3 after your name on your third entry if you want to be in the draw for the prize shown below - if you forget just leave me a comment. It makes life so much easier if I don't have to trawl right through entries counting up over the two weeks plus it makes it clear that you're playing for the extra prize - which is this beauty:
This has to be one of my very favourite embossing folders, even though I haven't used mine as yet! It's absolutely gorgeous and I think it would make a card front on its own, made by Spellbinders and called 'Shell Beauty'. It's deeply embossed and would be great to use with the brayer to ink one side before embossing. Sold? So get cracking with those snippets and I'll do the draw after 11am UK time on Saturday 14th June when I do the usual Playground stuff:)
The usual snippets challenge will run for one week (for the Penny Black stamp) and the Playground gates will close at 11am UK time on Saturday 7th June and will open again at midnight UK time on the same day. Maximum of three entries and please say 'No thank you' in a comment if you wish to still play but not be the winner of the prize.
Mr Linky is below - please let me know if you have any problems linking, I can sort it out for you quite quickly and am always happy to do so.
After a very damp week we have sunshine here in the Playground but the weather is still variable. But who knows, as it's June perhaps things will improve - see you in the Playground!
Di (and a wave from Parsnip)
x
Here's my snippets card - as you can see, I didn't use a shed load of snippets but even just one snippet qualifies of course:
I used:
- A6 white card blank
- a snippet of SU's 'Real Red' card stock for the 'frame'
- Penny Black stamp called 'Missed You!', coloured with Faber Castell Polychromos pencils and blended with Sansodor
- the flag pole was made with a little strip/snippet of white card, just with black bands added using a Whispers marker and the flag was punched from a little snippet of SU's 'Real Red' using SU's 'Petite Pennants Builder' punch
- the sentiment was stamped in Memento 'Tuxedo Black using a sentiment from the Stamendous 'Happy Messages' set
As always, I use my card swatch to check which SU card snippets I use from the snippets folder, that's how I know the names of the colours.
The idea for the card design came from Susan, over at 'My Little Sanctuary'. I did email Susan asking if I could CASE it and had a very sweet 'by all means' in response :-)
Onto this weeks picks now - and they're getting more and more difficult to pick as the weeks go by. This week was trickier than ever.


That was a really super fast scamper through some picks, as I said earlier, every single entry was fabulous so do please check out last week's Mr Linky if you haven't already done so.
And we have one new playmate this week:

OK, so onto the winner of last week's prize, Christmas stamp and die:
Well done Linby! It was lovely to read your comment, just now when I checked that you hadn't said a 'No thanks', saying you love the stamp but haven't got round to owning it yet - Mr Random just put that right for you, along with the ivy corner die :) I also checked back and I think your last weekly win was in week 54 back in January 2013 so you were well due for it to be your turn. Can you please let me have your address (di_wray@hotmail.com) and I'll post the goodies off to you this week.
And of course, this next week's prize is connected to my snippets card:
Yup, it's a stamp the same as the one I used today - Penny Black's 'Missed You!'
AND, to celebrate hitting 70 entries I'm also doing one of the 'two week' things. Most of you will already know this, but to be in with a chance of being picked by Mr Linky you have to enter a total of three times over the next two weeks. Not three per week, just a total of three over the two weeks so you can do three in one week, or split it between one and two over the two weeks. Just so long as you have a total of three entries - but of course you can still enter three times each week if you want to. DO please try to remember to add the number 3 after your name on your third entry if you want to be in the draw for the prize shown below - if you forget just leave me a comment. It makes life so much easier if I don't have to trawl right through entries counting up over the two weeks plus it makes it clear that you're playing for the extra prize - which is this beauty:
This has to be one of my very favourite embossing folders, even though I haven't used mine as yet! It's absolutely gorgeous and I think it would make a card front on its own, made by Spellbinders and called 'Shell Beauty'. It's deeply embossed and would be great to use with the brayer to ink one side before embossing. Sold? So get cracking with those snippets and I'll do the draw after 11am UK time on Saturday 14th June when I do the usual Playground stuff:)
The usual snippets challenge will run for one week (for the Penny Black stamp) and the Playground gates will close at 11am UK time on Saturday 7th June and will open again at midnight UK time on the same day. Maximum of three entries and please say 'No thank you' in a comment if you wish to still play but not be the winner of the prize.
Mr Linky is below - please let me know if you have any problems linking, I can sort it out for you quite quickly and am always happy to do so.
After a very damp week we have sunshine here in the Playground but the weather is still variable. But who knows, as it's June perhaps things will improve - see you in the Playground!
Di (and a wave from Parsnip)
x
Saturday, 31 May 2014
Froggy candy cane
The current challenge over at Merry Monday is to include 'Christmas Food' on your card, and I almost missed joining in :( I have less Christmas food images here than you can count on the fingers of one hand, so I went hunting online. One image really tickled me, an anxious turkey holding a placard saying 'Eat ham' (for our American friends, many people tend to eat turkey over here at Christmas, much as turkey is traditional for Thanksgiving in the USA).
Then, I found another image online, perhaps less emotive and very cute - this is the card that resulted, and we do know a few 'froggy folk' who would probably like this one, as opposed to an anxious turkey waving a placard:
- then came the point where Dumbo almost wrecked the flipping card :( Applied Marvy 'Liquid Applique' to froggy's hat trim and left it to dry overnight - so far, so good. Had already had a practise on a spare piece of card which worked fine but this time mistakenly used the heat gun on the high setting - snigger, it puffed up fine but almost looked like the slightly browned top of a lemon meringue pie, overheated! Ran three times round the walls in despair and then just picked the offending applique off and covered the trim area with clear 'Wink of Stella' before adding Glossy Accents to the candy cane
Isn't it odd how a card that seems to be very straightforward can give you serious palpitations? :(
Di
x
Then, I found another image online, perhaps less emotive and very cute - this is the card that resulted, and we do know a few 'froggy folk' who would probably like this one, as opposed to an anxious turkey waving a placard:
I used:
- 5" x 5" square white card blank
- free pre-coloured image of the frog hugging a candy cane, from My Cute Graphics.
- patterned papers from Dovecraft's modern 'Back to Basics' Christmas pack
- SU's 'Wild Wasabi' green card for the backings and die cut surrounds
- SU's 'Wild Wasabi' ink pad and a sentiment from Banana Frog's 'Winter Wonderland' clear stamp set
Isn't it odd how a card that seems to be very straightforward can give you serious palpitations? :(
Di
x
Friday, 30 May 2014
LOVE is forever and a new (to me) technique
Almost a year ago I bought this stamp set and it's a first outing for it:
I wanted to use a technique that Sheena Douglass showed on Create and Craft TV quite a while back and thought this set was good for a first try.I used:
- white DL card blank
- black card stock for the frame
- white card stock to stamp onto (in fact I generally cut a matching card blank up to get exactly the right shade of white - whoever knew there where so many shades of white huh?!). And of course I keep the other half with the rest of the same card blanks for another time
- a snippet of white card for the rose head to try out this 'ere technique. I used a rose stamp as well as also used 'Ruby Red' from my Twinkling H2O's. What you do is to spray the H2O paint and let the pot stand for a while until it goes creamy, as you would normally. Then, using a flat headed bristle brush carefully paint all over the stamp, much as you would if you inked it up. Then stamp onto the snippet of white card - I found I needed to press really firmly for a good image. Then, take a water brush (or you could use water and an ordinary paint brush) and just pull the colour in from the stamped outline, following the natural shading
- then I allowed the rose head to dry thoroughly before fussy cutting round it
- the barbed wire stem was stamped using Brilliance 'Starlite Black - looks more like a greyish silver to me, just the colour I wanted, and the wording was stamped using Brilliance 'Graphite Black'
- after the card was all trimmed and assembled I just popped the rose head on using Collall glue
And much to my
I know the technique probably isn't new to lots of you, and we do use other mediums such as Distress Inks in a similar way, but this really has made me look at those sad little neglected H2O's and several other stamps in a new light. Certainly worth a try if you also haven't tried it yet :) Just be prepared for the watered down H2O to be quite a lot paler than the outline of course, something to think of when picking colours to use.
Been busy here doing other things besides crafting so I'll be playing catch up on Playground commenting today, if I haven't already done so!
Di
x
Thursday, 29 May 2014
A mini journal
At the WOYWW crop on Saturday, Sam gave me the most fabulous 'handcrafted with her own fair hands' notebook - leather bound and so beautifully handstitched:
I absolutely LOVE it but there's a thing about me and new blank books, probably going back to childhood. Am always scared to actually use them!
But, when chatting to my buddy Sarn via the wonders of the airwaves on Monday, she suggested I could use it as a mini journal. Brilliant idea - the book is just less than A6 in size and much less daunting than the A4 sized journal I already have here.
Yesterday I had a little play, just the facing page - using colours to pick up the lovely floral lining of the book and a quotation that I think sums up how this little mini-journaling adventure should be undertaken:
I used:
- the mini journal of course
- Tim Holtz 'Scattered Straw' DI ink pad and a sponge applicator (tip, I slotted a piece of white paper underneath the page to stop any stray ink being spread onto the edges of other pages)
- Brilliance 'Pearlescent Ivy' ink pad and a stamp from the Inkylicious 'Bullrush' set
- Brilliance 'Rocket Red' ink pad and one of LOTV's 'Quotables' stamps from the 'Life's Journey' set
- Memento 'Tuxedo Black' ink pad and the little bird stamps which are also from the Inkylicious 'Bullrush' set
God bless this ship and all who sail in her - watch this space :)
Di
x
I absolutely LOVE it but there's a thing about me and new blank books, probably going back to childhood. Am always scared to actually use them!
But, when chatting to my buddy Sarn via the wonders of the airwaves on Monday, she suggested I could use it as a mini journal. Brilliant idea - the book is just less than A6 in size and much less daunting than the A4 sized journal I already have here.
Yesterday I had a little play, just the facing page - using colours to pick up the lovely floral lining of the book and a quotation that I think sums up how this little mini-journaling adventure should be undertaken:
I used:
- the mini journal of course
- Tim Holtz 'Scattered Straw' DI ink pad and a sponge applicator (tip, I slotted a piece of white paper underneath the page to stop any stray ink being spread onto the edges of other pages)
- Brilliance 'Pearlescent Ivy' ink pad and a stamp from the Inkylicious 'Bullrush' set
- Brilliance 'Rocket Red' ink pad and one of LOTV's 'Quotables' stamps from the 'Life's Journey' set
- Memento 'Tuxedo Black' ink pad and the little bird stamps which are also from the Inkylicious 'Bullrush' set
God bless this ship and all who sail in her - watch this space :)
Di
x
Wednesday, 28 May 2014
Less is More Week 173 - die cut
The current challenge over at Less is More is to use a die cut. I went for Christmas, and used two dies:
I used:
- 7" x 5" white card blank
- SU's 'Tempting Turquoise' card stock
- white card stock
- Memory Box 'Flurry Wreath' stamp, stamped using SU's 'Tempting Turquoise' ink pad then die cut using the matching Memory Box 'Flurry Wreath' die. Little tip about cutting out using this, below the list of ingredients. I used little sticky pads to make the wreath 'pop' a bit when I added it to the card - thereby shoving it up to Large Letter rate of course, sigh :(
- Memory Box 'Crisp Bow' die cut from SU's 'Tempting Turquoise' card stock
- sentiment was stamped straight onto the card using a stamp from Woodware's 'Bubble Wreath' set and SU's 'Tempting Turquoise' ink pad
Again, as all the goodies were out to play with, I made two cards the same.
Almost forgot the little tip - the Memory Box die I used is beautiful, but as it's a solid die (rather than just a frame) it needs a different approach to placement.
What I did was to stamp the wreath first onto white card and set that aside. Then, made a template by using the matching die to cut a spare piece of thinnish card.
Next step is to position the card template over the stamped image, making sure all the snowflakes are evenly lined up within the aperture of the template. This piccie below was taken after the card was finished but should show what I mean about alignment of the template you made:
See, the template is fitted over the stamped wreath. Once you're happy with the alignment just use a couple of small bits of low tack tape to hold the template in place over the image and then get the die in your little mitts again and 'lock' it into place cutting side down within the template - you'll feel when it pops into place. Use a little more low tack tape to hold the sandwich of image, template and die together and run thorough die cutting machine as normal. Bingo!
Another way is to use the holes you see outside the die shape in the above photo to mark and then reposition the die without leaving the template in the 'sandwich'. Ask me how I know that's not as accurate :)
Di
x
I used:
- 7" x 5" white card blank
- SU's 'Tempting Turquoise' card stock
- white card stock
- Memory Box 'Flurry Wreath' stamp, stamped using SU's 'Tempting Turquoise' ink pad then die cut using the matching Memory Box 'Flurry Wreath' die. Little tip about cutting out using this, below the list of ingredients. I used little sticky pads to make the wreath 'pop' a bit when I added it to the card - thereby shoving it up to Large Letter rate of course, sigh :(
- Memory Box 'Crisp Bow' die cut from SU's 'Tempting Turquoise' card stock
- sentiment was stamped straight onto the card using a stamp from Woodware's 'Bubble Wreath' set and SU's 'Tempting Turquoise' ink pad
Again, as all the goodies were out to play with, I made two cards the same.
Almost forgot the little tip - the Memory Box die I used is beautiful, but as it's a solid die (rather than just a frame) it needs a different approach to placement.
What I did was to stamp the wreath first onto white card and set that aside. Then, made a template by using the matching die to cut a spare piece of thinnish card.
Next step is to position the card template over the stamped image, making sure all the snowflakes are evenly lined up within the aperture of the template. This piccie below was taken after the card was finished but should show what I mean about alignment of the template you made:
See, the template is fitted over the stamped wreath. Once you're happy with the alignment just use a couple of small bits of low tack tape to hold the template in place over the image and then get the die in your little mitts again and 'lock' it into place cutting side down within the template - you'll feel when it pops into place. Use a little more low tack tape to hold the sandwich of image, template and die together and run thorough die cutting machine as normal. Bingo!
Another way is to use the holes you see outside the die shape in the above photo to mark and then reposition the die without leaving the template in the 'sandwich'. Ask me how I know that's not as accurate :)
Di
x
Labels:
Christmas cards,
Die cutting,
less is more,
Memory Box,
SU
Tuesday, 27 May 2014
'Christmas in your country'
............that's the theme over over Craftyhazelnut's Christmas Challenge this week. A quick rootle through my 'box of Christmas cards to upcycle' produced a few typically British images, village scenes, red post boxes and LOADS of robins. The robins were chirping calling to me so I picked one out and this is the result:
I know robins aren't exclusive to the UK, we've seen them in sunny Spain in the middle of Summer and no doubt they live in many other places too - but, for me, they're synonymous with Christmas here.
I used:
- 6" x 6" square white card blank
- red satin mirri card and a sheet of robins backing paper from a pad of My Mind's Eye 'Snowed In Winter Papers' - free ages ago (2011 is the date on the pad!) with Cardmaking and Papercraft magazine
- the main image was die cut using a Nesties oval die then layered onto white card cut using the largest die in the Spellbinder Floral Ovals set
Quite a quick card to make once I found the backing paper, and the image itself is so lovely I didn't want to detract too much from it.
I'd also like to enter this into Craftyhazelnut's Christmas Challenge Extra where it's always 'anything goes'.
I tried out the new Spellbinders Tool 'n One for the first time to clean the bits out of the Floral Ovals die. Verdict? I really like it but be prepared to possibly still have to poke a couple of stubborn pieces out of the die at the end - and (despite me thinking I was being a bit extravagant) I also like the foam pad you can get to go with it. Had wondered if the back of a mouse mat would be just as good but I'm converted to both the tool and the foam mat.
Sorry if I'm tempting you to spend your pennies - you can live without it, after all it's been a long time coming anyhow! It's just a time and sanity saver really.
Di
x
Monday, 26 May 2014
Playground picks and prize draw result
Time for the weekly picks and the draw for last week's prize. But first of all, what a fun time was had at the WOYWW Crop yesterday. Fabulous company, lots of fun and laughter - as well as a gorgeous lunch and loads of delicious cakes throughout the day......and some crafting of course, almost forgot that bit. Thank you so much Jan and Julia, what stars you are!
In all the excitement I only took a couple of photos - this first one is to show the amount of stuff that our playmate Sam brings along with her, and Fergus of course:
And that doesn't include the two fabulous quilts she also brought to let us see - the tiny bit of stuff in the bottom right hand corner is mine I must admit :)
I wanted to do a 'before and after', so late on in the afternoon I took this photo:
Isn't this a lovely photo of the Playground Scallywag - and in fact there wasn't as much (ahem) 'mess' as I'd expected either! We were both a bit high on the Collall glue though :)
Over the whole day I only coloured six images I'd stamped to take along. First job was to guide Sam in making a pop up box card and lots of the rest of the time was spent chatting, eating and tootling round the room to see what everyone else was up to - basically, just being a 'sticky beak' makes me happy!
Right, onto this week's Playground Picks:
Our Sarn made this lovely card, and it's actually here with me in the flesh (or should that be in the card)! A great technique using an ordinary wax crayon to resist the ink - who needs expensive goodies to make such an impact huh?
Such a sweet card, made by Shaz. Plenty of snippets used here and a really cute image!
I love this card, made by Linby. Brilliant paper piecing and even the teeny little headband is paper pieced! I think I'd have resorted to a fine marker - but it really was so worth the fiddly cutting.
Loads of lovely snippets were used by Carol L on this beautiful card - love the colours combinations and such a great idea to create the herringbone background.
Fabulous little flowers by the dozen on this lovely card, made by Kim. Someone else with loads of patience.
And, I think you'll agree, this is the star of my picks - made by Viv. Who would believe this fabulous jar started out life as a humble marmalade jar? Amazing!
That was a quick canter through this week, every single entry was worthy of being a 'pick' - so to check out what everyone made - remember you can always go back and look at last week's entries.
And the winner of last week's stamps and LOTV Art Pad images to colour is:
I have your address Irene and will post your prize off this week. Well done!
That's all for today folks, remember that the Snippets Playground is back to the usual routine this coming week - and you can join in here.
Di
x
In all the excitement I only took a couple of photos - this first one is to show the amount of stuff that our playmate Sam brings along with her, and Fergus of course:
And that doesn't include the two fabulous quilts she also brought to let us see - the tiny bit of stuff in the bottom right hand corner is mine I must admit :)
I wanted to do a 'before and after', so late on in the afternoon I took this photo:
Isn't this a lovely photo of the Playground Scallywag - and in fact there wasn't as much (ahem) 'mess' as I'd expected either! We were both a bit high on the Collall glue though :)
Over the whole day I only coloured six images I'd stamped to take along. First job was to guide Sam in making a pop up box card and lots of the rest of the time was spent chatting, eating and tootling round the room to see what everyone else was up to - basically, just being a 'sticky beak' makes me happy!
Right, onto this week's Playground Picks:


That was a quick canter through this week, every single entry was worthy of being a 'pick' - so to check out what everyone made - remember you can always go back and look at last week's entries.
And the winner of last week's stamps and LOTV Art Pad images to colour is:
That's all for today folks, remember that the Snippets Playground is back to the usual routine this coming week - and you can join in here.
Di
x
Subscribe to:
Posts (Atom)