Sunday, 24 April 2022

Birthday card for someone special

A lovely friend recently had a Birthday, and this is the card I made for her:

I used:

- 5.5" x 4.25" white card blank, tent style

- a layer of the same white card for the front panel, die cut using a Lil' Inkers 'Stitched Rectangle' die and set to one side

- used a sheet of patterned paper from a Honey Bee 'Team Tie Die' paper pad and die cut the bottom edge using a die from the Simon Says Stamp 'Flower Swag' set of dies - more of this below!

- then die cut the floral piece using a snippet of white card and the other die from the SSS 'Flower Swag' set

- glued the floral layer onto the edge of the patterned paper - using a glue pen - before gluing it onto the white stitched edge layer

- glued the whole panel onto the card front

- die cut the sentiment from another snippet of white card, using a Presscut die called 'Happy Birthday' and glued it in place

- added some clear amber 'dew drops' into the flower centres etc.

I had three attempts at getting the patterned layer as right as possible with the die cut edge at the bottom. Almost lost the will to live and, having watched a YouTube video I now know exactly how to do it of course! I just wasn't thinking properly on the day and the more I tried the more of a flap I got into. It's a stark reminder to look for a video when fiddling round with something where I'm unsure about measurements. The result is passable but not as wide as I wanted - still, said friend is a crafter - which always means that even if your best attempt goes a bit awry - they do understand!

Final say on the die cutting machine adventures. The two Gemini pale green 'double sided dies' cutting plates are brilliant! You use them as the middle part of the cutting sandwich which then only has the two clear matching plates on the outsides. No magnetic shim or thin plastic shim needed. Yes, the plates do score, as one would expect, but nothing like the clear plates score - and absolutely no bending occurs to any of the plates in the sandwich! It's early days but so far I rate it one of Jennifer McGuire's best ideas!

I'd like to enter this into Darnell's NBUS Challenge #37 HERE

Thanks to a prompt from Pauline on the Allsorts DT, I'm also linking this into the current Allsorts Challenge Week 673. The theme is 'Something beginning with B' and so I'm using 'Birthday and Background' for my take on 'B'.

Do remember, today you can find the results of Challenge #425 over in the Snippets Playground HERE

Also, from Monday 25th April to the end of the month it's ScrappyMo's Rudolph Days Challenge.

No real news about Dudley this week, although we did give our local sorting office a giggle apparently. We had something to return via Click and Collect and the online form asks you to declare if you have any dogs on the property. So I typed in 'One small dog, with big bark'. As it happens it was Steve, our regular postman who collected the package and with a huge grin he wagged his finger at Dudley and said 'You're famous now boy'!


Thursday, 21 April 2022

Penny Black Stickeroo Christmas card - simple style

Some days I want to have a quick play making a card without using loads of tools. For this Christmas card I just used my Tonic trimmer (and some glue):

I used:

- DL white card blank, tent style

- Penny Black Stickeroo from the 'Berry Delight' sheet of stickers

- backing card layers are Tonic pearlescent 'Majestic Gold'  card and Altenew 'Forest Glades' - trimmed to size and glued in place

- no sentiment added as I think the image speaks for itself

Made in a jiffy! These days, I tend to pop all the stickers from a Stickeroo sheet straight onto toning backing card for future use, then roughly trim them so I can just flick through the pile. I leave plenty of surrounding card per sticker so that they can then be trimmed straight or die cut to suit. 

Oh, and I write on the back of each image which sheet they came from for when I write a blog post, often months later! 

On the subject of tools, I managed to 'win' a Cuttlebug machine on eBay last weekend. Opened it the other day to have a play and was quite stunned. I reckon it had just the one freebie die run through it, once only from the single score mark on a cutting plate! The machine and plates are otherwise pristine and shiny new - even the free embossing folder was unopened in the original box. It cuts like a dream, as Cuttlebugs always do in their 'youth'. Talk about falling into the river and coming up with a salmon in each pocket! For once I really did hit lucky!


Sunday, 17 April 2022

Penny Black Masterpieces Made Simple - Thank You card

There's a new challenge over in the Snippets Playground - below is my snippets card and how I made it.

We have so many generous and kind Playmates - I received a package here last week and this card is being sent to a very generous lady who sent me a package stuffed with brand new prize goodies very recently (the toy box is stuffed to the brim and looking super healthy!):

I used:

- 5.5" x 4.25" white linen card blank - side opening

- the really pretty image is from the Penny Black 'vintage beauty' Masterpieces Made Simple set of images (no apologies for using these lovely images such a lot lately)

- left the image at full size and used a Penny Black set of dies called 'zig-zag stackers' to cut a panel from a snippet of white linen card, the same I used for as the main card body

- then stamped the sentiment directly onto the image panel. Used the Misti, Memento 'Tuxedo Black' ink and the Clearly Besotted 'Say what?' set of stamps for the 'Thank You greeting

- mounted it onto a very slightly larger snippet of Olive Green card - just to give a narrow and simple border

- then added it onto the card front before gluing a couple of 'Raindrop' gems in place - finished!

- ha, took the photo before the glue was fully dried so the raindrop gems look a bit milky 

Dudley's coat is growing back nicely - he had a bath this week and is still a fighter. Possibly it's getting to be easier as at least he didn't run and hide beforehand! 

His beloved Honka Duck goes almost everywhere with him. The other morning he was hunting for Honka and nosed open my craft room door, which I'd pulled too the evening before without realising that Honka was in there. Dudley slipped in and whisked Honka from under my desk and (you have to imagine this bit) there was Dudley with the almost life sized Honka Duck, crossways in his mouth, stood at the partly open door with his eyes almost rolling in puzzlement. He couldn't get through the space in the doorway as it opens inwards and of course didn't think to drop the duck!

Then, a sweet friend popped round with an Easter egg for us and whilst I was talking to her, Aslan rolled up. Aslan is the most beautiful Persian cat and super cool and laid back. He doesn't deign to use our gardens as his toilet so he's always very welcome. He decided to take a stroll round the downstairs of our house - a thorough inspection was carried out. Fortunately, Len had Dudley upstairs and I reckon there would have been mayhem had he realised that Aslan had come to visit. Purely interest on Dudley's part as he loves cats - but it could have been fun and games. Thankfully, Aslan doffed his cap, bade me farewell and moseyed off out of the front door again! 


Thursday, 14 April 2022

CASE-ing Linby

Our lovely Playmate Linby (real name Lynn - and one of my greatest enablers, in the book world, as well as crafting) was one of my picks from Challenge #424 - and I couldn't get her gorgeous cards out of my head. To see Linby's cards - please hop over HERE. So worth a look.  

It's such a super way to use up snippets and I already had one of the shadow frame dies to hand. Almost got rid of it the other week as I couldn't see beyond using the fairly repetitive and rather ordinary little decorative dies which it came with - what a numpty!

Plus, a while ago I was whining on here about being sent the wrong Christmas 'Snowflakes range' paper pad by Amazon, made by Crafters Companion. Basically it had the incorrect bar coded label on the back so someone, somewhere, dropped a clanger. Instead of being nicely patterned all over, the designs have lots of 'scenes' featuring woodland animals and Christmas images in the corners - plus loads of matching die cuts. I kept it, as we were still pretty much locked down at the time, and the other day, musing over Lynn's cards, I realised that my shadow box frame die does have huge potential after all!

Take a peek - cute and such fun to make:


I used:

- 5.5" x  4.25" white card blank, tent style using 300gsm white card stock from Hobbycraft

- more of the same card stock to die cut a shadow box frame - using the Creative Expressions 'Christmas Shadow Box' die set

- then decided how to fill the apertures, using papers from the 'wrong' pad (which is actually called 'Watercolour Christmas'), I used one single 6 x 6" sheet and picked out then die cut the pieces I wanted, using the separate straight edged shapes you have to use to cut out the apertures in the main frame (very handy!)

- glued the frame onto the card front

- glued the chosen images and pieces from the paper in place

- didn't add a sentiment - and called it done!

It sounds quicker than it was, but having done it twice over (yup, I made two the same whilst at it, gotta keep the Christmas card numbers growing) next time will be even easier, and faster, I hope. Now want to make even more and still have the dies and paper pad beside me here! I found that using the 'shadow box die itself was the really tricky part - holding all those pieces to also cut the straight edges in place with removable tape to do the die cutting, sheesh!

It was a real joy to use my Gemini and it cuts like a knife through butter - really effortlessly. I've read loads of hints and tips and can really recommend that you do check out Jennifer McGuire if you have issues with cutting plates. Be it be on any machine really, but she has delved deeply into the Gemini and come up with some great solutions. Watch here and be impressed, I am! The video covers avoiding as well as fixing warped plates for all machines and then at the end, a great idea for an unconventional 'cutting sandwich' for Gemini machine owners. I'm already onboard!

Plus, I snapped up a Cuttlebug on eBay the other day - for my thick Sizzix dies and as a back up. Bargain!

Cheers all round on the die cutting front!


Thursday, 7 April 2022

Floral Penny Black Masterpieces for Easter

Finally, finally, finally - I've done some moving around of stuff here and have found the perfect home for my much neglected Gemini Junior die cutting machine. 'Hooray' it shouted, with a sigh of relief! Shame on me - it's taken over six months for me to have it properly and permanently located beside my curved L-shaped desk. It's quite a heavy wee beastie when you have to watch your back - did it all alone without shouting for help once, and am a very happy bunny right now.

To put the machine properly through its paces I decided to use a set of dies that I very much doubt my almost defunct Cuttlebug would have touched. Along with using some new Penny Black 'Masterpieces Made Simple' card toppers - floral images this time, nice too.

And here are three Easter cards, for a couple of my besties from schooldays plus grand daughters and their Mum in Germany - we only send three Easter cards each year nowadays:


I used:

- three 5.5" x 4.25" white linen card blanks - all horizontal and side opening

- the images are from (top row) the 'vintage beauty' set and the one below with the lovely tulips is from the 'bright bouquets' set of images

- left all the images at full size and used a 'new to me' Penny Black set of dies called 'zig-zag stackers' to cut panels from white linen card, the same I used for as the main card body

- then stamped the sentiments directly onto the image panels. I used the Misti, the pressure tool which I love, Memento 'Tuxedo Black' ink and the Clearly Besotted 'Say what?' set of stamps for the Easter greeting and, as always, the greeting stamped perfectly onto the linen. In fairness, I did test run the stamping alignment, using grid lined acetate!

- mounted them onto very slightly larger snippets of  SU 'Certainly Celery' card, which matched so well - just to give them narrow and simple borders

- then added them onto the card fronts - finished!

I'd like to add these cards into Darnell's NBUS Challenge #37 for April. NBUS goodies were obviously the fabulous Penny Black 'zig-zag stitches' die set. The Penny Black Masterpieces sets are also new but that may be cheating a little.


Sunday, 3 April 2022

New challenge over at the Snippets playground

Hooray - there's a new challenge (#425) over at the Snippets Playground HERE - and it's my great pal and our Head Prefect/Chief Mischief Maker Sarn who is your hostess for this fortnight.


I'm really delighted to welcome Sarn in sharing with me the fun and games of running the Snippets Playground. 

Dudley and I discussed this the other day and we both have a strong feeling that Sarn's mischief will continue, if anything it might get worse. But, we agreed that it's a small price to pay - no doubt Dudley will be hoping for extra treats and cuddles from Sarn ☺

I've seen from the many comments on here, Sarn's blog and also the  Snippets Playground that you're genuinely as pleased as I am to have Sarn partnering me. Thank you everyone from, both of us, for your kind words!

'Pupdate' on Dudley: already Dudley's pale peach coloured ears are growing a bit longer and it's so lovely to be able to stroke the silkiness again. He doesn't seem to notice any difference since being so shorn, although in some ways he's a bit like a Spring lamb chasing round the garden in leaps and bounds doing his 'zoomies'. 

He's very keen on certain raw vegetables so we keep a dish of freshly chopped carrots and chopped baby red, orange, yellow bell peppers beside his water for him to 'snack' at during the day. The other day, Len added part of a green bell pepper and there's obviously a subtle difference in taste. Dudley very carefully sorted through the whole dish and removed each piece of green pepper, lining them up like soldiers beside his bowl. The look of disapproval on his little face was priceless!

A little heads up about a giveaway. Our Playmate Sue, of Zouave Cards is busy doing a craft room blitz and she is giving away two lovely bundles of Little Claire stamps. If you live in the UK, all you have to do is leave a comment on her blog post here.

OK - this coming fortnight, let's see if as many of you as possible can make something using your snippets and play along to make Sarn's first turn at being hostess 'go with a swing'! Being the Playground, that pun was totally intentional!

Happy dance here!


Wednesday, 30 March 2022

Rudolph Days Challenge - March 2022

I've been playing again with the brilliant Penny Black Masterpiece card 'toppers' - plus a new set of dies to frame them - made two at the same time.

I'd like to enter Scrappy Mo's Rudolph Days Challenge for March (it runs to the end of the month so I'm cutting it a bit fine this time) - other challenges I plan to enter are listed, with links, at the end of this post:

I used:

- 5" x 5" white linen card blanks, side opening (the images are printed on linen card, so this works well well them)

- images from two different Penny Black Masterpieces sets - 'icy winds' (the bird house) and 'pine cones & peace ' (the solitary bird)'. They are all sold at 3.25" x 4.5" and I trimmed them down to a square shape, very slightly under 3.25" square so they sit just under the frames I later added

- used snippets of the same white linen card to die cut the frame border part and then Tonic Gold Mirri card for the mitred inserts. The set of dies I used is also by Penny Black, called 'framed'  - it's different and much more delicate looking than many frame dies, especially with the mitred inserts

- at that point I could more accurately size up the image and frame, which is why I trimmed just a little bit more off the 3.25" square images I'd created

- glued the images in the centre (ish!) of the card blanks

- then added the frames with the gold inserts using a glue pen

- stamped the sentiments using the Misti, Memento Tuxedo Black in pad and a stamp from  Kirsty Wiseman's 'Many Greetings' set. Not sure if it's still available as I've had mine for many years, it was made by Personal Impressions

- finished!

The sentiment stamp is a sort of higgledy piggledy font and near impossible to get straight - even using the Misti plus acetate grids etc. But hey, a blind man on a galloping horse wouldn't notice - wise words from Len, learned at his Mum's knee!

I'd also like to enter the following challenges:

Darnell's NBUS #36. The Penny Black frame dies were having their first outing

Peace on Earth Christmas Challenge #12. This challenge is pretty new to me (a few of our lovely Playmates are on the Design Teams!) and it runs Bi-monthly with Anything Goes (for Christmas!) allowed and some beautiful inspiration boards to whet your appetite - this is the current one:


My cards are really 'Anything Goes' - although I could say that inspiration came from so much snow! Do hop over to see the DT cards - they're such a clever bunch and deserve our support! 

Speaking of supporting others - I recently placed an order for some crafting 'basic supplies' with the UK based Loobi Crafts HERE. It was triggered when I was looking for the new 'Saltwater Taffy' Distress ink pad and so many places were out of stock. The pot of gold wax in a photo on my blog earlier in the week came from there - and of course 'Saltwater Taffy' TH DI pad (fabulous colour) - plus some other lovely bits and bobs (as you do!). The order came in double quick time and was packaged with so much care with items wrapped in bubble wrap. I think the girls who run the family owned shop/website are well worth a positive shout out - they obviously enjoy and take pride in their work. I for one will be more than happy to buy from them whenever possible. Well done to Lynne and Lisa!  

When you hop over to Loobi Crafts, as I hope you do, be sure to check out their Spring Sale page. I only found it as I was typing this post and it's like an Aladdin's Cave! What choice, plenty of well known brands and products, many at as much as a third off. It certainly beats one or two 'sales pages' I peek at online where you're lucky if there's a reduction of 50 pence at times. Just some of the brands I spotted on my scamper through are Woodware, Tim Holtz, Pink and Main, Paper Artsy and the products are too wide ranging to list here. And yes, of course I placed an order - it just had to be done! Go and see, what are you waiting for - whooooosh!!  


Wednesday, 23 March 2022

Card for the Allsorts Challenge - and a new gadget

First of all, my goal is to enter as many Allsorts Challenges as possible, still bearing in mind that Christmas cards are also a priority - besides the Snippets Playground of course! It's been so heartwarming to read all your lovely comments about Sarn and I joining forces to run the Playground - happy times ahead!

The current challenge over at Allsorts Challenge #668 is 'Feminine' - and flowers sprang to mind here:

I used:

- A6 white linen card blank, side opening

- piece of the same white linen card to die cut the frame with flowers - called 'Tatty Layers - Lily Rose Panel' by Lisa Horton. The frame can be used without the flowers as a backing for images etc. I know it was one of you lovely Playmates who pointed me in the direction of the Lisa Horton frames with flowers - thank you!

- then glued the frame, with the flower outlines attached, onto the card front, using a fine glue pen

- stamped the sentiment using the Misti, my 'new gadget' - see below, Memento 'Tuxedo Black' ink and a sentiment from the Hero Arts 'Live Life' set of stamps. Sadly, despite being properly stored, the stamps have a slightly yellow hue and are also becoming rather pliable. They're many years old and owe me nothing but I'd be sad if they do become unusable

- and then, as it so often does, the 'red mist of crafting madness' descended upon me and Dopey here decided to infill all the die cut flowers - piece by flipping teeny, tiny piece!

- used one piece of paper from the fabulous Craft Consortium 'Ink Drops - Vivid' set of papers - mostly pink shades on one side and mostly yellows and a touch of green on the reverse, just to add a bit of a varying shades element

- die cut and then pieced each little perisher in place - using a fine glue pen

- 24 hours later - no kidding - it was finally done! Possibly one of the most fiddly things I've ever tackled. The frame just as it is, or with only the inclusion of the die cut floral outlines, is far better for one's sanity, trust me!

I did show the result to Dudley and it was fascinating to see his reaction. His eyes flicked from one side to the other and up and down, repeatedly - taking in every little detail. I suspect he could actually detect stress vibes coming from the card -  he had been party to a few choice words whilst trying to sleep at my feet during much of the process! If he could talk human talk I bet he would say 'Bonkers, Mama, totally bonkers!'.

And the 'new gadget' shown in the main photo above is something that's interested me for a while, since seeing brief glimpses of Jennifer McGuire using one in her more recent videos. As I have arthritis in practically every moving part of my body (apart from my tongue - which does its best to compensate!) - even using the Misti when making a batch of several cards at once gives me wrist ache. So I hunted all over the place and eventually found this:

Ignore the pot of gilding wax, used to prop the tool on its side for a better look (mind you, it's an absolutely gorgeous tone of gold!). Basically the new gadget is a 'Stamping Pressure Tool' - if you're interested in the link then just drop me an email, it took me a lot of searching to find this exact product - with a few blind alleys on the way. It was much cheaper than the one or two branded pressure tools I came across - so long as you can wait for 10 days or so  for it to arrive. It's 3" in diameter and comes with a black self-adhesive felt pad to attach to the base. You then just rub it over the lid of the Misti for a nice even print. And I already love it!

By the way, I've never played 'table top air hockey' but the tool basically seems to be a replacement 'pusher' - someone obviously was quite switched on!

I'd also like to enter this into Darnell's NBUS Challenge #36  for March HERE. The set of dies and the 'Pressure Stamping Tool' were both having a first outing.

If you need me, I can be found wandering around the shrubbery at the local 'Funny Farm'! Gently muttering 'Never again, teeny, tiny die cuts, never again'.


Sunday, 20 March 2022

Snowflakes and a snippet

I've wanted to enter the Christmas Kickstart Challenge #60 from the beginning of the month - the theme is 'Snowflakes are Winter's Butterflies'. So it had to be a snowflake, or several  - and it's also my snippets card for the new Snippets Playground Challenge #424 - over HERE:

Ha, ha - without me swinging from the ceiling - you also got me wearing a red top reflected in the mirri card! I tried believe me!

I used:

- 6" x 6" square white card blank - tent style - snigger, purely as I glued the final elements on with the card not sitting in front of me as a side opening one, but I actually like it!! Could have been top opening so I did OK really - phew

- piece of baby blue pearlescent card stock, just slightly smaller than the card blank, glued in place and it is even on all sides, dratted camera is determined to cause issues if it can

- then came a marathon die cutting session, using the fabulous Paper Boutique 'With Festive Love Doily' set of dies

- first die cut the midnight blue pearlescent background, and set it aside

- then die cut the 'snowflakes circle' from just some white fairly lightweight card stock I found in one of the many boxes of Christmas card sheets lurking here

- followed that by using the circle die in the set to fully create the frame - and set that aside for now as well

- reverted to my small Altenew die cutting machine and used a snippet of silver to cut out the backing for the sentiment. Then used leftover white pearlescent scraps, from the centre of the cut out circle, for the actual sentiment and three snowflakes. Very little was left over!

- assembly time! Just glued all the layers in place, using Collall All Purpose glue for the large midnight blue piece and a glue pen for everything else - bit fiddly at times

- for a finishing touch I added some teeny clear gems around the snowflake border, to the centre of the three separate snowflakes and also to 'dot the i's' in the die cut sentiment - just because I felt like it! 

I originally spotted a very similar die set over at Jules' blog - a good while ago. Needless to say I couldn't track the set down and so sort of gave up for a while. Suddenly, a good few months ago, a similar enough one popped up in an online shop and greedy little pig here had to have it. And also a more Summery one, which will be a future Playground prize as I managed to get two of those. But I need a rest before going down that road again

The first shock was a sheer size of the set of dies, in terms of dimension! You need almost a 6" square background/card blank before you get going. I rarely make large cards so that was my first challenge! In the end I just used all the dies included in the set - putting other ideas to one side. At first it seemed quite limiting and I did wonder if I'd been sold a 'one trick pony', to coin a phrase! However, I do think that, as Jules did on one of her later cards, the snowflakes frame is just so perfect to put round an image. I also fancied adding a round snowflakes shaker element in place of the sentiment - but I went with the flow and stuck to the set of dies whilst ahead.

This is my snippets card over at the Snippets Playground. The prize this time has no connection to the above card - but there's some really exciting news! Whooooosh - byeeeeee, you might have at least read to the end of this post!

I'd also like to enter this into Darnell's NBUS Challenge #36 for March HERE - the set of dies was most definitely NBUS!


Monday, 14 March 2022

Penny Black 'Masterpieces Made Simple'

I spotted Darnell using the relatively new Penny Black 'Masterpieces Made Simple' card toppers fairly recently - and, being up for anything easy, bought a few sets for my own Christmas cards (which are coming along really well right now, thank you!).

I adore PB 'Stickeroos' as you surely know by now - and the 'Masterpiece' toppers didn't disappoint at all. Similar idea and CAS, which I like rather than messy.

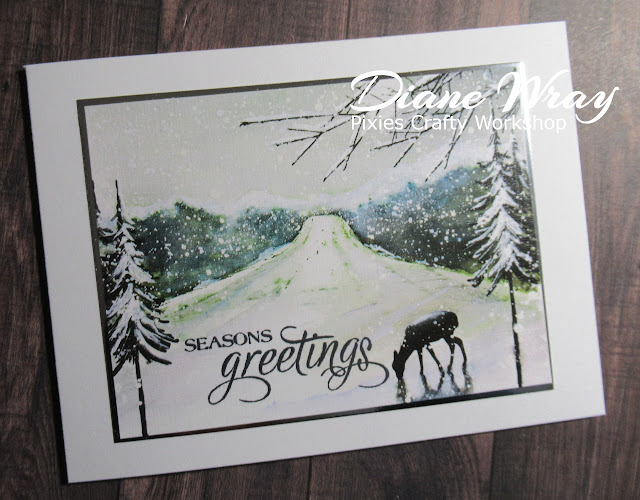
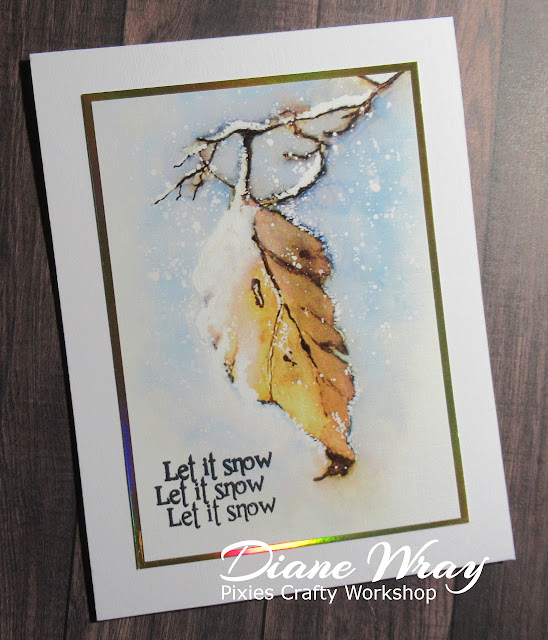
And here are a couple - rustled up in next to no time. Kept them quite plain and, I hope, a bit elegant:

I used:

- two 5.5" x 4.25" white linen card blanks - the horizontal one is side opening and the tall one is tent style (the white linen card works so well with the linen card of the PB 'Masterpieces' and also both of them work perfectly for stamping sentiments - which surprised me)

- both images are from the 'icy winds' set. Trimmed the card images very slightly and then stamped the sentiments directly onto the image panels. I used the Misti, Memento 'Tuxedo Black' ink and the 'Seasons Greetings' sentiment from the smaller version of the Inkylicious 'Seasons Greetings x 4' set of stamps on the deer image. 

 - then used a 'Let it snow' stamp from the Personal Impressions 'Many Greetings'  set of stamps designed by Kirsty Wiseman - onto the snow laden leaf image. A much loved and well used set of stamps

- mounted them onto very slightly larger snippets of silver and gold mirri card - just to give them narrow and simple borders

- then added them onto the card fronts - finished!

There are a lot of few more of these wonderful Penny Black sets waiting here - and also plenty of fun to be had using them. Such a quick and easy way to rustle up Christmas cards.

I'd like to add these cards into Darnell's NBUS Challenge #36 for March. NBUS goodies were obviously the fabulous Penny Black 'Masterpieces Made Simple' images. In the UK, 'Cuddly Buddly' sell them BTW, and they are a reliable and good company!


Wednesday, 9 March 2022

Under The Mistletoe

Before Christmas I bought a few of Lisa Horton's 'own brand' products and finally found time to have a little play with a couple of the items:

How very strange, the card looks as if it's behind gauze - yet the sentiment is clear as day and not out of focus. The green of the mistletoe is brighter and the embossing is much more crisp in real life - bet it's that shining silver that confused the camera!

I used:

- A5 white card blank, side opening (not made an A5 card for ages!)

- first hurdle was the 3D embossing. It took several attempts and the whole lot, including the Cuttlebug, almost went through the window at one point. I used white card for my final try which I sort of bent and fondled to break down the fibres a bit and then gave it a good spray of water on both sides using a mini mister - that gave the most successful result

- the slimline embossing folder is called 'Under The Mistletoe' by Lisa Horton and it also comes with a die to cut one sprig of mistletoe

- once the main panel was embossed, I then die cut the mistletoe twice - once from a snippet of pearlescent green and then from a snippet of pearlescent white card

- then embossed both sprigs by sitting them back into the embossing folder and running them through the Cuttlebug before fussy cutting the white berries and gluing them in place onto the green sprig. When I did that gluing step I sat the sprig on the convex sprig outline on the embossing folder so I could press the berries on without fear of distorting either the sprig or the berries - then kept the assembled sprig and berries for later use

- trimmed the mistletoe white embossed panel and layered it onto a slightly larger backing of silver mirri card

- then added the slimline panel to a piece of silver and white trimmed paper from Chloe's 'Crackle' foiled paper pad - my advice, don't expect to find the actual  colours you see on the cover inside the paper pad. - avoid if you expect them

- glued that full panel to the front of the card and, using a glue pen, added the single green sprig of mistletoe   

- thinking my trials were over, I moved onto another Lisa Horton product for the sentiment. It's a very clever idea but loads of issues. It's called 'Festive Banner Sentiments' and is a stamp and single huge 'multiple banners' die 

- having, after a struggle or three, come up with a die cut sentiment I then stuck it in place using very thin sticky pad pieces where it adhered to the embossed panel and thicker pieces where it adhered to the silver 'crackle' paper - to keep it on the same level

- and being a glutton for punishment, I made two at the same time of course! 

Lisa Horton's really great idea with the multiple sentiments stamp and the multiple banners die has even more worrying issues. The stamps appear to be cheaply made of acrylic (too stretchy to risk removing from the acetate backing sheet and no smell - a sure sign, the better quality photo polymer stamps used by larger companies have quite a pong). I left the stamp on the acetate and used removable tape runner on the back of the acetate to stamp, using the Misti. The widest part of the die for cutting the banners is a smidgen over the 6" width aperture on many smaller cutting machines, including mine and despite alignment marks, it still goes 'off kilter'. Almost impossible to not have one or two sentiments cut slightly adrift.

All in all - it's what is NOT said on these products that I have issues with - no definition of the materials the stamps are made from and also absolutely no mention of the overall dimensions of either the width or length of either the stamp or the die, as well as the mis-alignment. And the mis-represented paper pack cover, when I queried it, was blamed on 'photography limitations'. The normal gold and supposed 'rose gold' paper are almost impossible to tell apart - and the rose gold is depicted as a pale metallic rose pink on the pad cover. I actually thought I'd been sent a 'dud' pad of just normal gold and silver but was told pretty sharply, when I phoned to check, that wasn't the case. From the attitude I met with, I bet I'm by no means the first customer to query the discrepancy. 'Null point' for customer service! Buyer, be careful - I could well be wrong but I do smell the aroma of 'overseas production cost cutting' at work.

I suppose the lesson is to drop companies such as those like a hot potato once you find out their true 'modus operandi'.

This is only my personal opinion, but it was born out of bitter experience. To think that one card design would throw up so many problems.

I did want to enter this card into a few challenges such as NBUS - but am now so sickened by what I discovered during the crafting process, I really was hard pressed to even write this post - mostly as a reminder to self!

BTW, I do like the cards I ended up with - it was the journey to get to that point that gave me grief!


Sunday, 6 March 2022

New challenge over at the Snippets Playground

No card from me on here today, I had plans but time just ran out. But, it is the final Ruby's Memory challenge right now over in the Snippets Playground, with a special fun prize to be won! Off you go - see you on the swings (Dudley will push swings for treats - which makes me laugh as his little legs aren't very long to be able to reach up!). Or you may prefer just lounging in the tree house, Sarn's toasted crumpets and hot beverages will no doubt be on offer!


Wednesday, 2 March 2022

Ukraine

I've been trying enter to Allsorts Challenge more regularly, and originally intended to do some paper piecing for this current challenge. The other option was hand coloring. Then, right in front of where I swivel round to use the laptop there's a set of open shelves and sitting on there, right in line with my eyes, is the very old wood mounted stamp I used and hand coloured today.

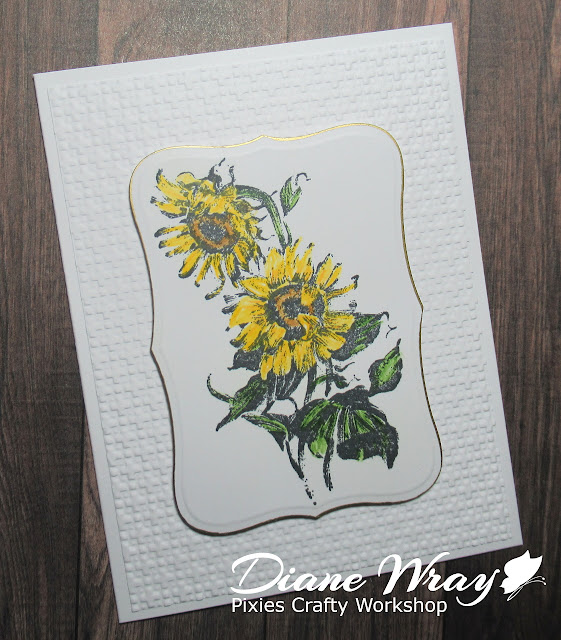
Here's the card I made - the sunflower is Ukraine's national flower:

I used:

- 5.5" x 4.25" white card blank, side opening

- piece of the same card stock as the card, embossed using SU's 'Textured Impressions' folder then trimmed to slightly smaller than the card front

- glued the embossed panel onto the card front

- stamped the Penny Black image called 'Hello Sunshine' onto a snippet of white card using Memento 'Tuxedo Black' ink

- coloured the image using Polychromos pencils

- die cut the image using an old but favourite die from the Spellbinders 'Labels Eight' set

- ran a ball-ended tool around the inside of the die cut whilst it was still in the die to create the 'lip'

- removed the die cut from the die and went around the edge of the die cut image using a gold Calligraphy pen. It's a chisel tipped pen and you just use the chisel sideways on - sort of running the edge of the card through the middle of the chisel tip, easier to show than explain!

- added the image panel to the card front, using slightly thicker than usual sticky pads for extra 'lift'

As always, taking a photo of shiny elements on a card is nigh on impossible - the gold edging is just like gold leaf, really pretty and also very shiny!

I'd like to add this card into the current Allsorts Challenge #665.


Sunday, 27 February 2022

Rudolph Days - February 2022

I made a batch bake of eight cards  with Mo's February Rudolph Days Challenge in mind - and this one of them:

And these are some of the others: 

I made eight cards in total - in four differing shades of the fabulous glittering ombre card - more of which further down this post. Quite a few of the sheets have shades of green in them, perfect for trees! Although I did make a couple of the cards using the ombre pink - needless to say!

I used:

- 5.5" x 4.25" white card blank, side opening

- piece of white card the same size as the card front and also using the same card stock

- die cut the tree shape into the separate panel of card, using a Reverse Confetti die - simply called 'Tree'

- then added the stitched effect around the edge of the panel using the largest die in the Lil'Inkers 'Side Stitch Rectangles Outline' set of dies

- backed the die cut tree shape with a piece of 'Craft Artists 'Ombre Glitter Card - Pastels' - just slightly smaller than the panel, using red line tape. To get the best out of the ombre A4 card you really need to use the centre portion where the main shades flow into one another (you can get two panels easily by doing this) and of course, then you get to keep the tops and bottoms of the sheets to play with later on!

- then added the panel to the card front, again using red line tape

- die cut the sentiment using leftover snippets of the same white card and some very subtly sparkly black card - using a two part die set also by Reverse Confetti called 'Layered Peace', glued together using a glue pen

- again, used red line tape to adhere the sentiment

- then added some little gems from a packet of shaker elements by Lucy's Little Things called 'Crystal Collection - Snowdrop'- and thought it was finished!

However, Len saw the card and immediately played a corker by saying that the tree was just a pyramid and what had it to do with Christmas. So, I scrabbled through my Christmas dies and found a star shaped die from the 'Creative Expressions 'Silent Night' set of dies and used a snippet of silver card from the ombre I'd been using - cut a star and stuck that where the sun don't shine on top of the tree. I should have known really, next comment was that it looked like a pyramid with a star stuck on the top! Men - no imagination, and stubborn with it!

I'd also like to join in with the following challenges:

Darnell's NBUS Challenge #35 for February - it was the first outing for both the pyramid tree die and the sentiment dies

Craftyhazelnut's Christmas Challenge # 583  - Anything Goes with the option of using some green - three of each set of four cards have green in the ombre effect. 

Christmas Kickstart Challenge #59 - The Sentiment Takes Centre Stage- I think the 'peace sentiment' stands out enough to qualify ☺

AND, don't forget that the results of Challenge #421 are now published, over at the Snippets Playground!


Wednesday, 23 February 2022

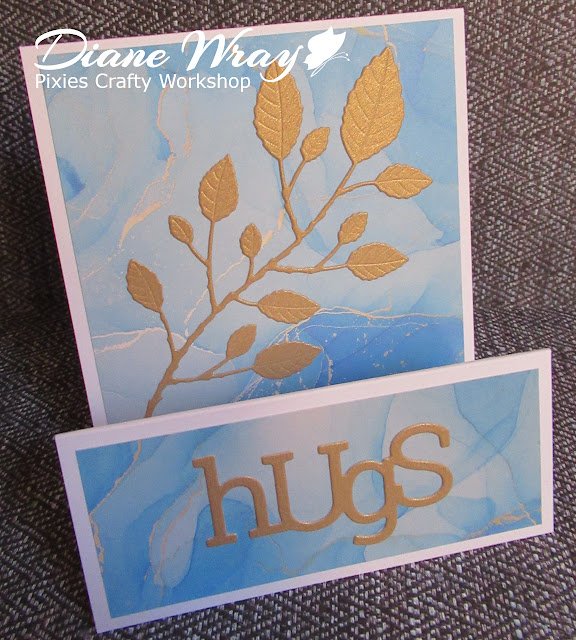
Zigzag card

I've been the lucky recipient of some of Sarn's wonderful 'zigzag' cards in recent months and finally had a go at making one the other day - winging it slightly. By the way. the pinkish hue is from a glorious sunset when I took the photos in late afternoon natural light:

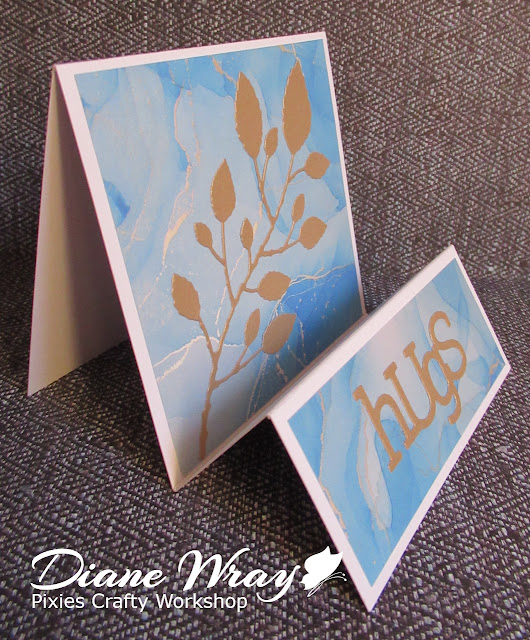
And a sideways peek, where you can possibly see the card folds a little better:

I used:

- 11.5" x 4" piece of white card stock

- scored across in one direction at 4", 8" and 9.75"

- folded the zigzag shape along the crease lines - using a Teflon bone folder to get sharp creases * see note below

- picked out a piece of patterned paper from Craft Consortium's Craft Paper from their 'Ink Drops' collection - called 'Ocean'. More about the papers below ** - they are luscious!

- cut a patterned piece for the main panel of the card measuring 3.75" x 3.75", plus one for the smaller front panel measuring 3.75" x 1.5"

- glued the patterned papers in place, using Collall All Purpose glue

- then die cut the sentiment using a snippet of Tonic Studios 'Craft Perfect' pearlescent card in 'Majestic Gold' and a Poppystamps 'Playful Hugs' die and glued it onto the front panel using a glue pen

- die cut the spray of leaves using another snippet of the same pearlescent gold card and a Memory Box die called 'Botanical Stem' (first spotted over at our Darnell's blog I think - such a lovely delicate die with embossed veins, I love it!) and glued it in place using a glue pen

I do have Yupo, a wide variety of acrylic colours as well as gold and silver metallic mediums to try and emulate some of the fabulous Yupo work done by Loll - but these papers called to me very loudly! I like quick and easy if I'm honest.

This card was fun to make and very quick - if you ignore the ditched card base that I totally ruined when I messed up the score lines. That situation is being resolved with a better large score board - more pennies.

* Used 300gsm white card for the base card and did have some serious issues making it fold with a sharp enough crease - even using the bone folder with threat and intent! My instinct is that 250 gsm weight, which I have loads of, would be more 'malleable', although for normal 'rigid' cards, 300gsm is my choice of weight normally. I made my card 4" square to fit in a bought envelope but you can vary the width as you wish. On hindsight I would possibly have made my final card with smaller measurements for the 'prop up' part of the card. But at that stage I was still guessing really - until Sarn kindly sent me a couple of sets of measurements for my next try!

* The papers used are made by 'Craft Consortium' and they are absolutely stunning! They're a UK brand, and they make loads of gorgeous papers - however, I think these are amongst their top ones, for now. The designs are based on the effect of alcohol inks on Yupo - with some 'faux' gold streaks. It's the faux gold (albeit not truly shiny so don't let the sales talk on websites fool you - I didn't and already knew what to expect) that really makes a lot of these double sided papers stand out from the crowd, I ended up buying three different pads - greedy little monkey! The papers come in pads of 6" square (and apparently even 12" square in some of the colours!). They will be great for 'camouflage sentiments' I can see.

The original idea was to still use shiny gold mirri card for the die cuts but in fact I realised that the Tonic pearlescent gold card is truly a more subtle and better look/match with the slightly muted faux gold streaks on the particular background paper I chose to use.

By the way, I just discovered that Top Topper Shop is a really good place to buy these papers in the UK and they do the papers in packs of just 10 sheets for £1.25 if you would like to have a play with a little selection of their packs but don't want to buy a full pad of 40 sheets! Clever idea. I ordered something else from them on Sunday and it was dispatched the following day.

I make no apology that I do overshare at times, which may help you if you spot something of interest to you. It's not a secret so why hide it? Also, this blog is still very much my own record for 'future reference and re-makes' as well. 

So happy to be able to share this in the current weekly Allsorts Challenge #664. I was so determined to join in with one of my favourite weekly challenges but haven't always managed (usually need a week to decide and a week to make!) The challenge theme is 'I love ....'. What a totally brilliant theme - and of course I love die cutting (my collection of dies is HUGE, yet there's always that additional new one that I NEED, sigh). Plus, I adore patterned papers. To be fair I have far too many. In my ongoing sort out in here, there will be a serious culling and dumping of old patterned A4 papers and many of the paper pads which only contain those 'meh' and rather dated looking papers that I bet we all have. Styles have changed so much and ...... it's a bit like updating your wardrobe! ☺

Am also nipping over to join in with Darnell's NBUS Challenge #35. Am so determined to use all my NBUS stuff, at least once in this lifetime, that I now first reach for the NBUS basket - before even beginning to seriously think about making a card!


Sunday, 20 February 2022

New challenge over at the Snippets Playground #422

We have a new challenge, and a special Guest Designer, over at the Snippets Playground today.

I'd been sorting out more stuff in the craft room and came across a load of fairly recently bought sheets of Penny Black Stickeroos  so I fished out a supply of toning snippets of card and stuck a lot of the Stickeroos onto backing snippets of card, ready to properly trim down when there was just a little bit of time in which to play.

I found some spare time the other day, in between the two storms - one named Dudley - what a cheek! I know he races round like a little tornado at times but that doesn't give the weather people permission to name a storm after him!

Anyhow, this is the first Stickeroo card I've made for ages and it's also a snippets card:

I used:

- DL white card blank, side opening

- white card, die cut using a new set of dies made by Creative Craft Products from their Slimline and DL Nestabilities range, called 'DL Stitched Straight Edge' die set - I used the largest die in the set

- decided which image I wanted to use from a Penny Black Stickeroos set called 'Gentle Blooms' - it was already stuck onto a snippet of 'Certainly Celery' card so I just trimmed it down to leave very narrow borders of card showing

- then I could choose a suitably sized sentiment which I stamped onto the stitched layer using Memento 'Rich Cocoa' ink and of course the Misti. The sentiment is by Penny Black from their ''special thoughts' set of stamps

- then glued the stitched panel onto the card front and added the image panel - both using Collall All Purpose glue which allows some 'wiggle room'

- finally, added a single 'raindrop' gem as dew to the left hand flower - you need to look closely but it's there alright! I adore these beautiful raindrops from 'Lucy's Little Things' and just love the finishing touch they add to the right cards

I'd like to add this card into Darnell's NBUS Challenge #35 - the set of DL dies was having a first outing.

And of course, you can find the new Snippets Playground and our Guest Designer (more fun and games I bet!) by clicking on the box below to be redirected.


Wednesday, 16 February 2022

Holly ring

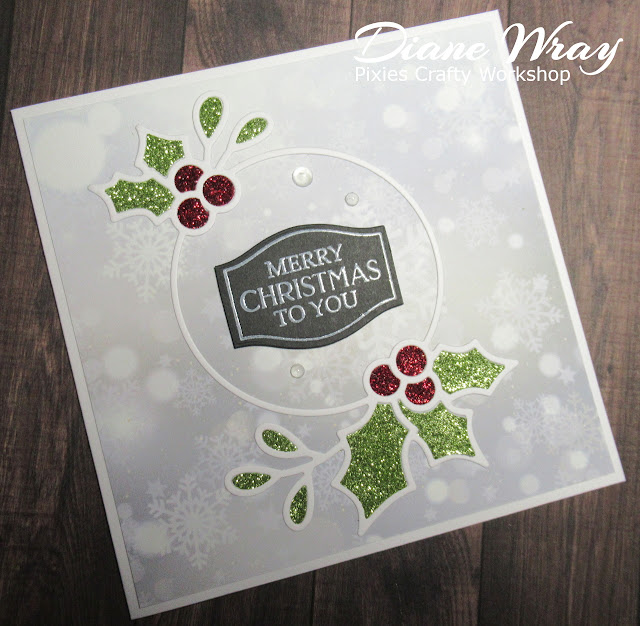
I spotted someone using the gorgeous Poppystamps 'Holly Ring' die around Christmas time and absolutely fell in love with it. It's been waiting in my NBUS basket for a first outing and this is what I came up with:

And a closer look at the gorgeous sparkle. I can't recommend X-cut's Xmas A5 Adhesive glitter sheets enough! Not cheap but so good for die cutting smaller elements for cards.

I used:

- 5.75" x 5.75" square white card blank, side opening

- piece of patterned paper from Whimsy's 'Blurry Flurries' paper pad, trimmed to 5.5" x 5.5" and glued onto the card front

- snippet of white card, die cut using Poppystamps' 'Holly Ring' die and glued onto the layer of paper on the card front, using a glue pen

- snippets of deep red and lime green Xcut Xmas A5 Adhesive Glitter sheets - from the 'Darks' pack

- die cut berries and foliage from the glitter snippets and added them into the spaces on either side of the ring

- sentiment stamp and die is made by Poppystamps from their 'Gilded Christmas Wishes' stamps and co-ordinating dies set

- stamped the sentiment in white onto a snippet of black card using a Hero Arts 'Unicorn' ink pad and then embossing using Rubber Stampede 'Clear embossing powder' - I quite like that by clear embossing, the white isn't too 'sharp' against the black

- die cut the sentiment using the matching die from the Poppystamps set and adhered it to the centre of the ring using thin sticky pads

- then added three clear 'raindrop' gems (a current fad of mine!) to finish off, using Cosmic Shimmer glue

It's so enjoyable to have some time to relax a bit and do a bit of crafting. Made three cards all the same as there were a few different techniques and a lot of stuff to get out and then tidy away again afterwards. It always seems to make sense to do a couple of extras, particularly when it's Christmas cards.

Of course, this card is heading over to Darnell's NBUS Challenge #35 for February.

I'm also joining in with the Christmas Kickstart Challenge #59, where the theme is 'The Sentiment Takes Centre Stage'.


Tuesday, 8 February 2022

Out of this world

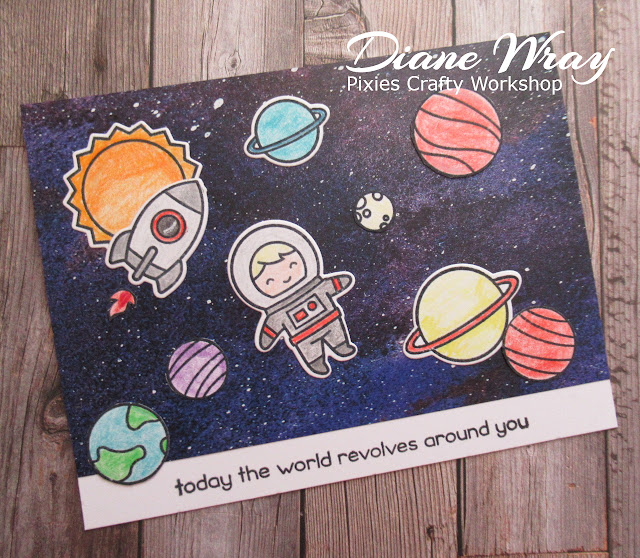
Luke, the son of a neighbour, has a Birthday coming up next week - and for once I managed to make a card for him in good time, rather than the usual last minute panic:

I used:

- 5.5" x 4.25" white card blank, tent style

- background paper came from a Crafters Delight book of scrapbooking papers called 'Watercolor Galaxy'

- trimmed the paper to leave half an inch of white card blank at the bottom of the card and to overhang the sides by about quarter of an inch on each side

- glued the paper in place and, once the glue had dried, trimmed off the excess from each side (from the back) with scissors

- then stamped a selection of images using Memento 'Tuxedo Black' ink and MFT's 'Out of This World'  set of stamps onto snippets of white card

- stamped the sentiment at the bottom of the card - same ink pad and same set of stamps

- coloured the images using Polychromos pencils

- die cut most of the images using the matching set of dies. However, the ordinary circular dies were joined so tightly together there was no room to get my wire snippers in between the dies - help!

- began to fussy cut them leaving a white outer edge the same as on the die cuts but soon realised that any imperfections would be glaringly obvious against the dark background so I opted to cut all the circular images right on the outer line - same for the flames from the rocket, which oddly enough didn't even come with a matching die

- then just glued all the elements in place using Cosmic Shimmer glue

I even coloured the little astronaut's hair pale blonde just like Luke's own hair. ☺

I freely admit that I have lots of scenic background papers and many night sky ones as well. They're lifesavers for fast cards! I also have some different 'space themed' stamped and die cut images still to use - sent to me by a lovely friend.

This card it so very much like a Lawn Fawn website sample card that it would be cheating to enter it into any challenges - but it was fun to make!


Sunday, 6 February 2022

New challenge open over at the new Snippets Playground!

This is my snippets card:

I used:

- 6" x 6" square kraft card blank

- snippet of approx. 5.25" x 5.25" white card onto which I stamped the image, using stamps from Uniko's 'Floral Vines' stamp and Memento 'Tuxedo Black' ink

- added the sentiment, from the same stamp set

- coloured the image using Faber-Castell Polychromos pencils, using later Summer to Autumn colours to tone in with the kraft card

- die cut four identical pieces to make the 'frame' using white snippets and a die from a brilliant set of dies by Clearly Besotted called 'Frame It Die Collection'

- glued the background image onto the card front 

- then glued the frame pieces in place - see note below

- added three clear 'raindrops' from Lucy's Little Things - using Cosmic Shimmer glue - I recently decided to try the glue again after early failures and found it perfect for attaching little 'doo-dads', as Darnell would say. I should have persevered with the first bottle I had quite a few years ago - and that was SaRn I think who recommended it! Basically I think I snipped too much from the applicator back than - now I just have a bead topped pin stick in the very teeny, tiny hole in the new bottle to keep it airtight

- finished!

The stamping took a fair bit of measuring and lining up with the aid of the Misti as the set comes with just the one floral image which you need to flip the other way round and stamp twice for my chosen design - but when it worked perfectly (with the aid of a grid lined piece of acrylic) I sure was a happy bunny! The real secret is to line up the ends of the lines underneath the 'Floral Vine' stamp - not the centre flower as I was tempted to do.

The frame dies are such a great idea - no doubt I spotted one of you Playmates using them at some point last year - I've had mine for a few months waiting to be used. The set comes with six different lengths of the corner ended dies, certainly in two, perhaps three, different widths/thicknesses but I don't want to unearth my own set again and cut more die cuts to prove it. So, you can make square frames or mix two different lengths of dies to make rectangular frames. Very clever, although it already seems to be discontinued over at Clearly Besotted, sigh. Whisper, other companies also sell similar sets - including Ali Express.

I did have to juggle around a bit with the frame pieces, purely because if anyone can attach stuff on the 'wonk' it's me. So, I flipped the pieces over and attached a narrow strip of sellotape across each corner before adding some glue and then 'going for it'! That allowed me some 'wiggle room'. ☺ And another tip - do check that your chosen frame will work with the size of image you want to use. I almost slipped up on that one early on in the process!

Do hop over to the Snippets Playground and see what this fortnight's prize is if you like this card. And you can also enter just for the fun of it as well!

I'd like to enter my card into Darnell's NBUS February Challenge #35 - HERE.

Player's Badge