Wednesday, 16 March 2011

What's On Your Workdesk Wednesday? 93

At last - a bit of a messy desk!


Piles of paper to be sorted and filed away, leftover bits from cardmaking - some of which has been there for over a week, the usual cup of coffee, stamps out ready to make some Easter cards and other general paraphanalia! On the workmat are a couple of waterfall cards from a freebie magazine kit ready to be assembled - plus this little half coloured image:


Another Penny Black stamp - and such a cute one - which needs the colouring finishing off and then to be made into a card to send to my step-mum who is still hospitalised. I think it'll appeal to her sense of humour :)

Lastly, in amongst the mayhem, I got fed up of rummaging through a box of glitter glues which were all higgledy piggledy (isn't that sooo descriptive?!) - and arranged them like this:


Yup, another Really Useful Box with divided tray to the rescue! A right mixture of Liquid Pearls, Distress and ordinary Stickles etc. There's also a fine paintbrush lying in the box - I'm too pernickety (another lovely word!) to apply glitter straight onto card with the nozzle......and also too flipping clumsy. So, I just squeeze a blob onto a piece of paper and pick what's needed up from there with the brush. Probably a bit wasteful - but much better than spoiling a card!

That's my state of play for this week - I'm off for a good old WOYWW browse to see what everyone else is up to! Join me here at Julia's! I'm also lying in wait for the postman - my blogaversary candy for the giveaway should be here any day now..........hmm, better work out how to set up Mr Linky and randon number gerneration I 'spose :) Might have to ask my in-house IT chappie for a hand!

Di
x

Tuesday, 15 March 2011

A special birthday card for Paula

Hmm, I found out that it was a bloggie friend's birthday recently - and a milestone one at that. She makes beautiful cards so I was up against it - added to which I flipping got the date wrong so this should have arrived today....... a bit late. Belated Birthday Wishes Paula! Here's hoping that this year is a really great one for you honey!

This is what I came up with:


It's another 'LOTV Cute Square' from the Party Girls set.....I just love these sooo much!! The card is an easel style using a Craftwork Cards white scalloped card - with a layer of patterned paper from the Papermania Capsule Collection 'Boysenberry' Paper pack. I punched both edges of some co-ordinating card using a Martha Stewart punch and the ribbon was from my stash (Hobbycraft). It was wired but if I love a ribbon I don't let that put me off buying it as it's really easy to slip the wire out of the edging. The circular Magical Birthday sentiment is from the LOTV Dreamy Days stamp set with a couple of little charms from my stash dangling merrily below it. The luscious flower is from the Prima Ballerina Recital set (appropriate 'cos the little cutie is dancing!). I chose the stamped Penny Black message to kinda bring it all together, and it sums up how we should face each day if we're able - especially as Paula had a rotten time last year health wise, and she is still in pain but always so funny in her emails.

Right, ironing is beckoning me - whoop, whoop!! But it's straight from the washing line as it's a gorgeous day here - and the smell of freshly dried ironing is one that brings back a lot of childhood memories. Err, plus it should be craft time on QVC - just looking you understand!! :)

Di
x

Monday, 14 March 2011

9 squares card

I've made a few of these over time. They look quite clean and crisp and are relaxing to make too:)

It's self-expanatory really - the 144mm square card is white linen with a silver mirri card square, topped with another white linen square. Then nine 1" squares of lilac pearlescent card topped off with cupcake stickers from my stash. Simples!

Di
x

Sunday, 13 March 2011

Flower card - if you can't have real flowers

My step-mum is still unwell and we aren't sure where things will go from here - will she go back home or possibly need long-term care? She's quite perky now but has to have oxygen due to chronic asthma and consequently she can't have flowers in her room but, as she loves flowers so much, I thought this card might be the next best thing.

I made the flower a while ago - and showed it on WOYWW here. And this is the finished card:


The flower is a La Pashe Build-a-Flower azalea. It seemed best to keep the card fairly simple (I used a pure white A6 linen effect card) - the pink background was die cut using a die from a Nesties Labels Eight set - I then used the next size down to cut the white label  from embossed card with a little bit of pink shimmery chalk edging added before removing the label from the Nestie. It was then just a case of adding the flower, leaf and a label before adding a few little drops of Anitas Glaze as 'dew'.

I hope it fits the bill, even though it has no perfume!

And, I've re-discovered my lovely chalks at the same time :) It's probably several years since I used them so they're well overdue for a few outings.

Di
x

Wednesday, 9 March 2011

What's On Your Workdesk Wednesday? 92

Wednesday again! First up, here's a tip (which the more I think about it is probably teaching Granny how to suck eggs) for anyone using Aqua Markers. Of course I had to have the whole set - as you do. So......being a tidy little soul I then HAD to have the zipped Letraset holders didn't I. I know the barrels of Aqua Markers are coloured as a guide but some of them aren't totally accurate. My tip is so simple - I didn't want to work with a colour chart so off I trolled to Staples and bought some small white round stickers which have been scribbled on coloured to match each pen and stuck onto the flat ends of the tops:


I guess this would work with Promarkers too - as I say, I betcha I'm by NO means the first to think of it though. I can see some eye-rolling going on! Before anyone says, I'm meticulous about putting the tops straight back on in any case - so no chance of ending up with a handful of pens and mixed up tops!

It's been a busy week so not a ton of crafting done really, although this is the card I made for my friend Joy's son and his girlfriend Jess. They recently got engaged so Jess is of course now Stuart's fiancee.......OK, so where is the accent symbol to go above the letter 'e'?!

Just to prove I can do a little bit messy - here's my desk just after I finished the card:


And this is the card - plus insert:


I used a square scalloped card from Craftwork Cards, a Love and Romance Lili of the Valley Cute Square, mounted onto a Nesties die cut - with a little bit of Stickles plus a teeny diamante gem in the little chap's hand - apparently Jess's engagement ring is a gorgeous diamond solitaire. I like the way the little girl seems to be having a think about what's going on :) The background paper, lace and roses are from my stash, the cute 'double heart' charm came from Dies to Die For and the sentiment stamp is from the LOTV Dreamy Days set. For the red bow I used some scrummy red organza ribbon that I bought in Germany a year or so ago - it has silver heart outlines on and I've been waiting for a very special card to use it for the first time! I hope we'll be going over again to see the grandchildren this Summer so a visit to the little shop where I found this and a few other tasty ribbons is def. on the cards..........to coin a phrase :)

So, now make sure you hop over to Julia's to find out what everyone else is up to........have fun!

Di
x

Tuesday, 8 March 2011

Whoopee - I won something!

This is almost the very first go I've had at entering a draw for some candy - normally I can't even win an argument so I don't bother. BUT, Lady Luck smiled on me and I won a newly released Lili of the Valley stamp - called Teddy Romeo. The lovely Dawny P ran the candy draw on her blog here. And this is the little fella that is winging his way to me in the post - isn't he cute as a button! :)) I'm 'doubly delighted' 'cos I'm such a fan of LOTV!! Whoop, whoop!!!

janloveteddyromeodbl[1]ed

Di
x

Monday, 7 March 2011

Thank you card

On Friday I had a brilliant day out with a good friend called Joy, who I used to work with - and totally true to her name it was a day with a lot of laughs. We set off early and spent most of the day in Ikea down in Southampton. Got there in time for their 99p breakfast (yippee!!) and talked and shopped a LOT....thank goodness we went in Joy's 'people carrier' as it was stuffed full with goodies by the time we left Ikea! As soon as I spottted this LOTV Cute Square which Mr Postie brought the other day I just knew a card had to be made to say thank you for a great day out.......but we did dress casually and neither of us wore a hat :))


The background paper is from a Daisy and Dandelion paper pad called Picnic Patch, the LOTV Cute Square is from the 'Tea and Chat' set, the lacy strip was cut using a Martha Stewart punch, brown organza bow from my stash of ribbons, little heart and bakers twine also from my stash. The sentiment is an Elzybells one and the yummy organza flower came from The Crafty Cow and is made by Prima (Roosevelt Collection). I've said it before - I do so wish Elzybells hadn't closed down as their stamps were such good value and really well designed. Thankfully I stocked up before they closed but just know I missed out on quite a lot :(

Di
x

Sunday, 6 March 2011

Sympathy card

As my friend Moira knows, if our parents abandoned us had to leave us behind at boarding school in Germany, due to our Dads being posted back to the UK, they had to appoint guardians for us. This happened to me and a really lovely couple called Alice and Frank, who were good friends with my parents, took me under their wings for half term breaks etc. I think the main reason was in case they needed to sign for any emergency operations and so on and I felt very treasured because, although they had no children of their own, they coped admirably with a 17 year old lovesick teenager!

Sadly, my adopted 'Auntie Alice' died a week ago and I sent this card to Frank - they had been married for over 50 years I believe. I kept it simple yet as elegant as possible, given that Alice was always such a quietly elegant lady herself - the image is a Penny Black one - 'Letters and flowers'.


RIP Alice and thinking of my lovely 'Uncle Frank' - so very sad.

Di
x

Saturday, 5 March 2011

Never ending birthday card

I have a friend who is also into cardmaking and has followed me into making kenetic cards, easel cards and twisted easel cards. I've got few few more ideas up my sleeve and as it's her birthday next week I wanted to give her a new challenge to try out - wicked girl that I am! Luckily she's currently in Spain (hopefully sunning herself and going nowhere near a PC) and doesn't get home until late at night on the day before her birthday so I can post this early!


My first attempt at assembling a never ending card went into the bin, I made a real pigs ear of it - thankfully before I even got beyond the initial stage. This one worked fine though - much to my relief 'cos I hate to be beaten. The papers are all from a 'Celebrations' paper pad by Paper Cellar so they co-ordinated pretty well The sentiment is a SU one, 'The more candles the bigger the wishes'.

Di
x

Wednesday, 2 March 2011

What's On Your Workdesk Wednesday? 91

It's been a funny old week - I seriously think my litle car must be in love with someone at our local dealership - three trips there this past week, plus an overnight stay! I think she's all better now, so fingers crossed.

This is what we've been up to here - Mr Fixit doing the drilling and myself directing operations and then me playing. My craft room is very small compared to many, so I keep lots of stuff neatly tidied away in Really Useful Boxes behind sliding doors. But, I found that staring at a blank piece of wall to one side of my corner desk was uninspirational to say the least. Mr Fixit wasn't happy about my original idea of shelving - and in any case I couldn't reach it without kneeling on the desk if it went too far along (that's how little space I had to play with). This is the solution - and I'm so easily pleased that I just love the compromise :)


I had such fun digging my favourite and most used bits out of their boxes. Martha Stewart punches of course plus other punches. Then a little selection of wooden stamps - these are the ones I'm using a bit right now and I'll ring the changes for example at Christmas time (probably should be starting on Christmas cards now really!?) and a few bottle of glimmer and shimmer mist. The bottom shelf was originally going to hold all of my Stickles bottles (got a load of Tim Holtz Distress ones this week and they're gorgeous). When Mr Fixit saw them he remarked that it looked a bit like a spice rack though so they have been relocated apart from a couple of plain glittery ones. I had to laugh though 'cos this IS a spice rack in any case :)) Bought from eBay here and really well made - just great for anyone with limited space or even a spare piece of wall in amongst lots of other display shelving. So hopefully no fears about the wall falling down which keeps Mr Fixit happy - plus I have something more inspiring than a blank wall to look at.

Right, I'm off for a good old nose at what everyone else is up to - join me at Julia's here to see what's going on :)

Di
x

Sunday, 27 February 2011

Just lounging around - birthday card

I made this card quite a while back:

It's one of my favourite Penny Black stamps - called Uplifting Occasion :). I can tell it was made some time ago but I did put my heart and soul into it! Isn't it odd looking back at cards we thought were so 'right' at the time and then realising we certainly would have been marked as 'could do bettter'. Even the photo is blurred. Tee, hee!

Di
x

Friday, 25 February 2011

Remembering Don

My OH's older brother took up watercolouring when he retired a few years ago. Sadly his retirement wasn't as long and happy as we'd all hoped and he developed what proved to be a terminal illness. It's four years this weekend since he died and I have no idea what prompted me to stumble across a couple of photos whilst browsing through folders on my laptop today - perhaps subliminal thoughts?

The Summer before he died, Don asked my OH for a copy of a photograph we'd take on a recent holiday to Thailand - and we didn't suspect a thing. On our next visit I remember that day as being so happy - glorious sunshine, Don looking very well and hopefully things going to plan after his chemotherapy and a lot of laughter as Don, his wife Maureen and ourselves spent most of the day in the garden - interspersed with visits from the family.

To our surprise and delight this is what he'd produced for his 'baby brother', taken from the photograph he'd so cleverly asked Len for - and the frame is just so perfect too. He must have had a cunning plan all along and as you can imagine, it's one of our most treasured possessions:


When it was Don's 70th birthday, just a month before he died, this is the card I made for him. It seemed so appropriate to show him how much his painting was appreciated:

How I made it doesn't really need explanation - I took a photo of his picture and added some artists bits and pieces - plus peeloffs.

RIP Don xx

Di
x

Wednesday, 23 February 2011

What's On Your Workdesk Wednesday? 90

Crumbs - these Wednesdays come round quickly!

Firstly a little peek at my slightly OCD storage - it's nice to be able to hide all the Really Useful Boxes as I don't have the luxury of lots of beautiful open shelves with fancy baskets and colourful containers. I had to make the most of what space I knew would be available so opted for this set-up. I'm with Wipso in that I have to be organised otherwise it all becomes a jumble and not so easy to pick/mix/match whatever I might need. So I do 'generally but not always' try to clear stuff away from my desk once I've finished using it.


Without standing on my desk and pressing my back right against the wall it's hard to get much of the row of three floor to ceiling sliding doors in :) When they are all closed it does look very neat and tidy.


This is the left hand side door slid open with my 'can't be without this' trolley (bought from Costco). I've had it for years right back from when I first took over the dining room table for crafting, as a 'prolonged interim measure', so it just had to stay when this room was built - a faithful friend :) The shelves were built just at the correct height so that it can be wheeled in and out if needs be. There will be much weeping and wailing if it ever collapses under the weight of all the card etc. in those drawers! Maybe it's time for a sift through to redistribute some of the stuff...ha, that's the spare space I'm just gonna gloat about already spoken for :(

This is part of the middle section - with some blank spaces as am currently doing a little bit of re-organising. No doubt they'll be full again once I've finished though...........see previous paragraph! The grey expanding folders contain peeloffs and rub-ons (yup, all categorised). I don't use peeloffs that much now but am loathe to get rid of them 'just in case'. The very top shelves - out of vision but right across the whole lot - are much too high to reach when you're vertically challenged like me but very useful for storing things I'm happy enough to use only now and again.
And this is what's actually 'on my workdesk' right now:


I seem to be happiest wielding a pair of scissors and recently sent for the La Pashe Build-a-blossom set. This is an azalea I'm partway through making. I suspect that these flowers will look their best just left to make their own statement on a very simple embossed background maybe?

I'm off for my weekly nosey at what everyone else is up to! To join in go to Julia's here!

Thank you to everyone who left such lovely comments last week - I'm pretty sure I replied to them all. Much appreciated ladies xx
Di
x

Monday, 21 February 2011

House Mouse frolics

My step-mum isn't very well right now and this card is hopefully to remind her of her love of cute and mischievous meece. It's another Joanna Sheen decoupage image - these are so cute but the detail on some of them would test the patience of a saint!

I used an 8" x 8" white embossed card from The Range and layered the image onto to plain white card to give some body/thickness so I could add and tuck under the edges of the ribbon and lace. I then added one of the papers from a Papermania Capsule Collection pad (Boysenberry) before adding the lace and ribbon then the decoupage. Just the addition of some card candy, a little heart charm tied with pink and white bakers twine (I love this stuff!) and a sentiment from the decoupage sheet to finish it off.

Di
x

Friday, 18 February 2011

Pay It Forward Thank You card

On Thursday 3rd February, a day late for WOYWW, I posted about the lovely hand sewn gifts that Wipso sent me in Pay It Forward.

Such generosity deserved a special card to say thank you and this is what I made and sent off:


The card is a scalloped one from Craftwork Cards topped with some pretty paper from my stash - also from Craftwork Cards. I had a first proper play with one of Santa's presents to me (a mini sewing machine from John Lewis - in fuschia pink of course!) and sewed a border of zig zag stitch round the coloured paper before rounding the corners and mounting it onto the card itself. The frame behind the image was die cut using a Nestie die, the lace is from my stash, as are the flowers which I topped with buttons threaded with embroidery thread. The dinky little scissors were tied with a piece of seam binding from The Ribbon Girl and the sentiment is a Whimsy ticket, die cut using their super newish die cut for tickets.

The little mouse is of course The Tailor of Gloucester - coloured using Aquamarkers. And it seemed totally appropriate for such a talented lady who produces some stunning designs along with her sister Twiglet

I added a slightly 'cheesy' (ha, ha - mouse, get it!!) sentiment inside just saying 'Thank you sew much for your kindness'. Wipso, aka Annie, said some really sweet things when she got the card so I think I got it right :)

I now have visions of the pair of them perched just like this little mouse, on their sewing reels, having a quick coffee break and dreaming up new ideas for their online shop!

Di
x
.

Wednesday, 16 February 2011

WOYWW - #89

I love to see how other crafters store their stash and some folk are incredibly lucky with HUGE rooms and every sort of storage and display unit imaginable. Space being at a premium in my little 'den' means that most of my stuff is stored behind sliding doors on shelves specially sized and at the right distance apart to take up to 4 shallow Really Useful Boxes heightwise (or a combination of deeper or mixed ones) and three across each width. I had a brilliant and very patient local carpenter to do all of this - I even thought he might take up card making once we'd finished all the planning and installation!

I don't have the luxury of ribbon reel storage so that I can just tug a bit of ribbon and snip it off a reel on a piece of dowelling or whatever - but this works for me:


Oops, the Martha Stewart Punch Around the Pages are still on my desk from last week - within stroking and sighing range!

Anyhow, this is a 9 litre Really Useful Box ( with four divided insert trays stacked on top of one another).

A bit of quick maths means there's a total of 60 compartments so I can sort through ribbons in colours and textures easily. I can get 5 metres of ribbon easily into one compartment - probably a lot more but I prefer variety to quantity.Once you hit over 1" width ribbons this stacking system isn't really viable though :(

I also store flat flowers and lots of other bits and pieces in this way. If I don't have anything more exciting to show next Wednesday then I might dig some more boxes of stash out!

Now I'm off for a nosey round what everyone else is up to on WOYWW - go to Julia's here to see!

Di
x

Monday, 14 February 2011

Valentine's Day card for someone special

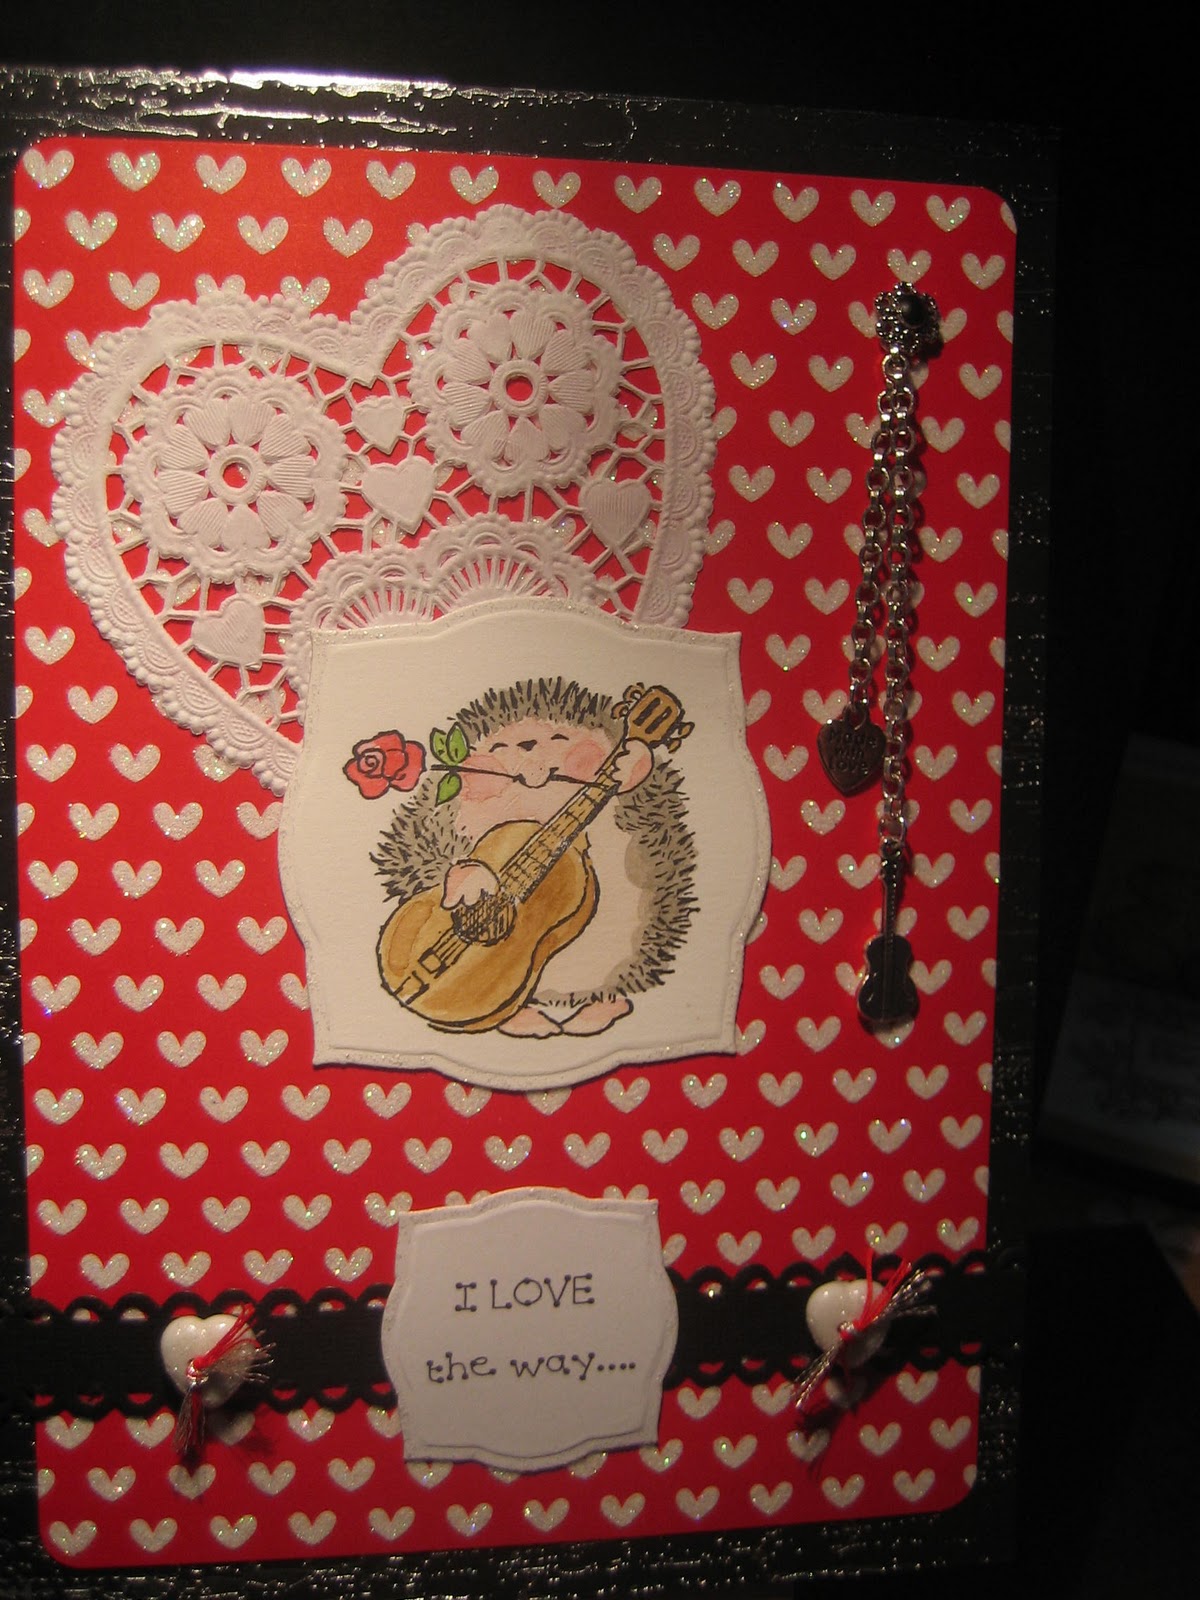
As soon as I saw the Penny Black stamp I've used on this card I just HAD to have it!

 My OH has five guitars so you can see why this little hedgie image caught my eye. It's a Penny Black of course and called 'Hmm' which is very appropriate if you have a rose clenched between your teeth!

I coloured the hedgie image using Aquamarkers and then layered the die cut image (using square Nestie label set) onto some yummy sparkly heart design card with a heart shaped doily behind it, which was in turn layered onto a black A5 card with silver foiling round the edges.

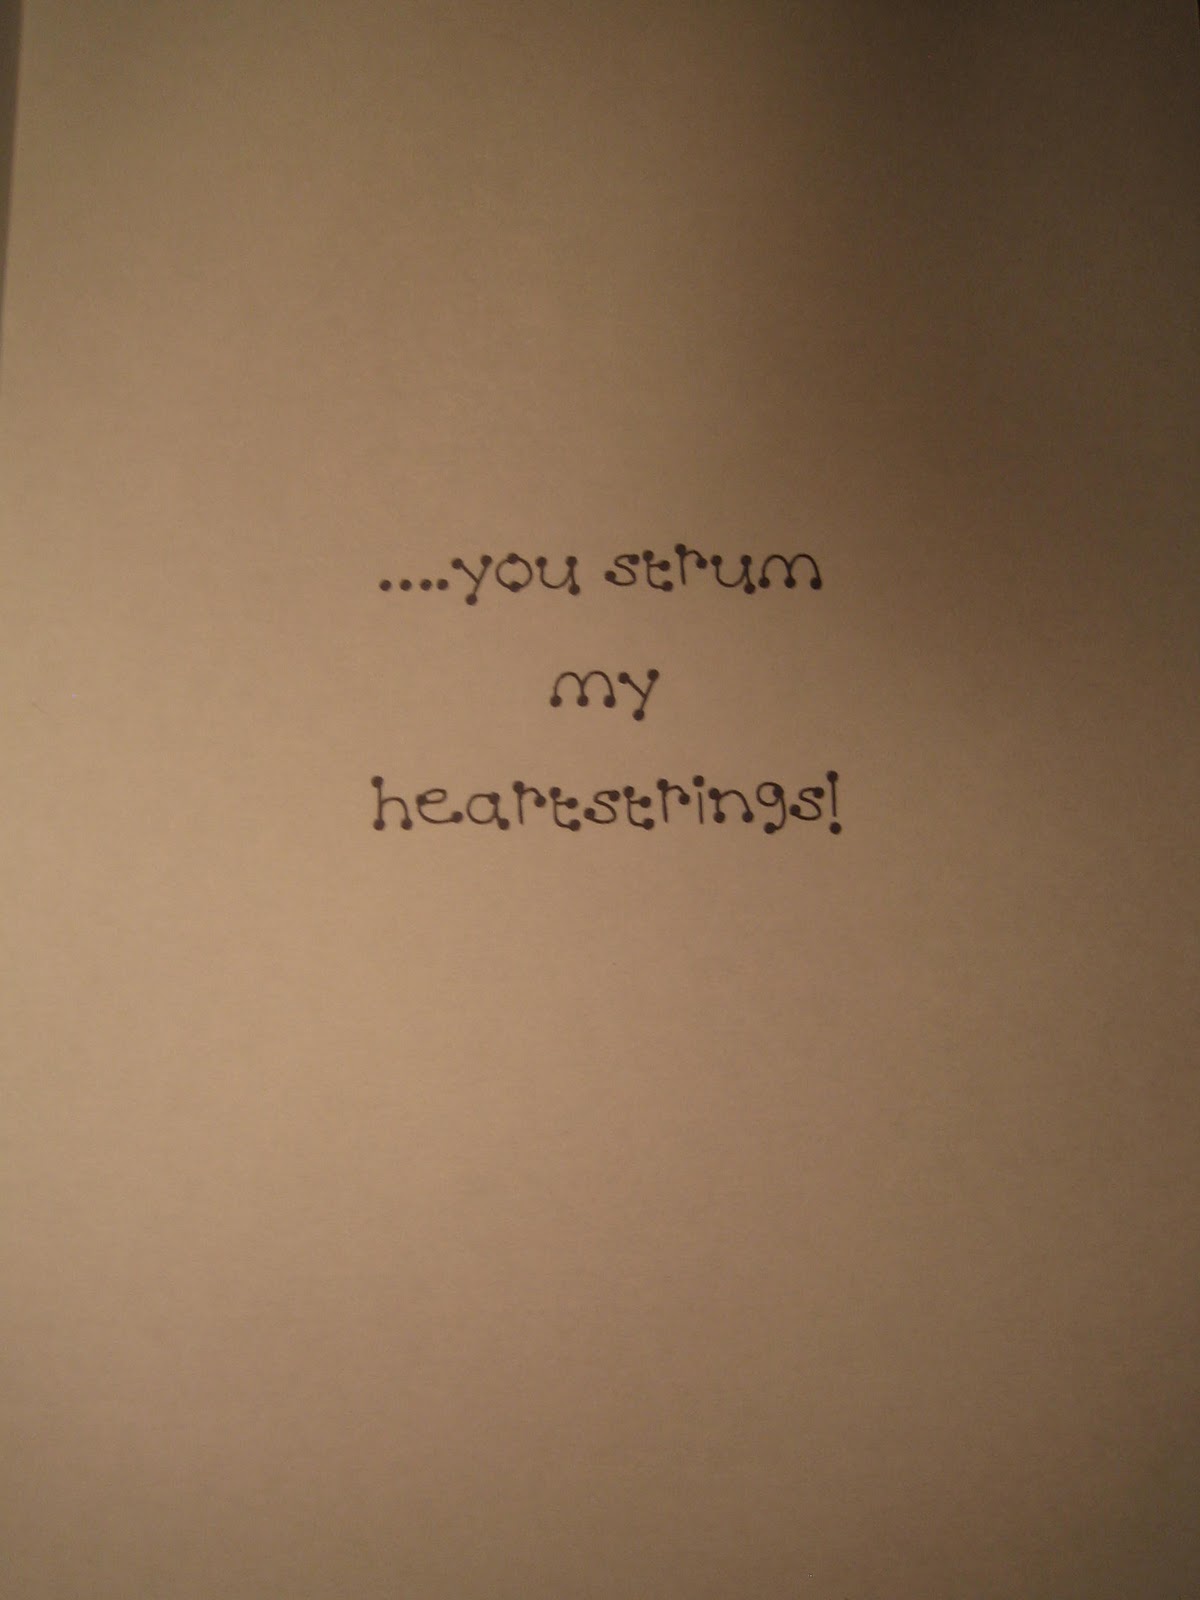
As it's for a chap I didn't add flowers and ribbon for a change - just a couple of charms (one is a guitar of course!) and a Bazzil Basics Half The Edge strip in black which is topped off with a couple of glittered white heart shaped buttons. They took AGES to dry and I had to keep my craftroom door firmly closed - they were then threaded with with red and silver embroidery thread. I printed the sentiment and then die cut it...and in case you're wondering what the rest of it says, here's the insert .......rubbish photo though :)


Aaaah, doesn't Valentine's Day bring out the romantic in all of us!!

Di
x

Sunday, 13 February 2011

Birthday card for a GorJuss friend

I know from my friend Moira that these little cuties always go down well - so I turned to some GorJuss decoupage when making a card for a friend whose birthday almost snuck up on me. Need to post it tomorrow and keep my fingers crossed it arrives on Tuesday!

The decoupaged image is from a GorJuss kit of course. The pearly pink background is from a DCVW beautiful Luxury Stock pad with a gorgeous shimmer to it (note to self - use more of this!).

The flower is cut from left over bits of the same card - waste not, want not - using Tim Holtz's tattered Floral dies then a little Prima brad added.  And Tim Holtz dies do work beautifully in my little pink Cuttlebug despite some sellers saying they are only for a couple of other die cutting machines. You just use less/thinner CB plates.......simples! The cream slotted lace came from e-bay, pink ribbon from my stash and the little 'Made With Love' heart is from my stash, tied with pink and white bakers twine.

The sentiment is a new venture too, it's a Whimsy ticket stamp and I also got the die to cut it out - if you buy one and wonder how on earth to use the little piece of plastic that comes with the die then go here for a tutorial, I had to!! My only extra tip would be to also hold the die in place with easy removeable tape when you actually do the die cutting. Dumbo here sent to the States for them and I now know they are available over here in the UK.......although at the time places seemed to be out of stock. Still, for once I didn't get stung for import duty :))

OMG! This is my 100th post too!

Di
x

Wednesday, 9 February 2011

WOYWW - #88

Not a lot 'cos I'm working on an idea for Pay It Forward and had to hide it! The Aquamarkers might be a little clue although I'm not convinced that what I'm doing will really work :(

But in the background are some of my Martha Steward Punch Around the Pages - and this baby card:


The card stock is from Craftwork Cards, little baby is a Lili of the Valley Cute Square die cut into a circle and layered onto a scalloped Nestie die cut. The lemon background paper is from my stash and underneath the bow is a strip punched out using Martha Stewarts Deep Vine punch. Flowers and brads are from my stash (I think they're Prima flowers) with some punched out leaves and a couple of twirls of green wire. The ribbon is lovely soft silk ribbon from The Ribbon Girl and the 'date of arrival' stamp is from Pink Gem Designs. The little dummy, which came from Posey-Rosie-Card-Craft on eBay, is fastened round the bow using white and brown bakers twine - also from The Ribbon Girl. 

To see what everyone else is up to - hop on over to Julia's here!

Di
x

Monday, 7 February 2011

Easel card with a difference

I came across a box with a cute QVC kit in whilst rooting round in my stash the other day (it's not good that I have stuff I've forgotten about - no more craft shopping for me for a while, well......a week at least). This is a Dawn Bibby designed set made by KanBan called Spring Woodland - card stock, toppers (some layered), flowers, sentiments and borders - in such pretty colours and designs. I hadn't realised that a lot of the card stock was patterned on both sides and it seemed such a shame not to make the most of it! This is what I came up with:


The sharper eyed might notice a crease running diagonally across the front of the card......next step is when it's open:


How cute is this?! I'd only ever spotted this idea once before in my trawls through other blogs and filed the idea away for future reference - the posting I found is here - thank you Sarah for the inspiration! Do take time to have a look at her blog - there are some super ideas there! The diagonal easel card is so easy, even more so with double sided patterned card stock although that's not essential of course, and a nice alternative to the normal easel cards. I still love those mind you but this is a bit of a twist - and it takes less card and sticking:)

Di
x

Saturday, 5 February 2011

Just chilling out card

This is another LOTV cute square card - just so you can see what lovely little designs there are!

I made this for our daughter in law's Dad who is recovering from surgery. It's self-explanatory - I kept it crisp and simple just adding his name at the bottom right. The papers came from my stash - and the hardest bit was writing our message in German on the insert!
Oh how I love these LOTV squares.....and the layers were stuck down correctly despite the piccie making it seem that they're a bit on the low side....I need a better camera sometime, or perhaps I should get down on my knees to take piccies :(

Di
x

Thursday, 3 February 2011

WOYWW - # 87

Yesterday was a bit of a blur - family blip. But, I couldn't let this week go by without joining in WOYWW - even a day late - because I have some delicious goodies to show...from none other than the very talented Wipso. This is what she sent to me for Pay It Forward - how gorgeous huh?! I love everything, and look, she made a gorgeous card too and crochet flowers. The little bear is a Good Luck Bear - he even has a magnet on his back - and I'm hoping he's gonna do his stuff! I now need a new blue top for the beautiful ribbon brooch too :)


BUT, my VERY, VERY favourite has to be the poppy picture. I don't know how but I reckon Wipso must have known just how much I love the poppies header on her blog........and now I have my very own poppies to stroke and gaze at in my crafty den!! What a lucky girl I am to be sure!!


Thank you so much Annie - you're very kind. xxx

I'm still working on ideas for my Pay It Forward and need to get my skates on.....just as well I only got two people signing up, and I hope they can be patient for a little bit longer.

Edit: Just shows how topsy turvy I am - I forgot to link to WOYWW - go here to join in the fun ladies :) x
Di
x

Monday, 31 January 2011

Giraffe birthday card


I just couldn't find a paper anywhere in my stash that I liked for the background and in the end opted for an African sunset downloaded from the internet rather than spend all day looking - never one for being very patient if the wind is behind my sails! The giraffe and sentiment were stamped onto cream card stock with a border of KanBan African Gold card in the most lush sunset/burned earth colour. I'm ashamed to say I've had the sentiment stamp for years - and it was totally pristine so I suspect had never been used - slap wrists! Then the cream A5 gatefold card had the centre of the downloaded African sunset picture added to the inside and then the left and right pieces which I'd measured and trimmed off went onto the opening flaps of the card before I added the image and sentiment.

I know a purist might think that mixing a real life photo with a cute stamp is a bit odd - but I like it anyhow! Plus, I know just who it's going to be kept for - a friend who lived in Africa for a lot of years......and he also likes quirky things............which is just as well :))


Di
x

Wednesday, 26 January 2011

What's On Your Workdesk Wednesday? Week 86

I've been looking agog at so many other crafters' workdesks for more Wednesdays than I can remember. So, finally it's time to stop being timid, be brave and dip a toe in the water to join in the fun!

First up is what seems like a really clear space. I cleared other stuff away - how good is that - before showing my first kind of serious attempt at a style of card  which is totally outside my little comfort zone.  I loved making this though, playing with some distressing inks and such and what's even better is that it's easier to hide any mistakes.....err, don't look TOO closely 'cos I made a couple at least :)


And this is how those of us with  no fine gizmos probably improvise to take piccies of what we've produced. Aha, and my wonderful ATG Gun that Santa brought me is also in shot (I just love how much easier and quicker it is to use than DST although other glues and of course Ultra Strong DST are still in use).
That's my ever present mug of coffee - Piglet in pink (my fave colour!).

A close up of the card wot I made - told you not to look TOO closely. The background on the card itself is stamped but taking piccies in this light is seriously not easy!

And finally, in case you think it's all too orderly for me to join in the fun of WOYWW, this is SOME of the rest of my mess! And it's very tidy for me....a bit like first day at school when you have a tidy satchel :)


Right, I'm off to have my weekly nosey round everyone else's workdesks!! You can join me for What's On Your Workdesk Wednesday (WOYWW), hosted by the lovely Julia, here http://stamping-ground.blogspot.com/  :)

Di
x