The current challenge over at Less is More is 'More Than One Tree', and over at Craftyhazelnut's Christmas Challenge it's 'Go Green'- either colours or upcycling (I went for colours). And this card is also for Craftyhazelnut's Christmas Challenge Extra for November, which is always 'Anything Goes':
I used:
- 5" x 5" square white card blank
- Memory Box die called 'Pine Border Outline, and snippets of gold mirri card (already backed with Stick-It self adhesive sheet) run through the Cuttlebug
- the same die once again and three different snippets of green card, also already backed with Stick-It self adhesive sheet then run through the Cuttlebug
- the next part was really like doing a jigsaw, just mixing the greens and popping them into the spaces in the gold die cut which was adhered to the card first of course, some of those tiny pieces were mighty fiddly! Of course, as there are three greens I managed to make three cards in total just by swopping the different shades around
- then I fell back on something I very rarely use - peel offs - for the sentiment and also the gold outline star
- after all these years since I began using peel offs, it wasn't until yesterday I worked out such an easy way to handle them. Normally I'd just peel them of the backing sheet and an intricate sentiment would often end up a bit distorted, no matter how long I allowed it to 'relax back into shape'. But this time I gently eased the bottom of the sentiment from the backing sheet by sort of rolling it away whilst supporting it along the length of a long pokey tool before just easing the whole sentiment away - works a treat! A fine knitting needle would be an alternative to use
When setting up to make these cards I got carried away and now have, sat sitting on my desk, the makings of a further three cards. It depends just how much self-punishment I feel up to though!
Di
x
Wednesday, 19 November 2014
Monday, 17 November 2014
By request - after a tortuous journey
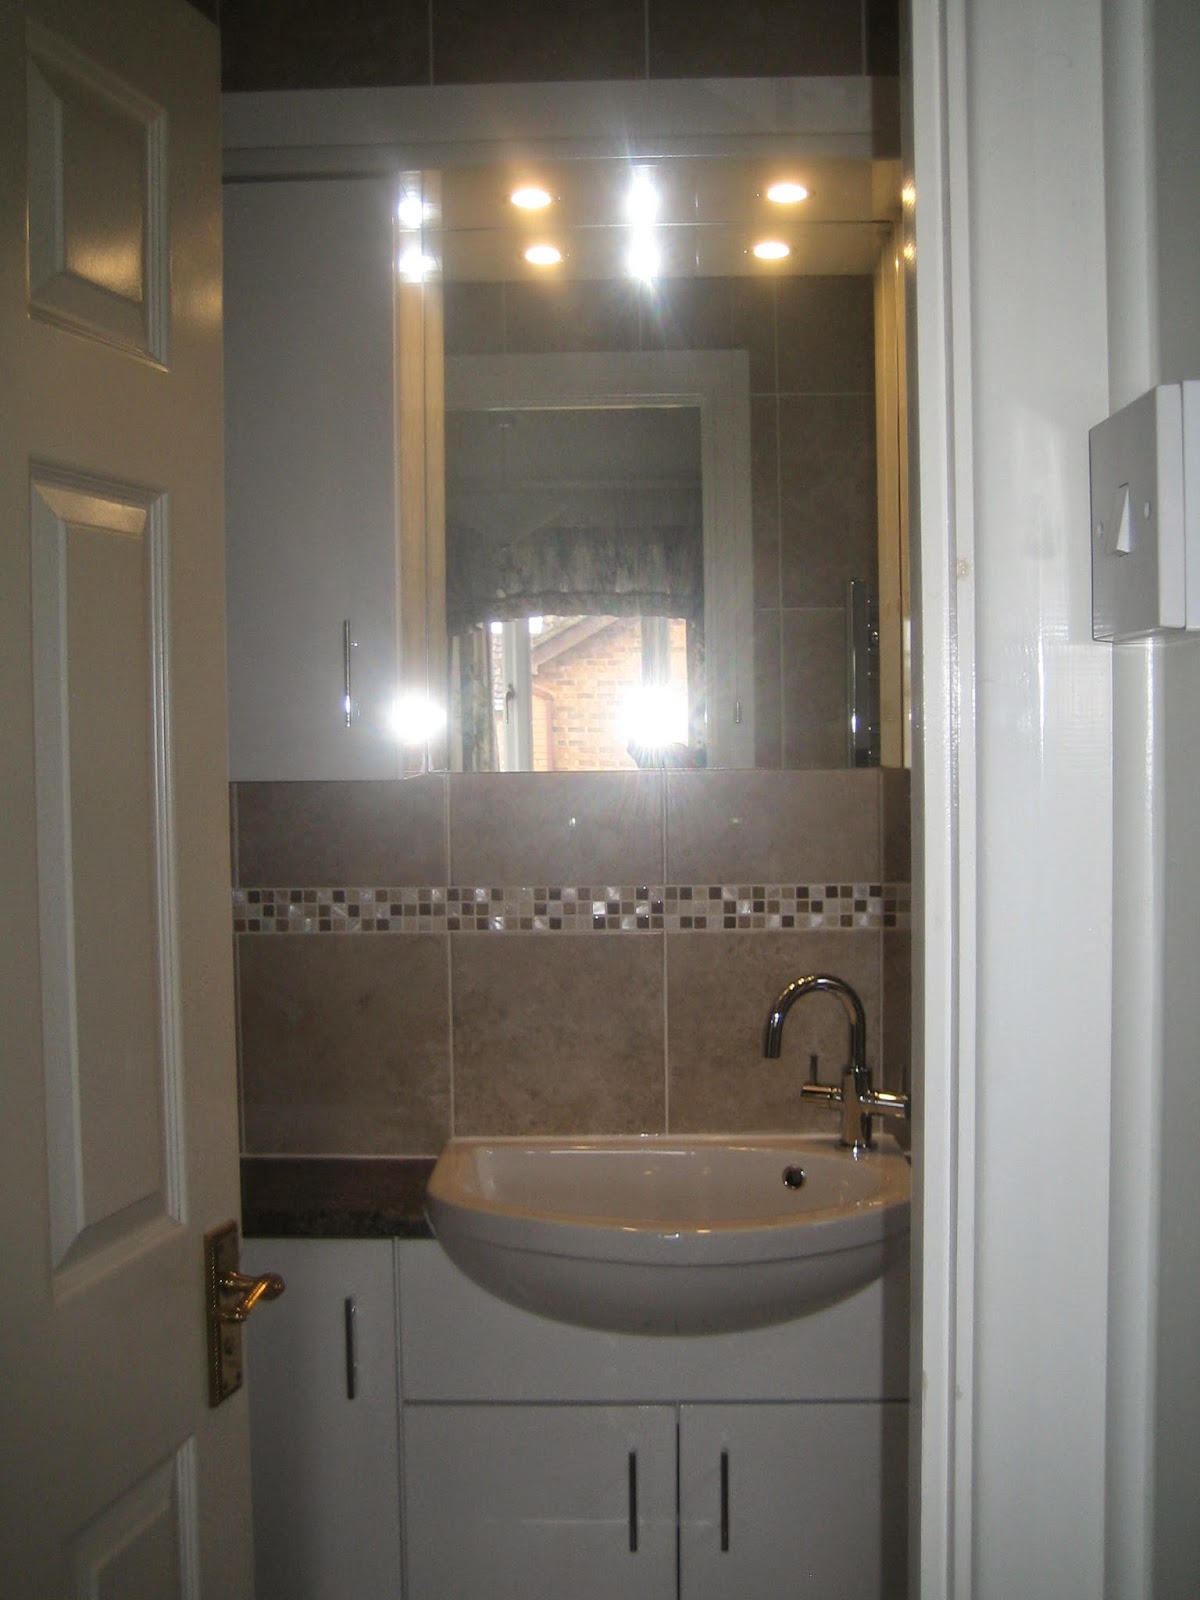
A few of you wanted to see what the full end result was of the six weeks of tortuous en-suite shower room refitting. What was supposed to be a two week re-fit ran into a full six weeks - a lovely result but what a looooong haul to get there. I did a full test run yesterday morning and all seems to be well - brilliant in fact. And no damp patches on the ceiling below either (one of my biggest fears) - thank goodness!
This was at the end of day one as they started work - just a partial view of our bedroom, full of stuff ready for the job. It would appear that the bathroom company lack their own storage space don't you think?
And six weeks later - tah, dah! At last :) The shower all ready to rock and roll.
And the view from the shower.
Tons of wall and floor cupboards for storage (10 cupboards in total) - yay, no more sprays and bottles of cleaning stuff cluttering the place up. Even the narrow cupboard to the side of the toilet will house the loo brush and bottle of cleaner nicely. And there's plenty of room inside the top cupboards for all the toiletries anyone could wish for.
As the window is on the side of the house and not overlooked I think the only window dressing will be something like a white orchid plant - artificial, given my lack of green fingers!
Dual fuel (central heating/electric) towel rail so no damp towels in the Summer. Am such a wimp!
Taken from our bedroom, with the flash accidentally turned on - but at least it hides yours truly holding the camera! The mosaic border tiles fascinate me, some are stone, some are Mother of Pearl and some are light brown glass - a really lovely combination. But, as I've been saying - what a ride it's been!
Now there's the bedroom to tackle of course. The wallpaper border is finally all off so that's a good start!
Hope I didn't bore you - after a grim few weeks there's a little dog wagging two tails here (that would be me of course!). And Len is delighted to have the main bathroom all to himself again I'm sure :) Thankfully that was all refitted when we doubled the size of it during the extension build about five years ago - no way could either of us face this lot again - for a while at least! Never say never of course.
Di
x
This was at the end of day one as they started work - just a partial view of our bedroom, full of stuff ready for the job. It would appear that the bathroom company lack their own storage space don't you think?
And six weeks later - tah, dah! At last :) The shower all ready to rock and roll.
And the view from the shower.
Tons of wall and floor cupboards for storage (10 cupboards in total) - yay, no more sprays and bottles of cleaning stuff cluttering the place up. Even the narrow cupboard to the side of the toilet will house the loo brush and bottle of cleaner nicely. And there's plenty of room inside the top cupboards for all the toiletries anyone could wish for.
As the window is on the side of the house and not overlooked I think the only window dressing will be something like a white orchid plant - artificial, given my lack of green fingers!
Dual fuel (central heating/electric) towel rail so no damp towels in the Summer. Am such a wimp!
Taken from our bedroom, with the flash accidentally turned on - but at least it hides yours truly holding the camera! The mosaic border tiles fascinate me, some are stone, some are Mother of Pearl and some are light brown glass - a really lovely combination. But, as I've been saying - what a ride it's been!
Now there's the bedroom to tackle of course. The wallpaper border is finally all off so that's a good start!
Hope I didn't bore you - after a grim few weeks there's a little dog wagging two tails here (that would be me of course!). And Len is delighted to have the main bathroom all to himself again I'm sure :) Thankfully that was all refitted when we doubled the size of it during the extension build about five years ago - no way could either of us face this lot again - for a while at least! Never say never of course.
Di
x
Sunday, 16 November 2014
Pixie's Snippets Playground - Week 151
It was touch and go whether there would be a snippets card from me this week - although the Playground would still have gone ahead as usual. However, by Friday morning I'd caught up with snippets commenting and managed to make this card whilst waiting for the bathroom fitters to arrive:
I used:
- 5" x 5" square white card blank
- a snippet of matt silver card, embossed using the lovely Darice folder called 'Snowflake Background' then cut slightly smaller than the card front
- next came the fun bit - using a Spellbinders Holiday die set called 'Picture Perfect'. The set comes with four dies - a large plain frame, the large tree and outline village 'scene', as well as two small dies with a little house, trees and a tiny light bulb (as you would find on Christmas tree lights)
- I used just the two large dies, firstly by die cutting the solid blue background using the frame die from a snippet of pale blue pearlescent card stock - and that snippet only just fitted in the die
- then I had to plan/think the next step right through before die cutting the 'scene' and frame. Took one square snippet of white Centura pearlescent card stock just a bit bigger than the plain frame die and covered the reverse with Stick-It adhesive sheet because the scene die is so intricate. Then flipped the white Centura card over and first popped a piece of wax paper over the card with the more waxy side facing uppermost. Next popped the frame die onto the wax paper covered card face down of course and just sat the 'scene' die inside - secured them in place with removable adhesive tape and then ran everything, all layered together, through the Cuttlebug
- success - the die cut popped out of the die easily and it was just a matter of making sure all the windows in the houses etc. were clear before peeling off the backing from the Stick-It adhesive backing and then lining up and carefully adhering the white scene complete with its integral frame to the already cut blue background
- after assembling the silver embossed snowflake background and the scene onto the card out came the 'bow maker' and two snippets of white ribbon (white with sparkly edged satin and plain white organza) to tie a double layered bow. Pushed a sparkly blue gem brad through the centre of the bow then just glued the bow onto the card using glue gun
To be honest, I really cribbed this design and colours from the illustration on the Spellbinders packaging as that's what totally sold the die to me in the first place :)
Onto this week's picks:
I picked this card, made by Neets, as it's a perfect example of how you only need three small snippets to make a really stunning card.Of course having an eye for design is imperative as well :)
On the other hand, Kath used quite a few snippets brilliantly here, in various sizes when she made this great card for a young 'chap' :) Love it Kath - inspiration for those of us who struggle with cards for boys!
This week I'd earmarked two possible picks from one of our playmates and this was my final choice - a darling and so cosy Christmas card - made by Sue J.
And, this week I upped the number of picks to four as this Christmas card, made by Lucy, struck me as absolutely perfect and I couldn't leave any of the other three out either :)
We had no new playmates this week - but some of you played along for the first time in a while, which is lovely to see. Our lovely Jules is 'missing in action' but I checked and she's absolutely fine, just very, very busy.
The winner of last week's prize of the Kanban 'Let's Do Lunch' stamp set is:
Well done Pat! I just checked and it's 22 weeks since you last won so it was time your lucky number came up :) I still have your address and will pop your prize in the post ASAP. Let's hope it doesn't take as long to arrive as the last one did - I think that package walked to you!
Some of you might wonder why I run Mr Random using the full number of entries (52) rather than (say) the seven of you who said 'Yes please' this week. Easy really - some of you playing for the prize might have entered more than once and it's the fairest way I can think to give you that extra chance.
And I bet you girls already guessed what this coming week's prize is? Tee, hee:
Yup, it's a Spellbinders Holiday 'Picture Perfect' die set, exactly like the one I used today. And, as the 'scene' die is very intricate, I'll also include an A4 sized pack of 5 adhesive sheets of Stick-It for you to play with. Looking at the die it's reminiscent of some of the Memory Box village dies but I do like the fact that it already comes with the swirly tree and the frame.
Mr Linky is below - do please let me know if you have any problems linking, it's easy for me to sort out so don't struggle on alone :)
Over the coming weeks we're probably going to have a few Christmas themed prizes - I have some lovely goodies lined up! Of course your snippets makes don't have to be Christmas themed though!
Let's just whisper this - when I get up this morning it'll be a test drive of the refitted shower room. If you see spouts of water and hear anguished screams from Hampshire then you'll know there's more snagging work to be done! Fingers crossed but am not holding my breath :)
Just a little peek :)
Di (and the usual happy wave from Parsnip of course)
x
I used:
- 5" x 5" square white card blank
- a snippet of matt silver card, embossed using the lovely Darice folder called 'Snowflake Background' then cut slightly smaller than the card front
- next came the fun bit - using a Spellbinders Holiday die set called 'Picture Perfect'. The set comes with four dies - a large plain frame, the large tree and outline village 'scene', as well as two small dies with a little house, trees and a tiny light bulb (as you would find on Christmas tree lights)
- I used just the two large dies, firstly by die cutting the solid blue background using the frame die from a snippet of pale blue pearlescent card stock - and that snippet only just fitted in the die
- then I had to plan/think the next step right through before die cutting the 'scene' and frame. Took one square snippet of white Centura pearlescent card stock just a bit bigger than the plain frame die and covered the reverse with Stick-It adhesive sheet because the scene die is so intricate. Then flipped the white Centura card over and first popped a piece of wax paper over the card with the more waxy side facing uppermost. Next popped the frame die onto the wax paper covered card face down of course and just sat the 'scene' die inside - secured them in place with removable adhesive tape and then ran everything, all layered together, through the Cuttlebug
- success - the die cut popped out of the die easily and it was just a matter of making sure all the windows in the houses etc. were clear before peeling off the backing from the Stick-It adhesive backing and then lining up and carefully adhering the white scene complete with its integral frame to the already cut blue background
- after assembling the silver embossed snowflake background and the scene onto the card out came the 'bow maker' and two snippets of white ribbon (white with sparkly edged satin and plain white organza) to tie a double layered bow. Pushed a sparkly blue gem brad through the centre of the bow then just glued the bow onto the card using glue gun
To be honest, I really cribbed this design and colours from the illustration on the Spellbinders packaging as that's what totally sold the die to me in the first place :)
Onto this week's picks:

We had no new playmates this week - but some of you played along for the first time in a while, which is lovely to see. Our lovely Jules is 'missing in action' but I checked and she's absolutely fine, just very, very busy.
The winner of last week's prize of the Kanban 'Let's Do Lunch' stamp set is:
Some of you might wonder why I run Mr Random using the full number of entries (52) rather than (say) the seven of you who said 'Yes please' this week. Easy really - some of you playing for the prize might have entered more than once and it's the fairest way I can think to give you that extra chance.
And I bet you girls already guessed what this coming week's prize is? Tee, hee:
Yup, it's a Spellbinders Holiday 'Picture Perfect' die set, exactly like the one I used today. And, as the 'scene' die is very intricate, I'll also include an A4 sized pack of 5 adhesive sheets of Stick-It for you to play with. Looking at the die it's reminiscent of some of the Memory Box village dies but I do like the fact that it already comes with the swirly tree and the frame.
The Snippets Challenge will run for one week and the Playground gates will close at 11am UK time on Saturday 22nd November and will open again at
midnight UK time on the same day.
Maximum of three entries and please say 'Yes please' (or similar) in a comment if you wish to play and be a possible winner of the prize. As always, if you're only interested in one or other of the items making up the prize, just say so and if you win then I'll do a further draw for whatever it is you don't want. But, do go for both if that's what you'd like of course.
Mr Linky is below - do please let me know if you have any problems linking, it's easy for me to sort out so don't struggle on alone :)
Over the coming weeks we're probably going to have a few Christmas themed prizes - I have some lovely goodies lined up! Of course your snippets makes don't have to be Christmas themed though!
Let's just whisper this - when I get up this morning it'll be a test drive of the refitted shower room. If you see spouts of water and hear anguished screams from Hampshire then you'll know there's more snagging work to be done! Fingers crossed but am not holding my breath :)
Just a little peek :)
Di (and the usual happy wave from Parsnip of course)
x
Friday, 14 November 2014
Stickeroos and gift tags
I recently succumbed and bought Stampin' Up's Scalloped Gift Tag punch.
The other day, with only an hour spare to play, I was flicking through my Penny Black Christmas Stickeroos and realised I had loads of half used sheets. Some with small images and others with larger images that were unlikely to ever be used. Bingo - an idea!
I used:
- white card strips, 2" wide x 4" long
- with some of the strips I punched the tag shape first and then added some small stickers - there's one tag like that in each of the above photos - and then rounded off the bottom corners
- and the other strips I just covered the whole front with all or part of a Stickeroo and trimmed away any excess with a sharp pair of scissors (do this from the back, and preferably with non-stick scissors), before punching the tag shapes and rounding the bottom corners
- last thing, just some matching metallic cord threaded thorough the top of the tags
And as a result, a total of 20 Christmas tags, made in under an hour :)
Even if you don't have a tag shaped punch, these could have been made with just the top corners cut across and then a hole pinched for the cord, or ribbon of course. In fact, some of these might find their way onto cards - in which case I'd probably change the cord for some pretty ribbon.
Di
x
The other day, with only an hour spare to play, I was flicking through my Penny Black Christmas Stickeroos and realised I had loads of half used sheets. Some with small images and others with larger images that were unlikely to ever be used. Bingo - an idea!
I used:
- white card strips, 2" wide x 4" long
- with some of the strips I punched the tag shape first and then added some small stickers - there's one tag like that in each of the above photos - and then rounded off the bottom corners
- and the other strips I just covered the whole front with all or part of a Stickeroo and trimmed away any excess with a sharp pair of scissors (do this from the back, and preferably with non-stick scissors), before punching the tag shapes and rounding the bottom corners
- last thing, just some matching metallic cord threaded thorough the top of the tags
And as a result, a total of 20 Christmas tags, made in under an hour :)
Even if you don't have a tag shaped punch, these could have been made with just the top corners cut across and then a hole pinched for the cord, or ribbon of course. In fact, some of these might find their way onto cards - in which case I'd probably change the cord for some pretty ribbon.
Di
x
Thursday, 13 November 2014
Me vewy bad girl
HUGE apologies playmates - I've slipped behind with my snippets commenting again. In between struggling on sanding down walls and still feeling under the weather after the flu shot (Len too, which is reassuring) - time is just slipping as the day goes by, probably as everything seems to take twice as long as it normally would do :(
Maybe we need a good dose of this:
Or possibly this sort of tonic might be better:
'Ere though, that's a teeny bottle of gin for sure :)
I'll catch up ASAP!
Di
x
Maybe we need a good dose of this:
Or possibly this sort of tonic might be better:
'Ere though, that's a teeny bottle of gin for sure :)
I'll catch up ASAP!
Di
x
Wednesday, 12 November 2014
A first notebook
I spotted some really lovely spiral bound notebooks that Rusty had recently decorated, over on her blog. If you scroll down her blog (or search on 'notepad') there of lots of little beauties, many of them personalised and such fun too. This was my first play:
I used:
- A6 sized, lined, paper mache note book - details of supplier are below
- papers from Papermania's 'Elegance' paper pack
- various stickers plus an edging strip from Papermania's 'Elegance' Designer Stickers pack (am sure Sam gave me this very slightly used pack at the WOYWW crop back in the Summer - mwah!)
- snippets of narrow black and gold lurex ribbon just knotted around the spirals
The notebooks came from eBay HERE. Really fast service, and at a cost of just less than £2 each (which included postage within the UK), really good value for a sturdy little item. They also have more sizes, as well as the book edge bound style. Nice little stocking fillers :)
Oh go on - someone tell me where you can buy them cheaper then :( If you need me I'll be sanding down some walls - just shout!
Di
x
I used:
- A6 sized, lined, paper mache note book - details of supplier are below
- papers from Papermania's 'Elegance' paper pack
- various stickers plus an edging strip from Papermania's 'Elegance' Designer Stickers pack (am sure Sam gave me this very slightly used pack at the WOYWW crop back in the Summer - mwah!)
- snippets of narrow black and gold lurex ribbon just knotted around the spirals
The notebooks came from eBay HERE. Really fast service, and at a cost of just less than £2 each (which included postage within the UK), really good value for a sturdy little item. They also have more sizes, as well as the book edge bound style. Nice little stocking fillers :)
Oh go on - someone tell me where you can buy them cheaper then :( If you need me I'll be sanding down some walls - just shout!
Di
x
Tuesday, 11 November 2014
The 'Frozen' craze - part 2
Recently I posted a card on here that I made for one of the little grand daughters in Germany. She was absolutely thrilled with 'Frozen' Elsa!
So, I sort of followed 'Frozen' again when Livi, Mia's younger sister's Birthday came round, and wondered maybe I ought to use an image of Anna?!
Then I thought that Olaf would appeal more. Thus, Olaf took centre stage for Livi's Birthday card:
I used:
- 8" x 8" square white card blank
- snow scene backing card is by Kanban called 'Artscapes - Winter Dale'
- Olaf was such fun to make, he comes as a printout you can download from here - you do have to snip all the pieces out then you can assemble him however you wish :) I printed him onto glossy photo paper
- at that point I fished out some acetate, which has a falling snow pattern all over it, and adhered it to the backing card using double sided adhesive sheet - that added a protective layer over Olaf in case of little fingers peeling him apart :)
- next I tied white organza ribbon round one edge and stuck the image panel to the card blank
- the bow was just a snippet of white spotted organza ribbon with a snowflake charm added using some green shiny cord
- the number 5 was (again) from Sarn, stuck onto a circle of snow blue card punched from the leftover backing card
- Livi's name was spelt out using Craftwork Cards letters, which had been stuck onto 1" squares of sky blue card - punched from more of the leftover backing card
- the sentiment is LOTV from their 'General Greetings - small' set, stamped using SU's 'Marina Mist' ink pad then die cut using a 'Speech Bubble' die made by XCut
- and lastly, two fir trees - die cut using Marianne's LR0136 die then embossed using Cuttlebug's 'Snowflakes' folder before being brushed with Wink of Stella (which doesn't show in the photo of course :) In fact, the overall shine of the acetate doesn't show either - which could be a good thing 'cos then maybe you wouldn't see the image on here :)
Edit - if you follow the link for Olaf, do scroll down to find the image itself. Other tabs may have opened so make sure you're on the actual Olaf image one.
Di
x
So, I sort of followed 'Frozen' again when Livi, Mia's younger sister's Birthday came round, and wondered maybe I ought to use an image of Anna?!
Then I thought that Olaf would appeal more. Thus, Olaf took centre stage for Livi's Birthday card:
- 8" x 8" square white card blank
- snow scene backing card is by Kanban called 'Artscapes - Winter Dale'
- Olaf was such fun to make, he comes as a printout you can download from here - you do have to snip all the pieces out then you can assemble him however you wish :) I printed him onto glossy photo paper
- at that point I fished out some acetate, which has a falling snow pattern all over it, and adhered it to the backing card using double sided adhesive sheet - that added a protective layer over Olaf in case of little fingers peeling him apart :)
- next I tied white organza ribbon round one edge and stuck the image panel to the card blank
- the bow was just a snippet of white spotted organza ribbon with a snowflake charm added using some green shiny cord
- the number 5 was (again) from Sarn, stuck onto a circle of snow blue card punched from the leftover backing card
- Livi's name was spelt out using Craftwork Cards letters, which had been stuck onto 1" squares of sky blue card - punched from more of the leftover backing card
- the sentiment is LOTV from their 'General Greetings - small' set, stamped using SU's 'Marina Mist' ink pad then die cut using a 'Speech Bubble' die made by XCut
- and lastly, two fir trees - die cut using Marianne's LR0136 die then embossed using Cuttlebug's 'Snowflakes' folder before being brushed with Wink of Stella (which doesn't show in the photo of course :) In fact, the overall shine of the acetate doesn't show either - which could be a good thing 'cos then maybe you wouldn't see the image on here :)
Edit - if you follow the link for Olaf, do scroll down to find the image itself. Other tabs may have opened so make sure you're on the actual Olaf image one.
Di
x
Sunday, 9 November 2014
Pixie's Snippets Playground - Week 150
It's Remembrance Sunday here in the UK (as well as elsewhere in the Commonwealth of course), so I'll spend time watching the annual service from the Cenotaph on TV - and shed a tear as always no doubt.
I used:
- A6 white card blank
- image from the Kanban 'Damask Divas - Let's Do Lunch' set, stamped using Memento 'Tuxedo Black', coloured with Pro Markers and then paper pieced using snippets from Papermania's Capsule 'Blueberry Pie' paper pack. As I often say, I store DP snippets in the back of their 'parent pad', just in half a sealed envelope which has been then cut straight across and stuck into the back of the pad as a little pouch to hold snippets
- the image was then die cut using a Spellbinders Nestabilities die
- background papers are also snippets from the same paper pad
- sentiment is a stamp from the 'Let's Do Lunch' stamp set, stamped using Memento 'Tuxedo Black' then punched out using SU's Extra Large Oval punch
- added the image and sentiment onto the front of the card using thin sticky pads
- final touch, three pieces of 'Sarn Candi', also added using little squares of thin sticky pads. The candi is easy peasy to make - thanks to Sarn for sharing this trick, just punch little rounds (I used SU's round itty bitty punch) from your chosen paper/card and then place face down onto a mouse mat or similar and rub over the back with a ball shaped tool to form the cup shape
I have to confess, I'd already seen this great stamp set being used by Amanda and Caroline - here and here - loved it and bought it! Sometimes this Playground is soooo bad for my pocked money (
Here's my weekly 'picks':
Mr Linky is below - do please let me know if you have any problems linking, it's easy for me to sort out so don't struggle on alone :)
Have a great week! I'll be plodding on trying to remove the last of that wretched border :( Please just shoot me if I ever, ever, even look at wallpaper or borders ever again, sigh.
Di (and the usual happy wave from Parsnip of course)
x
I used:
- A6 white card blank
- image from the Kanban 'Damask Divas - Let's Do Lunch' set, stamped using Memento 'Tuxedo Black', coloured with Pro Markers and then paper pieced using snippets from Papermania's Capsule 'Blueberry Pie' paper pack. As I often say, I store DP snippets in the back of their 'parent pad', just in half a sealed envelope which has been then cut straight across and stuck into the back of the pad as a little pouch to hold snippets
- the image was then die cut using a Spellbinders Nestabilities die
- background papers are also snippets from the same paper pad
- sentiment is a stamp from the 'Let's Do Lunch' stamp set, stamped using Memento 'Tuxedo Black' then punched out using SU's Extra Large Oval punch
- added the image and sentiment onto the front of the card using thin sticky pads
- final touch, three pieces of 'Sarn Candi', also added using little squares of thin sticky pads. The candi is easy peasy to make - thanks to Sarn for sharing this trick, just punch little rounds (I used SU's round itty bitty punch) from your chosen paper/card and then place face down onto a mouse mat or similar and rub over the back with a ball shaped tool to form the cup shape
I have to confess, I'd already seen this great stamp set being used by Amanda and Caroline - here and here - loved it and bought it! Sometimes this Playground is soooo bad for my pocked money (
Here's my weekly 'picks':
I love this card, made by Red Squirrel! (aka as Rosey) And the blog post is really funny as well - you have to go and read about the adventure of punching out all those lovely little white fronds to make up the wreath :)

Our Kate has come up absolute trumps this week! The images above are just a small sample from her blog post stuffed, full of Christmas inspiration with some great ideas for using up your snippets. Do go and see!
These are just two out of so many fabulous Playground snippets makes - remember you can check them out by just looking at last week's snippets post. The links and thumbnails are still there.
No new Playmates this week so let's move straight onto the snowflakes dies and embossing folder which was last week's prize. And the winner is:
Laurie makes beautiful cards, as I'm sure many of you already know. This was her entry this week:
So, Laurie, after playing along since the end of September, your name came out of the hat for the first time! Can you please drop me an email (di_wray@hotmail.com) with your address and I'll post your prize ASAP. Probably tomorrow in fact - bad girl me, I still have Mary Anne's prize from last week to post so I'll take both envelopes to the Post Office at the same time :) It's been a mixed week here with workmen, us being zonked out by flu shots and also me spending many an hour trying to remove a wallpaper border - as some of you already know.
OK, this coming week's prize is, of course, a Kanban stamp set exactly the same as the one I used today (sorry about the rubbish photo). The top stamp of the 'Domestic Goddess/cook' has that well known sentiment to go with it 'I love to cook with wine. Sometimes I even put it in food' :)
The Snippets Challenge will run for one week and the Playground gates will close at 11am UK time on Saturday 15th November and will open again at
midnight UK time on the same day.
Maximum of three entries and please say 'Yes please' (or similar) in a comment if you wish to play and be a possible winner of the prize.
Mr Linky is below - do please let me know if you have any problems linking, it's easy for me to sort out so don't struggle on alone :)
Have a great week! I'll be plodding on trying to remove the last of that wretched border :( Please just shoot me if I ever, ever, even look at wallpaper or borders ever again, sigh.
Di (and the usual happy wave from Parsnip of course)
x
Friday, 7 November 2014
Less is More - non-traditional Christmas colours
The challenge over at Less is More this week is to use non-traditional Christmas colours on your Christmas card - and the challenge over at Craftyhazelnut's Christmas Challenge is 'Sparkle'. So I combined the two with this card, which is also for Craftyhazelnut's Christmas Challenge Extra where it's always 'Anything goes':
I used:
- A6 white card blank
- a slightly smaller snippet of silver holographic card stock
- a slightly smaller again snippet of white card stock as the next layer
- the sentiment was stamped before I assembled any of the card, just using a stamp from Woodware's 'Large Patch Tree' set and SU's 'Pacific Point' ink pad
- an even smaller snippet of white card stock for the glittered trees. These were such fun to do and something different to the usual embossing although the technique is similar. I recently bought a pot of SU's 'Heat and Stick' powder and had been itching to have a play. This is how it goes. First of all you stamp your chosen image or sentiment using VersaMark and then sprinkle some SU 'Heat and Stick' powder over the stamped image/sentiment. I used a 'no-name pre-loved DoCrafts stamp with three squiggly trees on'. Then you gently heat it with a heat gun to make it go tacky before sprinkling glitter over (I used a bright fuchsia pink bought many years ago at a craft show) and then you reheat to 'set' it. I added a line of silver glitter in the same way, this time using my VersaMarker pen just to 'ground' the trees
- then cut out the image using a L'il Inkers Stitched Rectangle die and popped the rectangle onto the card using thin sticky fixers
A really fast card to make, once you gather up all the stuff needed - took me twice as long to clear the very fine glitter from everywhere though! Mind you, it's stuck fast to the card which is reassuring :) And it glitters beautifully but where I have to take my photos right now is a bit hit and miss with the lighting.
I think this technique would be great for glittering up sentiments, I did initially try it with the one I used today but it wasn't clearly defined enough for my liking so next time I play will use use a big and bold sentiment stamp to try out. Bet it could look really dramatic, without much else on a card to be honest! And, what a lovely way to glitter up stars and snowflakes too. BTW, my glitter is that really, really fine stuff!
Thankfully I made this card on Wednesday morning, yesterday was a wash-out and I was fit for nothing (except perhaps the 'knackers yard') all day. We had our flu shots on Wednesday afternoon and both suffered all day yesterday - still, better to be protected I guess. And I swear the nurse must play for the local darts team!
Di
x
I used:
- A6 white card blank
- a slightly smaller snippet of silver holographic card stock
- a slightly smaller again snippet of white card stock as the next layer
- the sentiment was stamped before I assembled any of the card, just using a stamp from Woodware's 'Large Patch Tree' set and SU's 'Pacific Point' ink pad
- an even smaller snippet of white card stock for the glittered trees. These were such fun to do and something different to the usual embossing although the technique is similar. I recently bought a pot of SU's 'Heat and Stick' powder and had been itching to have a play. This is how it goes. First of all you stamp your chosen image or sentiment using VersaMark and then sprinkle some SU 'Heat and Stick' powder over the stamped image/sentiment. I used a 'no-name pre-loved DoCrafts stamp with three squiggly trees on'. Then you gently heat it with a heat gun to make it go tacky before sprinkling glitter over (I used a bright fuchsia pink bought many years ago at a craft show) and then you reheat to 'set' it. I added a line of silver glitter in the same way, this time using my VersaMarker pen just to 'ground' the trees
- then cut out the image using a L'il Inkers Stitched Rectangle die and popped the rectangle onto the card using thin sticky fixers
A really fast card to make, once you gather up all the stuff needed - took me twice as long to clear the very fine glitter from everywhere though! Mind you, it's stuck fast to the card which is reassuring :) And it glitters beautifully but where I have to take my photos right now is a bit hit and miss with the lighting.
I think this technique would be great for glittering up sentiments, I did initially try it with the one I used today but it wasn't clearly defined enough for my liking so next time I play will use use a big and bold sentiment stamp to try out. Bet it could look really dramatic, without much else on a card to be honest! And, what a lovely way to glitter up stars and snowflakes too. BTW, my glitter is that really, really fine stuff!
Thankfully I made this card on Wednesday morning, yesterday was a wash-out and I was fit for nothing (except perhaps the 'knackers yard') all day. We had our flu shots on Wednesday afternoon and both suffered all day yesterday - still, better to be protected I guess. And I swear the nurse must play for the local darts team!
Di
x
Wednesday, 5 November 2014
High flying Warren the Wabbit
Today is the 6th Birthday of a little neighbour of ours and up until children are eight or so ( sometimes beyond that) I do like to incorporate their name onto their Birthday cards. With this card I started out with the idea for how to do the name as a banner and then rummaged round to find stuff to suit. This was the result:
I used:
- 6" x 6" square white card blank
- SU 'Real Red' card stock topped with a sheet of 'clouds' paper from a paper stack called 'Let's Fly Away', free with Quick Cards Made Easy magazine in 2012
- the bunny in the basket started out as a Craftwork Cards round topper featuring Warren the Rabbit, ready to colour as you choose. I chose badly, the turquoise I used on part of the balloon was a horrible clash with the cloudy background paper and for a minute or two I thought all was lost. By then I'd already fussy cut round the image anyhow, it took quite a while to get round the ropes holding the basket and would have been such a waste of time and effort! But, I already had a snippet of dotty patterned paper (from the My Mind's Eye 'Quilting Bee' paper pad) ready for the banner and realised it could save the day. All I did was to die cut a circle (using the Tonic circular die set I recently raved about) just slightly larger than the balloon, gently snip around part of Warren's ear, then glue the dotty circle over balloon wreck leaving Warren's ear to overlap the front :)
- used a Memory Box 'Classic Numbers' die to die cut the number 6 and a round die for the red circle to stick it onto then adhered the balloon onto the card with thin sticky pads
- the trailing banner 'tail' was fun to make - first punched banners from the dotty paper using SU's 'Banner' punch. Then stamped the letters onto white card using stamps from a See-D's (NBUS, shame on me) alphabet set and SU 'Real Red' ink pad, punched them out using the super useful SU Itty Bitty round punch and stuck them onto the banners. I'd already tied a length of yellow and white bakers twine to the balloon so all that was needed was to add thin sticky pads to the back of each banner and place them evenly along the twine
- the sentiment was stamped onto a snippet of white card, using SU's 'Real Red' and an Inca 'Dot Birthday' stamp which is especially good for kids cards. Then to cut the cloud shape using using MFT 'Cloud Trio' - the largest cloud in the set I used a useful trick to correctly position the cloud over the already stamped sentiment. All you do is to die cut yourself a template using the die you want to use and some spare card (paper is too thin for the next step I reckon). Place the cloud shaped aperture which is left in the spare piece of card you just die cut over the sentiment exactly where you want it to sit and stick in place using removable tape at the edge, not at the aperture though, Then, take the die, sit it face down and gently wiggle it into the die cut shape - that's why I reckon you need to use card and not paper for your template as it's easier to feel the die sort of drop into place. Tape the die to the card to stop it from moving, again use removable tape. Run the die and both layers of card through the die cutting machine and hey presto, one perfectly positioned die cut sentiment - if all of the above drivel made any sense to you of course :)
The Memory Box number dies are new goodies, the lovely Sarn has been kindly keeping me stocked up with Olivia numbers (and letters) but I thought it was time I coughed up and bought my own number dies for a start. I don't like the Britannia Letter dies I already have (waaaay too fussy for my taste) so might even order the Memory Box letters next :) Or put them on my 'Santa, I've been a good girl' letter - tee, hee.
Di
x
I used:
- 6" x 6" square white card blank
- SU 'Real Red' card stock topped with a sheet of 'clouds' paper from a paper stack called 'Let's Fly Away', free with Quick Cards Made Easy magazine in 2012
- the bunny in the basket started out as a Craftwork Cards round topper featuring Warren the Rabbit, ready to colour as you choose. I chose badly, the turquoise I used on part of the balloon was a horrible clash with the cloudy background paper and for a minute or two I thought all was lost. By then I'd already fussy cut round the image anyhow, it took quite a while to get round the ropes holding the basket and would have been such a waste of time and effort! But, I already had a snippet of dotty patterned paper (from the My Mind's Eye 'Quilting Bee' paper pad) ready for the banner and realised it could save the day. All I did was to die cut a circle (using the Tonic circular die set I recently raved about) just slightly larger than the balloon, gently snip around part of Warren's ear, then glue the dotty circle over balloon wreck leaving Warren's ear to overlap the front :)
- used a Memory Box 'Classic Numbers' die to die cut the number 6 and a round die for the red circle to stick it onto then adhered the balloon onto the card with thin sticky pads
- the trailing banner 'tail' was fun to make - first punched banners from the dotty paper using SU's 'Banner' punch. Then stamped the letters onto white card using stamps from a See-D's (NBUS, shame on me) alphabet set and SU 'Real Red' ink pad, punched them out using the super useful SU Itty Bitty round punch and stuck them onto the banners. I'd already tied a length of yellow and white bakers twine to the balloon so all that was needed was to add thin sticky pads to the back of each banner and place them evenly along the twine
- the sentiment was stamped onto a snippet of white card, using SU's 'Real Red' and an Inca 'Dot Birthday' stamp which is especially good for kids cards. Then to cut the cloud shape using using MFT 'Cloud Trio' - the largest cloud in the set I used a useful trick to correctly position the cloud over the already stamped sentiment. All you do is to die cut yourself a template using the die you want to use and some spare card (paper is too thin for the next step I reckon). Place the cloud shaped aperture which is left in the spare piece of card you just die cut over the sentiment exactly where you want it to sit and stick in place using removable tape at the edge, not at the aperture though, Then, take the die, sit it face down and gently wiggle it into the die cut shape - that's why I reckon you need to use card and not paper for your template as it's easier to feel the die sort of drop into place. Tape the die to the card to stop it from moving, again use removable tape. Run the die and both layers of card through the die cutting machine and hey presto, one perfectly positioned die cut sentiment - if all of the above drivel made any sense to you of course :)
The Memory Box number dies are new goodies, the lovely Sarn has been kindly keeping me stocked up with Olivia numbers (and letters) but I thought it was time I coughed up and bought my own number dies for a start. I don't like the Britannia Letter dies I already have (waaaay too fussy for my taste) so might even order the Memory Box letters next :) Or put them on my 'Santa, I've been a good girl' letter - tee, hee.
Di
x
Labels:
birthday,
boys cards,
craftwork cards,
Die cutting,
SU,
techniques
Sunday, 2 November 2014
Pixie's Snippets Playground - Week 149
Into November now girls! And the darker nights are here, the shops are already full of tinsel and fairy lights - so it's no use hiding 'cos Christmas is on the way. We had 72 entries this week - well done!
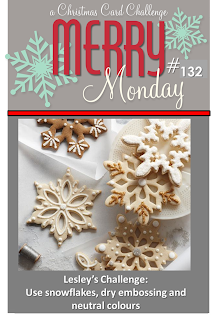
My snippets card is also for the latest challenge over at Merry Monday, where it's 'Snowflakes, dry embossing and neutral colours' - I loved this theme!
This is the inspiration photo:
I used:
- A6 white card blank
- snippet of white card, embossed using the Darice 'Snowflake Background' embossing folder (I love this folder, beautiful design and it's a generous 5" x 7"), trimmed to marginally less than A6 and glued onto the card front
- snippet of SU 'Crumb Cake' card stock, die cut using the Memory Box 'Grand Merry Christmas' die, trimmed down and fixed to the card with slim sticky pads
- the snowflake is double layered, cut from snippets of SU 'Crumb Cake' and white card stock. I backed the snippets with 'Stick It' adhesive sheet before cutting the snowflakes, using a Jennifer Ellory die which came free with a recent craft magazine (had to use wax paper as the first try failed, that die is lovely but it didn't want to part with the die cut!)
- finished off with a single pearl in the centre of the snowflake
I'm almost up to date with the number of Christmas cards I want to make, but this design would be great for 'batch baking'/a production line :)
Right, onto this week's picks now:
This is such a gorgeous Wedding card - made by Viv. Plenty of snippets used and what a lovely result! The little touches of pink are perfect.
And what amazing herring bone work on this gorgeous card, made by Carol L. That must have taken a LOT of patience - fabulous result!
As always, I could go on forever with picks - so much fabulous work is get more and more difficult to select them. But, right now Blogger is playing up anyhow so I won't be hanging round longer than necessary. I remember it happening once before - when writing a post the pictures and start of a line of text jump around when the mouse hovers near them - it's making me feel quite dizzy here so I'm moving as fast as possible and trying not to look at the screen too much.
We have one new playmate this week:
It's another Diane, in fact also a Diane W - which is fun 'cos we can blame the other Diane when I make mistakes :)
Welcome Diane, hope you come back to play with us often!
OK, onto the draw for the Lawn Fawn 'Stitched Scalloped Borders' die set - and the winner is:
Well done Mary Anne! According to my little black book it's been about 10 or 11 months since you won - and I do still have your address so long as you haven't moved since then :) I'll post your prize as soon as I can get to the Post Office, early this week.
And here's the prize for this coming week:
I already gave away the Memory Box 'Grand Merry Christmas' die a while back, so now we have the same embossing folder I used (Darice's Snowflake Background) plus a set of two snowflake dies (All Occasion) which are very similar to the free one I used for my card today.
The Snippets Challenge will run for one week and the Playground gates will close at 11am UK time on Saturday 8th November and will open again at midnight UK time on the same day.
Maximum of three entries and please say 'Yes please' (or similar) in a comment if you wish to play and be a possible winner of the prize. Please also let me know if you're only interested in one or the other of the items making up the prize - then I would do another draw for whatever it is you wouldn't want. But, as always, it's fine to want both of course! But do please say Yes please to be in the draw with a chance.
Mr Linky is below - please let me know if you have any problems linking, it's easy for me to sort out so don't struggle on alone :)
Have a great week!
Di (and the usual happy wave from Parsnip of course)
x
My snippets card is also for the latest challenge over at Merry Monday, where it's 'Snowflakes, dry embossing and neutral colours' - I loved this theme!
This is the inspiration photo:
I used:
- A6 white card blank
- snippet of white card, embossed using the Darice 'Snowflake Background' embossing folder (I love this folder, beautiful design and it's a generous 5" x 7"), trimmed to marginally less than A6 and glued onto the card front
- snippet of SU 'Crumb Cake' card stock, die cut using the Memory Box 'Grand Merry Christmas' die, trimmed down and fixed to the card with slim sticky pads
- the snowflake is double layered, cut from snippets of SU 'Crumb Cake' and white card stock. I backed the snippets with 'Stick It' adhesive sheet before cutting the snowflakes, using a Jennifer Ellory die which came free with a recent craft magazine (had to use wax paper as the first try failed, that die is lovely but it didn't want to part with the die cut!)
- finished off with a single pearl in the centre of the snowflake
I'm almost up to date with the number of Christmas cards I want to make, but this design would be great for 'batch baking'/a production line :)
Right, onto this week's picks now:

As always, I could go on forever with picks - so much fabulous work is get more and more difficult to select them. But, right now Blogger is playing up anyhow so I won't be hanging round longer than necessary. I remember it happening once before - when writing a post the pictures and start of a line of text jump around when the mouse hovers near them - it's making me feel quite dizzy here so I'm moving as fast as possible and trying not to look at the screen too much.
We have one new playmate this week:
Welcome Diane, hope you come back to play with us often!
OK, onto the draw for the Lawn Fawn 'Stitched Scalloped Borders' die set - and the winner is:
And here's the prize for this coming week:
I already gave away the Memory Box 'Grand Merry Christmas' die a while back, so now we have the same embossing folder I used (Darice's Snowflake Background) plus a set of two snowflake dies (All Occasion) which are very similar to the free one I used for my card today.
The Snippets Challenge will run for one week and the Playground gates will close at 11am UK time on Saturday 8th November and will open again at midnight UK time on the same day.
Maximum of three entries and please say 'Yes please' (or similar) in a comment if you wish to play and be a possible winner of the prize. Please also let me know if you're only interested in one or the other of the items making up the prize - then I would do another draw for whatever it is you wouldn't want. But, as always, it's fine to want both of course! But do please say Yes please to be in the draw with a chance.
Mr Linky is below - please let me know if you have any problems linking, it's easy for me to sort out so don't struggle on alone :)
Have a great week!
Di (and the usual happy wave from Parsnip of course)
x
Subscribe to:
Posts (Atom)