My OH has a few young rellies with offspring and we always send gift vouchers or cheques for birthdays and Christmas. This isn't laziness - it's quite apparent that they do like having something to spend after all the excitement is over and they also all write to tell us what they bought, which is really cute of them!
This year I've made these - I looked at some ready made ones and thought I could just as good - for about half the price - plus have the fun of making them!
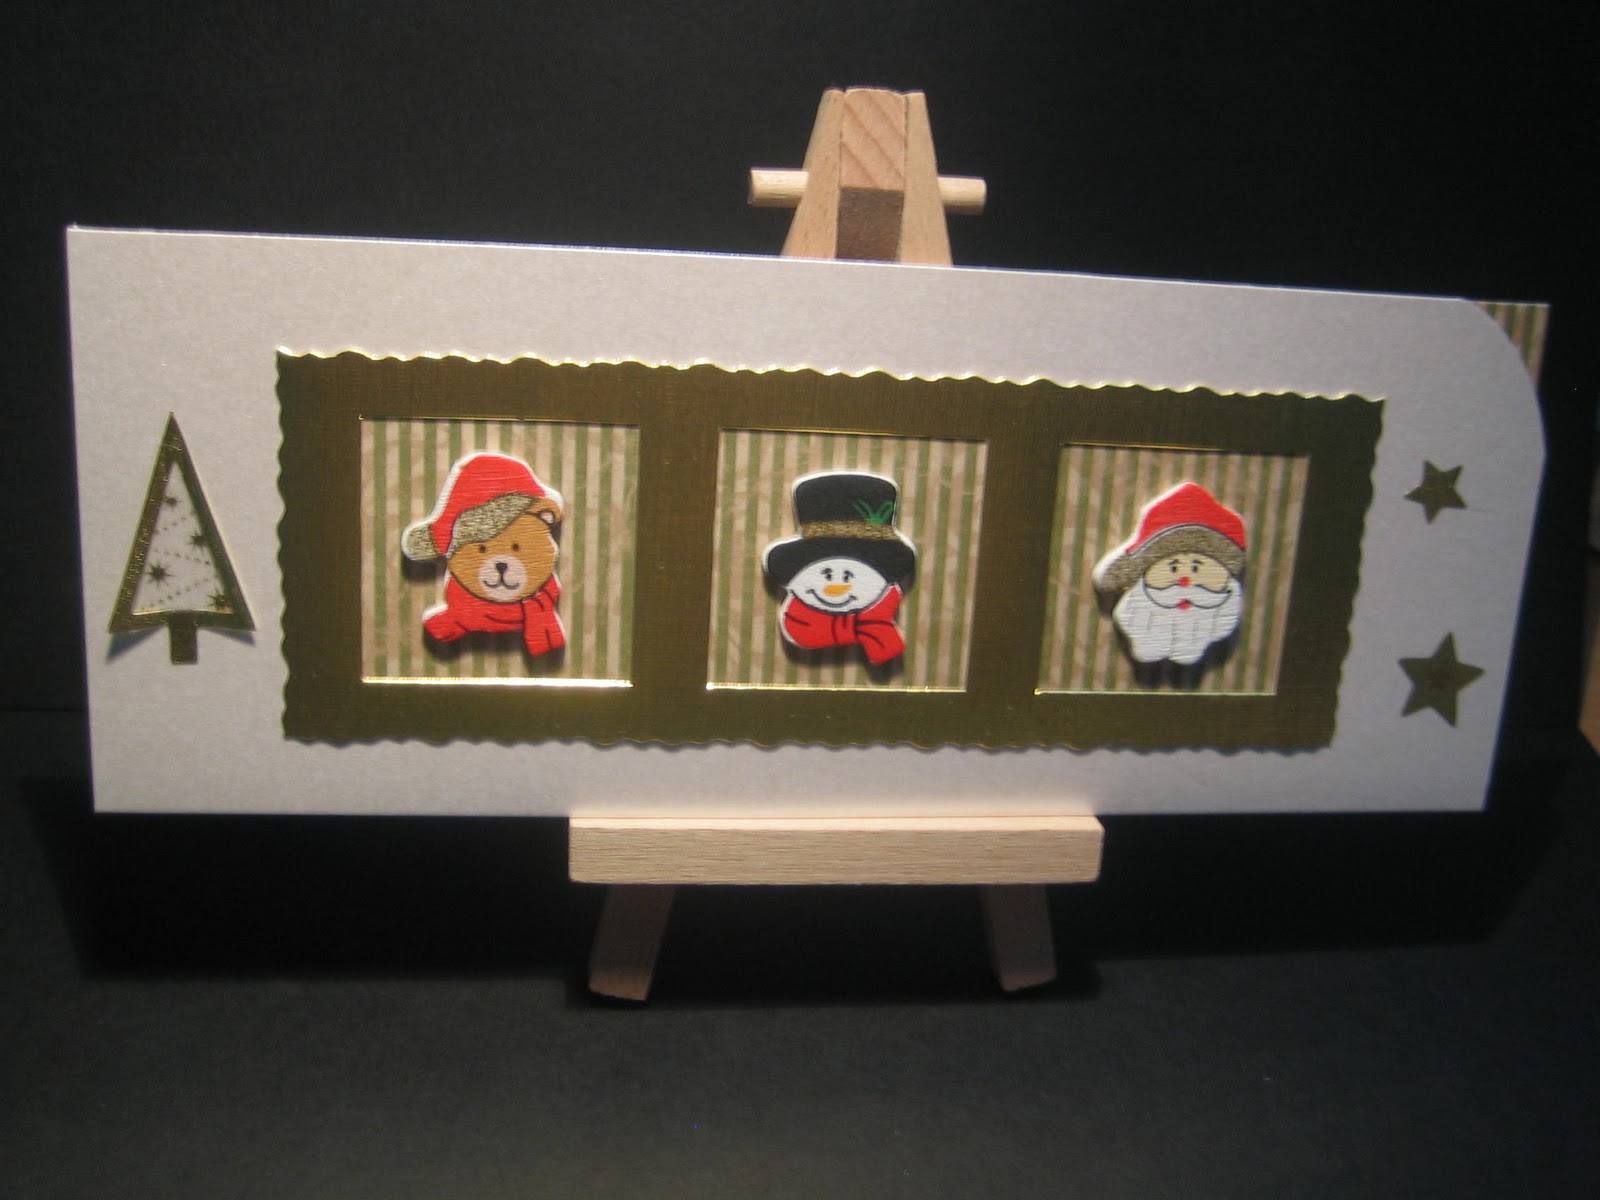
I started off with some tall narrow ivory pearlised cards from my stash - and I did take the trouble to ensure that a cheque would fit nicely into the finished product. The money holders were made by lining the inside of the card (not the whole lot, just the back part to about two thirds of the way along) with paper and cutting the corner off theright hand corner of the front part with Fiskars rounder scissors so that the paper shows - and the all important cheque or gift voucher can be seen peeking out. Then the card was sealed using double sided tape at the left hand end. The holders for 'the boys' (top one) are lined with paper from a Dovecraft Noel paper pad, and I used the same paper behind the gold triple square die cut. I got these die cuts from 'Dies to die for' years ago and have used them in endless ways. Then all I added was some little wooden embellies from my stash and a few gold Anita's Dimensions trees and stars.
The 'girlie' penguin ones were made in a similar fashion - the paper is from a Daisy and Dandelion Christmas themed A5 paper pack (Penelope and Percy) and it's already glittered too. Then all that was needed was to add the penguins (Anita's 3D laser stickers from whence I know not where) - plus a few Anita's Glitterations snowflakes.
I need to add a little rhyme to the back of each one - when inspiration strikes me :)
Di
x
Tuesday, 30 November 2010
Friday, 26 November 2010
1st Wedding anniversary
I made this card for our friends - Julie and Steve - who celebrate their 1st wedding anniversary on Sunday. I posted their wedding card on this blog when I first started off and had a lot of fun making this card for them!
Shame the sentiment reflected the light - it's a silver Dufex one and just says 'Best Wishes', although the insert does say Happy 1st Anniversary!. The card is an 8" x 8" square white one with an embossed dots pattern. Then a silver layer of textured card, cut out round the edges using my only Martha Stewart Deep Edging Punch - no fancy 'Punch Around The Corner' ones as yet but I'm working on it! To hide the oddly matched corners I used a mix of the sentiment, 3-D butterflies ( these are lush!) and a selection of Prima flowers/pearl brads. Then my trademark organza bow down the left....and not forgetting the soooo cute House Mouse decoupage in the middle, which was the whole point of the card! As Julie and Steve are such a 'close knit' pair it seemed very appropriate! :)
Thanks for looking, and even if you don't comment it's nice that you called by!
Di
x
Shame the sentiment reflected the light - it's a silver Dufex one and just says 'Best Wishes', although the insert does say Happy 1st Anniversary!. The card is an 8" x 8" square white one with an embossed dots pattern. Then a silver layer of textured card, cut out round the edges using my only Martha Stewart Deep Edging Punch - no fancy 'Punch Around The Corner' ones as yet but I'm working on it! To hide the oddly matched corners I used a mix of the sentiment, 3-D butterflies ( these are lush!) and a selection of Prima flowers/pearl brads. Then my trademark organza bow down the left....and not forgetting the soooo cute House Mouse decoupage in the middle, which was the whole point of the card! As Julie and Steve are such a 'close knit' pair it seemed very appropriate! :)
Thanks for looking, and even if you don't comment it's nice that you called by!
Di
x
Saturday, 20 November 2010
Christmas panic mode - part 2
My previous post was about the Papermania Christmas paper pack coming to my rescue. At the same time as I started making those cards with my right hand I was making these ones with my left hand....well, you know what I mean :)
After the class Karen and I went to last week I also bought some reindeer and snowflakes 'sparkle' stickers made by Classic Art. These were so simple to make and I have a second pack still to use so that will be another eight cards to add to the box!
This one is on a pure white card I promise! Perhaps the pink is my face reflected after all the exertion? I used some white cards edged with silver bought ages ago - quite Christmassy I think! This one is A5 size and the ribbon bow is made using some organza ribbon from my stash. It's wired but it's also very easy to remove the wire with a pair of tweezers. The sentiments are from a set I bought from QVC a while back. The other cards are 4" x 4" square ones. Another simple and quick make!
Of course I also have quite a few 'specials' under way for closer friends and family which are more involved to make but at least some cards are getting done! Phew :)
Di
x
After the class Karen and I went to last week I also bought some reindeer and snowflakes 'sparkle' stickers made by Classic Art. These were so simple to make and I have a second pack still to use so that will be another eight cards to add to the box!
This one is on a pure white card I promise! Perhaps the pink is my face reflected after all the exertion? I used some white cards edged with silver bought ages ago - quite Christmassy I think! This one is A5 size and the ribbon bow is made using some organza ribbon from my stash. It's wired but it's also very easy to remove the wire with a pair of tweezers. The sentiments are from a set I bought from QVC a while back. The other cards are 4" x 4" square ones. Another simple and quick make!
Of course I also have quite a few 'specials' under way for closer friends and family which are more involved to make but at least some cards are getting done! Phew :)
Di
x
Thursday, 18 November 2010
Panic mode - how many sleeps until Christmas?!
Last week I went to a card making class and we concentrated on Christmas cards in which sent me into a spin when I got home and realised how many cards I have yet to make for Christmas. Luckily I'd bought what I thought was just a paper pack in the shop after our class - but it turned out to have matching 'toppers' as well - perfect for some quickie makes. The paper pack is Papermania's Classic Christmas by Stephanie Dyment and for once I've launched straight into using it rather than admiring it for a while. It's gorgeous I must say and has certainly come to my rescue - I've worked out I can make at least 22 cards like the first six I've rattled off (four shown below) and still have some paper and bits and bobs left over.
So, all I've done is to match a topper with the relevant paper - although they really are so complimentary to one another it would be good to mix them too. The cards I've made so far have patterned paper edged with the Floral Vine Martha Stewart edging punch which has then been layered onto a contrasting/toning card. These photos show red card stock but some of the papers will look good on cream or white. Then the topper has been added after being layered onto a slightly larger piece of mirri card - and an organza bow added as the finishing touch. Simples - and a little sigh of relief here that I might be able to speed things up a bit :)
Hope you're better organised than I am!
Di
x
So, all I've done is to match a topper with the relevant paper - although they really are so complimentary to one another it would be good to mix them too. The cards I've made so far have patterned paper edged with the Floral Vine Martha Stewart edging punch which has then been layered onto a contrasting/toning card. These photos show red card stock but some of the papers will look good on cream or white. Then the topper has been added after being layered onto a slightly larger piece of mirri card - and an organza bow added as the finishing touch. Simples - and a little sigh of relief here that I might be able to speed things up a bit :)
Hope you're better organised than I am!
Di
x
Tuesday, 16 November 2010
'A little bird told me........' birthday card
I made this card for a friend's birthday - which is today so it's safe to post this :)
I really wanted to distress the background myself but time wasn't on my side to have a real 'play' - mental note to self to plan ahead more! I used a cream card and layered Papermania double sided paper onto it. This paper is great as it has a bit of a vintage look to it, pink and cream on one side and distressed brown on the other. The bottom of the paper has been edged using a Martha Stewart 'Floral Vine' deep edge punch. This is the first Martha Stewart punch I've bought and am now a total convert!
I used a Woodware clear set stamp set called 'Bird Song' and paper pieced the little bird onto the reverse side of the paper (ie. brown) and stuck him onto the card before stamping over the top with his rather splendid cage - using a Brilliance 'Pearlescent Chocolate' ink pad. I also paper pieced a wing so that it looks as if it's on the outside of the cage to give more dimension. Some of this detail has been lost though as the ink is almost the same colour as the brown distressed paper - little lesson there I think :) The birdie's little pink eye was just a teensy bit of the 'confetti' made when I punched the bottom of the pink and cream paper! And even the little musical notes come in the stamp set!
The sentiment was stamped onto plain cream card using 'Pearlescent Chocolate', punched into a circle with my SU punch then layered onto a larger scalloped SU punched circle in the distressed brown.
The flowers were fun too - they're creamy coloured embossed Prima flowers which I swished over with Pearlescent Orchid and Pearlescent Chocolate on a blending sponge, and their centres are card candy (I deepened the pink card candy with some more 'swishing with a blending sponge'). I'll be using more of these flowers - you get loads in a packet and they are made so that you can totally colour match them to your project. Yummy!
Then, before attaching the flowers I added a piece of really gorgeous lacy cream ribbon. I got some of this, also in white, ages ago in Hobbycraft and it's so soft and silky - up until now I've just stroked it and looked at it, as I'm sure many people do with crafty goodies before they realise it really should be used!!
Thanks for calling by!
Di
x
I really wanted to distress the background myself but time wasn't on my side to have a real 'play' - mental note to self to plan ahead more! I used a cream card and layered Papermania double sided paper onto it. This paper is great as it has a bit of a vintage look to it, pink and cream on one side and distressed brown on the other. The bottom of the paper has been edged using a Martha Stewart 'Floral Vine' deep edge punch. This is the first Martha Stewart punch I've bought and am now a total convert!
I used a Woodware clear set stamp set called 'Bird Song' and paper pieced the little bird onto the reverse side of the paper (ie. brown) and stuck him onto the card before stamping over the top with his rather splendid cage - using a Brilliance 'Pearlescent Chocolate' ink pad. I also paper pieced a wing so that it looks as if it's on the outside of the cage to give more dimension. Some of this detail has been lost though as the ink is almost the same colour as the brown distressed paper - little lesson there I think :) The birdie's little pink eye was just a teensy bit of the 'confetti' made when I punched the bottom of the pink and cream paper! And even the little musical notes come in the stamp set!
The sentiment was stamped onto plain cream card using 'Pearlescent Chocolate', punched into a circle with my SU punch then layered onto a larger scalloped SU punched circle in the distressed brown.
The flowers were fun too - they're creamy coloured embossed Prima flowers which I swished over with Pearlescent Orchid and Pearlescent Chocolate on a blending sponge, and their centres are card candy (I deepened the pink card candy with some more 'swishing with a blending sponge'). I'll be using more of these flowers - you get loads in a packet and they are made so that you can totally colour match them to your project. Yummy!
Then, before attaching the flowers I added a piece of really gorgeous lacy cream ribbon. I got some of this, also in white, ages ago in Hobbycraft and it's so soft and silky - up until now I've just stroked it and looked at it, as I'm sure many people do with crafty goodies before they realise it really should be used!!
Thanks for calling by!
Di
x
Thursday, 11 November 2010
New baby cards
The other day, in Mothercare, there was a young Mum with the most adorable newborn twins. It reminded me of a stamping set I bought from Elzybells before Elizabeth shut up shop.These clear stamps are so cute, you can make a few variations by mixing them. This is what I came up with:
The cards were made using a white scalloped edged card from Craftwork Cards, a background layer of Dovecraft Back to Basics patterned paper then a small paper doily, topped with a scalloped circle made using my Wooodware punch. The scalloped circle had already been stamped, paper pieced using toning paper to the background layer and some colouring (using Aquamarkers natch!). The pram and hood are seperate so you can assemble it how you want, as are the teddy and the little face peeking out........just a curl of hair for the boy and a sweet little bow for the girl. Elizabeth really did think of lots of small details! The wheels were paper pieced too using plain paper. Then I got to use a couple of new SU punches - with the scalloped circle to match the pram body and the plain one using white card with the sentiment stamped in toning ink. Semi-sparkly gems were then added to the centre of the wheels and the point where the hood is attached to the pram just to highlight a little bit more.
They were such fun to make and the best bit came next - the ribbon bow! I love bows and ribbons and whilst rootling through my punches I came across a 'long reach' ribbon slot punch that I've had for years! The idea is to punch a row of slots to thread ribbbon through but try as I might, despite careful measuring and all the rest, I could never get it right so this poor punch was abandoned.
Now it's high up on my list of useful things! It was so easy to thread organza ribbon through and make a decent bow just where I wanted and even if the ribbon shows on the other side of the card it looks so professional ........I love it!
And in case you thought I'd forgotten the twins who sparked off this little session of cardmaking:
So that you could see the twinnies I had to cut the hood in half so that it looks as if it's down. The stamps even include triplets sentiments............maybe teddy would have to be ejected from the pram or moved somewhere else if a third little face was added :)
Di
x
Friday, 5 November 2010
Gorjuss girls bookmarks
A couple of weeks ago I met up with some old school friends way up in Liverpool - sadly for one of our ex-teacher's funeral. The Late Betty was certainly the life and soul of our school reunions and we'll miss her loads.
Moira, one of my oldest (sorry Moira - that week between our ages makes all the difference!) friends, and I stayed overnight with me in the Adelphi Hotel (that hotel is a bit like stepping back in time!). We got chatting about this blog and she was saying how much she likes the Gorjuss girls. She lives in Kilmarnock and they have a shop up there which sells Gorjuss girls stuff - much more than card making stuff too! They do have a website, but up to now it hasn't been updated to show the goodies - ranging from shopping bags to emery boards. How do I know about the emery boards? - lookee here:
These are just TOO cute to use aren't they :) Moira whizzed out to treat me to some when she got home!
Anyhow, knowing her new found love of all things Gorjuss, set me thinking. She's a real bookworm - has been since we met on our firstincarceration term at boarding school. The world could be tumbling down but give her a good book and she's a happy bunny! Lying in bed the other night, instead of chasing/counting sheep, I came up with this idea.
I already had some Gorjuss girls tags - die cut decoupage ones...and the wee girlie perched on the pile of books is just so appropriate! I layered them onto folded card stock cut to size and added some magnetic paired pieces. It isn't my first venture into magnetic bookmarks, I've made a few for charity in my time, first came across the idea in New York and they are much less likely to be lost. You just flip the bookmark over your page (and store it flipped over the book cover when you've got your nose stuck into whatever you're reading - I haven't tried it on hardback covers I must confess but in theory it's 'simples'!!).
Here they are open, sorry about the rubbish photo!!
Then all that was left was to flip the three over a piece of card stock and embellish a little bit - like so:
Into a cello bag and popped into the post to Kilmarnock. And, the lovely thing is that Moira loved them - that made my day!
Di
x
Moira, one of my oldest (sorry Moira - that week between our ages makes all the difference!) friends, and I stayed overnight with me in the Adelphi Hotel (that hotel is a bit like stepping back in time!). We got chatting about this blog and she was saying how much she likes the Gorjuss girls. She lives in Kilmarnock and they have a shop up there which sells Gorjuss girls stuff - much more than card making stuff too! They do have a website, but up to now it hasn't been updated to show the goodies - ranging from shopping bags to emery boards. How do I know about the emery boards? - lookee here:
These are just TOO cute to use aren't they :) Moira whizzed out to treat me to some when she got home!
Anyhow, knowing her new found love of all things Gorjuss, set me thinking. She's a real bookworm - has been since we met on our first
I already had some Gorjuss girls tags - die cut decoupage ones...and the wee girlie perched on the pile of books is just so appropriate! I layered them onto folded card stock cut to size and added some magnetic paired pieces. It isn't my first venture into magnetic bookmarks, I've made a few for charity in my time, first came across the idea in New York and they are much less likely to be lost. You just flip the bookmark over your page (and store it flipped over the book cover when you've got your nose stuck into whatever you're reading - I haven't tried it on hardback covers I must confess but in theory it's 'simples'!!).
Here they are open, sorry about the rubbish photo!!
Then all that was left was to flip the three over a piece of card stock and embellish a little bit - like so:
Into a cello bag and popped into the post to Kilmarnock. And, the lovely thing is that Moira loved them - that made my day!
Di
x
Monday, 1 November 2010
Olivia's Ist Birthday card
Today Mia's baby sister, our other Grand daughter Olivia ( known as Livi) is one! I followed very much in the same line as Mia's 3rd birthday card made recently.
This is Tinkerbell, in a bit of a 'minx' pose, from the same Disney set (QVC) as a few others I've used recently. The card is from the same set that I made Mia's card from but this one has an aperture as I wanted it mainly for the lovely green to match Tinkerbell's dress :). The lettering and ribbon were from my stash. It was made in a trice but still with lots of love for a very special little lady. Here's the inside of the card just so you know I didn't clip Tinkerbell's wings and feet!
See what I mean about the saucy pose?! The backing paper on the inside of the card came from my stash - no idea where I got it from, sorry.
And finally, here's the Birthday Girl herself - Happy Birthday Livi! From Grandad and GranDi XXX

Di
x
This is Tinkerbell, in a bit of a 'minx' pose, from the same Disney set (QVC) as a few others I've used recently. The card is from the same set that I made Mia's card from but this one has an aperture as I wanted it mainly for the lovely green to match Tinkerbell's dress :). The lettering and ribbon were from my stash. It was made in a trice but still with lots of love for a very special little lady. Here's the inside of the card just so you know I didn't clip Tinkerbell's wings and feet!
See what I mean about the saucy pose?! The backing paper on the inside of the card came from my stash - no idea where I got it from, sorry.
And finally, here's the Birthday Girl herself - Happy Birthday Livi! From Grandad and GranDi XXX
Di
x
Saturday, 30 October 2010
Boy's birthday card
Tomorrow is one of my OH's g/nephew's birthday. I had to make a card in a bit of a hurry to catch the post but this is what I came up with:
Thanks to a nearby Hobbycraft I grabbed a little set of toppers and some brown foam letters/numbers. Phew, no time to colour in an image- to my delight - so I had to make the trip :) Mind you, the parking there is awful - just a little car park (some serious underestimating I suspect) and of course tons of folk going in just for a nosy as it's newly opened. Hopefully the novelty will wear off and us 'serious crafters' might get a chance to park without too much trouble before long. Loads of folk are just mooching and coming out empty handed......mind you, I think Pauline and I are working hard at making up the difference :)
It's yet another easel card, topped with Core'dinations blue card, the cowboy toppers (and I have enough left for another card due in a week's time), the letters/number (glittered with stickles), some red card candy, a red button threaded with raffia and that flipping Happy, Happy Birthday stamp that I have to touch up each time. I must look for a decent one as I do like it..........no wonder it was in a Hobbycraft reduced tub ages ago :(
Yeee Ha - all done in the whirl of a lasso :) I'll be almost replicating this one for the second card. Thankfully that little chap is only going to be two as the cowboy topper I have left is riding a rocking horse! As Ben is now nine years old maybe it's time to dispense with putting his age onto cards - until the milestone ones at least.
Di
x
Thanks to a nearby Hobbycraft I grabbed a little set of toppers and some brown foam letters/numbers. Phew, no time to colour in an image
It's yet another easel card, topped with Core'dinations blue card, the cowboy toppers (and I have enough left for another card due in a week's time), the letters/number (glittered with stickles), some red card candy, a red button threaded with raffia and that flipping Happy, Happy Birthday stamp that I have to touch up each time. I must look for a decent one as I do like it..........no wonder it was in a Hobbycraft reduced tub ages ago :(
Yeee Ha - all done in the whirl of a lasso :) I'll be almost replicating this one for the second card. Thankfully that little chap is only going to be two as the cowboy topper I have left is riding a rocking horse! As Ben is now nine years old maybe it's time to dispense with putting his age onto cards - until the milestone ones at least.
Di
x
Saturday, 23 October 2010
'Just saying Hello' notelets
It's raining outside and I just grabbed a little time slot to rustle up some notelets....beats housework hands down!
The cards are 4" x 4"white linen, topped with scalloped circles cut from fairly big scraps of pearlised card (and I kept the leftovers too!) . The 'Just saying Hello' was stamped in Stayzon Black using an Elzybells sentiment (thank goodness I managed to buy a few stamps before Elizabeth closed her store) and the beautiful little sparkly toppers were in my stash. I don't think anything else was needed so I left it at that.
One of my best finds lately came from Hobbycraft - a pack of two tiny wooden easels which are just great for propping cards up on to take photos. They weren't expensive and I was delighted as I've been searching for them for a while now!
Di
x
Thursday, 21 October 2010
Good luck to two young ladies
A friend's two daughters are taking ballet exams on 4th November. They are such well behaved young ladies that I thought she might like a card for each of them from their Mum and Dad to wish them luck on the big day. This is what I came up with:
Lucy is the youngest and her favourite colour is pink, hence the pink dress. Holly is almost a teenager and I thought white was suitable.
First I embossed the flowers down the border of the white linen cards and then added clear gems to the centres of the flowers - Kan Ban Bling.
The backgrounds are diecut and embossed using oval scallop Nestabilities and the feathery toppers were bought from The Range a little while back. They might not be true ballet dresses but they're near enough and the feathery effect is lovely! I added peel offs spelling out Good Luck and their names. Hope the cards work for them - they've been practising so hard.
Di
x
Lucy is the youngest and her favourite colour is pink, hence the pink dress. Holly is almost a teenager and I thought white was suitable.
First I embossed the flowers down the border of the white linen cards and then added clear gems to the centres of the flowers - Kan Ban Bling.
The backgrounds are diecut and embossed using oval scallop Nestabilities and the feathery toppers were bought from The Range a little while back. They might not be true ballet dresses but they're near enough and the feathery effect is lovely! I added peel offs spelling out Good Luck and their names. Hope the cards work for them - they've been practising so hard.
Di
x
Sunday, 17 October 2010
Mia's 3rd birthday
Today is my OH's grand daughter's 3rd birthday. Life has had a few downs this past week or so and I only hope our presents and card reach her in Germany in time :( She is such a sweetie and we love her, and her baby sister Olivia, so much. This is one of my favourite pictues of Mia, and little Livi (Olivia) is in the background:

I think this little lady might break some hearts when she grows up?!
Peppa Pig is a great favourite at the moment but I went more traditional when making her birthday card. Cinderella!!
The images are thick cardboard ones from QVC and the sentiment 'Thank heavens for little princesses', also in the same set, is so appropriate. The card also came from QVC in a set of really pretty delicately patterned cards for 'special ocasions'. It was really just a case of 'position and stick' once I'd selected what to use - certainly much quicker and easier than the 90th card in my previous post!! I then stuck a 3 on the little bush and spelt out Mia's name using really pretty glittery letter and number stickers from Hobbycraft. In my haste I didn't keep a note of the manufacturer but it was either Anitas or Papermania. I love these and as it's Olivia's 1st birthday in a couple of weeks time I'll be using them again no doubt! The insert has a Cinderella image printed on it - from the internet of course :)
Happy Birthday Mia!!! Love from Grandad and GranDi xxx
Di
x
I think this little lady might break some hearts when she grows up?!
Peppa Pig is a great favourite at the moment but I went more traditional when making her birthday card. Cinderella!!
The images are thick cardboard ones from QVC and the sentiment 'Thank heavens for little princesses', also in the same set, is so appropriate. The card also came from QVC in a set of really pretty delicately patterned cards for 'special ocasions'. It was really just a case of 'position and stick' once I'd selected what to use - certainly much quicker and easier than the 90th card in my previous post!! I then stuck a 3 on the little bush and spelt out Mia's name using really pretty glittery letter and number stickers from Hobbycraft. In my haste I didn't keep a note of the manufacturer but it was either Anitas or Papermania. I love these and as it's Olivia's 1st birthday in a couple of weeks time I'll be using them again no doubt! The insert has a Cinderella image printed on it - from the internet of course :)
Happy Birthday Mia!!! Love from Grandad and GranDi xxx
Di
x
Saturday, 16 October 2010
90th birthday card
Recently a friend asked me to make a 90th birthday card for her Grandmother. As I always do, I asked what her interests are. Apparently she is Austrian by birth and loves Viennese waltzes. So far so good - ideas were beginning to formulate already! Then, my heart sank when my friend added that she loves playing Scrabble and doing crosswords. Oh boy, how could I combine those without it just looking like a 'jumble'?!
My crafty friends know I agonised over how to tackle this card - and I ended up a bit out of my comfort zone. Sketches, test layouts and goodness knows what! This is what I came up with:
I abandoned the crossword idea - even using it on the insert I felt would have been too much of a muddle. The card is from The Range - a large square one with embossed dots which I brushed over with a Brilliance Inkpad - Pearlescent Beige as the white was just too stark. The music (Strauss - Blue Danube Waltz) was from the internet and I adjusted the colour to made it look more sepia before printing onto plain 130gsm paper. I also found the violin and the Scrabble tiles images on the internet - both printed onto photo card to give them a glossy finish. The 'ninety' (A Hero Arts stamp from a set with all ages in - so useful!) was stamped onto the back of an oval sentiment from Craftwork Cards. The oval shape was brushed over with the same Pearlescent Beige as the card itself and the 'ninety' was stamped using Cosmic Copper, with a small gold sparkly gem on the dot above the letter 'i'. I spelt out Nanny using the snipped-to-size Scrabble tiles (Nanny is the family's pet name for this very special lady).
The final touches were leaves from Hobbycraft, cream and peach roses (glittered with Stickles gold) and cherry blossom flowers (all flowers came from Wild Orchid Crafts). Then finished off with a double layered bow of organza ribbon (cream and peach). The insert also has a peach rose printed on it.
It's now safely packed in a box from Craft Creations, ready for delivery tonight to my friend. I hope she likes it and I hope you do too.I've lost count of the hours I spent on this but, as I said, it's for a very special lady celebrating a very special birthday!
Later edit:
It went down really well with my friend - apparently Nanny's favourite colour is peach so that was also a lucky 'extra' :) It isn't the big day until Tuesday so I might have more feedback after then. For now, I'm just happy it's been made and has initial approval!
Di
x
My crafty friends know I agonised over how to tackle this card - and I ended up a bit out of my comfort zone. Sketches, test layouts and goodness knows what! This is what I came up with:
I abandoned the crossword idea - even using it on the insert I felt would have been too much of a muddle. The card is from The Range - a large square one with embossed dots which I brushed over with a Brilliance Inkpad - Pearlescent Beige as the white was just too stark. The music (Strauss - Blue Danube Waltz) was from the internet and I adjusted the colour to made it look more sepia before printing onto plain 130gsm paper. I also found the violin and the Scrabble tiles images on the internet - both printed onto photo card to give them a glossy finish. The 'ninety' (A Hero Arts stamp from a set with all ages in - so useful!) was stamped onto the back of an oval sentiment from Craftwork Cards. The oval shape was brushed over with the same Pearlescent Beige as the card itself and the 'ninety' was stamped using Cosmic Copper, with a small gold sparkly gem on the dot above the letter 'i'. I spelt out Nanny using the snipped-to-size Scrabble tiles (Nanny is the family's pet name for this very special lady).
The final touches were leaves from Hobbycraft, cream and peach roses (glittered with Stickles gold) and cherry blossom flowers (all flowers came from Wild Orchid Crafts). Then finished off with a double layered bow of organza ribbon (cream and peach). The insert also has a peach rose printed on it.
It's now safely packed in a box from Craft Creations, ready for delivery tonight to my friend. I hope she likes it and I hope you do too.I've lost count of the hours I spent on this but, as I said, it's for a very special lady celebrating a very special birthday!
Later edit:
It went down really well with my friend - apparently Nanny's favourite colour is peach so that was also a lucky 'extra' :) It isn't the big day until Tuesday so I might have more feedback after then. For now, I'm just happy it's been made and has initial approval!
Di
x
Friday, 15 October 2010
Chilli eatin' House Meece
Today is my OH's birthday! A friend gave me a House Mouse decoupage sheet from the Food and Drink set - just perfect! He loves hot food and would eat chilli con carne anytime! You can buy the House Mouse decoupage sets here - and postage is free!
I wrote my 'slushy' message before I remembered to take a photo - oops! Here's a close-up of the main part of the card. I just love the little mouse gulping water :)
I made an easel card using cream linen cardstock topped with Core'dinations reddish coloured card, embellished with cream Card Candy. The button was from my stash and I tied a little piece of raffia through the button rather than the usual girlie organza ribbon. From a covering sheet, which comes with all the House Mouse designs, I cut out a little mouse to go alongside the sentiment - thanks for the idea Pauline...........and thanks for the chilli eatin' decoupage sheet!
I tend to sit in bed with my morning cup of tea, tray on lap, snipping out decoupage (I know, how sad is that!) whilst OH watches the early morning news. I actually cut this little lot of decoupage out with him sitting right next to me and he didn't even notice! Hmm, I wonder what THAT says?! :)
BTW, he loved the card! I wonder what will be on the menu for dinner this evening :)
Di
x
I wrote my 'slushy' message before I remembered to take a photo - oops! Here's a close-up of the main part of the card. I just love the little mouse gulping water :)
I made an easel card using cream linen cardstock topped with Core'dinations reddish coloured card, embellished with cream Card Candy. The button was from my stash and I tied a little piece of raffia through the button rather than the usual girlie organza ribbon. From a covering sheet, which comes with all the House Mouse designs, I cut out a little mouse to go alongside the sentiment - thanks for the idea Pauline...........and thanks for the chilli eatin' decoupage sheet!
I tend to sit in bed with my morning cup of tea, tray on lap, snipping out decoupage (I know, how sad is that!) whilst OH watches the early morning news. I actually cut this little lot of decoupage out with him sitting right next to me and he didn't even notice! Hmm, I wonder what THAT says?! :)
BTW, he loved the card! I wonder what will be on the menu for dinner this evening :)
Di
x
Monday, 4 October 2010
Dancing in the rain
After the weather recently this card seems quite appropriate. I found the words in my little pink craft notebook (I try to write down sayings etc. in there that might be handy for future use....and of course there's my wish list of all things crafty in there too!!).
The image is a Sugar Nellie stamp called 'Splashing Maggie' and she's so cute :) Of course I coloured her with Aquamarkers, am loving those, and added some Anitas glaze to the puddle splashes and her coat buttons. I used plain white linen cardstock and then ran some acetate through the Cuttlebug using a random dots embossing folder which I think is really for snowy efffects but in real life it works very well giving the efect of rain when it's folded over the front of the card. The photo doesn't do it justice but I suspected that would be the case :(
Di
x
The image is a Sugar Nellie stamp called 'Splashing Maggie' and she's so cute :) Of course I coloured her with Aquamarkers, am loving those, and added some Anitas glaze to the puddle splashes and her coat buttons. I used plain white linen cardstock and then ran some acetate through the Cuttlebug using a random dots embossing folder which I think is really for snowy efffects but in real life it works very well giving the efect of rain when it's folded over the front of the card. The photo doesn't do it justice but I suspected that would be the case :(
Di
x
Friday, 1 October 2010
Finding your Frog Prince
I bought these 'Frog Prince' stickers in Germany whilst over there in May. I had the inkling of an idea of what I wanted to do with them but it wasn't until this Monday when browsing round a local garden centre that I found the small 'unprincely' froggy stickers :)
The card background is a white linen A6 card, the little 'unprincelies' are surrounding the Prince himself on a background of green Coredinations card from my stash, cut into a flower shape with my trusty Woodware flower punch. Some little green sparkly jewels from my stash (KanBan) brightened it up a bit. The sentiment 'You have to kiss a lot of toads to find your Frog Prince' was printed and then stuck onto a background of the same green card as the flower. I keep a note of little sayings and this was one I wrote down some time ago :) The ribbon is sticky backed and came from my stash - I think it was originally from QVC.
How about this for spooky - late yesterday evening I went into the garden to check that I'd closed the greenhouse properly and felt something light land on my foot (I was wearing flipflops at the time). It moved off PDQ as I squeaked in alarm.....then, when I looked closer it was the tiniest and cutest little frog I've ever seen! I tucked him into a safe place away from prowling cats but there was no sign of a crown I'm afraid :))
Di
x
Wednesday, 22 September 2010
My Fairy name!
Your fairy is called Oak Iceshimmer
She is a bone chilling bringer of justice for the vulnerable.
She lives in forests of oak and lime trees.
She is only seen when the first flowers begin to blossom.
She decorates herself with leaves and berries. She has icy blue butterfly wings.
This is true in that I will defend the vulnerable as I hate injustice. But, I draw the line at trolling round wearing leaves and berries :)
Di
x
Tuesday, 21 September 2010
Butterflies and flowers birthday card
Weeks ago I coloured in a couple of Sugar Nellie images using my watercolour pencils and a little bit of jel pen to add some sparkle - Country Garden was one of them. I finally got round to making a card with the so cute image.
It's another easel card - covered with the butterflies wrapping paper I love. I mounted the image onto embosssed white card topped off with a frame cut using my (few!) Nesties and then popped through the Cuttlebug and embossed with little dots. I ran it through twice but in truth the card would have been just as good without the dots :)
I did similar with the stamped sentiment which even has cute little butterflies on (from Elzybells......there are still stamps to be had in the closing down sale) - then all that was needed was a big perfectly matching lilac 'ribbbon brad' from my stash and some pink organza ribbon threaded through and tied in a bow - to 'prop' the card up on. A few silver corner peel offs and just a couple of Anitas gorgeous silver 3-D butterflies.
I had difficulty taking a piccie though without some of the junk on my desk in the background!
I think this card will be saved for a friend's birthday next month - she's always appreciative of my efforts which does make such a difference doesn't it :)
Di
x
It's another easel card - covered with the butterflies wrapping paper I love. I mounted the image onto embosssed white card topped off with a frame cut using my (few!) Nesties and then popped through the Cuttlebug and embossed with little dots. I ran it through twice but in truth the card would have been just as good without the dots :)
I did similar with the stamped sentiment which even has cute little butterflies on (from Elzybells......there are still stamps to be had in the closing down sale) - then all that was needed was a big perfectly matching lilac 'ribbbon brad' from my stash and some pink organza ribbon threaded through and tied in a bow - to 'prop' the card up on. A few silver corner peel offs and just a couple of Anitas gorgeous silver 3-D butterflies.
I had difficulty taking a piccie though without some of the junk on my desk in the background!
I think this card will be saved for a friend's birthday next month - she's always appreciative of my efforts which does make such a difference doesn't it :)
Di
x
Monday, 20 September 2010
Hey, hey, we're the monkeys!
This card is for a little chap who is five years old tomorrow. It's very simple, once I mastered the flipping folding! The background paper is from my stash - I've had it for donkeys years and sadly only got the one sheet although I'm pretty sure it came from Craft Creations. Then I just used silver peel offs for Joe's name and his age - coloured with peel off pens and some googly eyes added to the number 5. These peel off numbers are great for kids as they have little feet as well as big eyes - which just beg to have googly ones added :)) I can't remember where I got them from :(
I should have put the monkey with the penny whistle a bit lower down but trust me, once they're stuck that's it....no chance of them coming loose....and Joe is only small so perhaps Mummy will put it on a mantelpiece so he can look up and see all of the 'band'!!
Di
x
Sunday, 12 September 2010
Get well card
This card is for a lady currently in hospital after major surgery. She's on a club committee which my OH chairs and we thought a card from all the club members would be a nice gesture. A funny/jokey card didn't really seem appropriate - so I went for feminine and pretty.
The card itself is quite large (8" x 8") and came ready embossed, with a nice flat patch in the centre, from The Range a few weeks ago on my one and only visit. The pyramage is a Dufex one, I keep a few of these ready made up on standby. Then I mounted the image onto a scalloped square cut from silver linen effect card - which came from Craft Creations ages ago. Then just Pauline's name using peel offs layered onto the same silver linen card and some card with little wisps of silver on....finished off with small aurora borealis gems in each corner - and added to the card using thin adhesive pads.
The finishing touch is an organza bow using ribbon from my stash, but doubtless bought from Hobbycraft**.
Making the insert to go inside was a tad tricky but it worked out in the end - I printed the club logo above a printed message and left lots of room for people to sign at their regular committee meeting on Tuesday evening. The challenge was how to make a double folded insert which was much bigger than A4 folded in half. But, endless careful measuring and some careful joining at the spine of the card worked really well - you wouldn't know what a struggle it had been :)
Di
x
** To my absolute delight, Hobbycraft are opening a branch within just a couple of miles of here in October! I'm as happy as a pig in 'you know what'!! Sudden thought, I wonder if a part time job in the new store would be a good, or totally bankrupting, idea!!? :))
The card itself is quite large (8" x 8") and came ready embossed, with a nice flat patch in the centre, from The Range a few weeks ago on my one and only visit. The pyramage is a Dufex one, I keep a few of these ready made up on standby. Then I mounted the image onto a scalloped square cut from silver linen effect card - which came from Craft Creations ages ago. Then just Pauline's name using peel offs layered onto the same silver linen card and some card with little wisps of silver on....finished off with small aurora borealis gems in each corner - and added to the card using thin adhesive pads.
The finishing touch is an organza bow using ribbon from my stash, but doubtless bought from Hobbycraft**.
Making the insert to go inside was a tad tricky but it worked out in the end - I printed the club logo above a printed message and left lots of room for people to sign at their regular committee meeting on Tuesday evening. The challenge was how to make a double folded insert which was much bigger than A4 folded in half. But, endless careful measuring and some careful joining at the spine of the card worked really well - you wouldn't know what a struggle it had been :)
Di
x
** To my absolute delight, Hobbycraft are opening a branch within just a couple of miles of here in October! I'm as happy as a pig in 'you know what'!! Sudden thought, I wonder if a part time job in the new store would be a good, or totally bankrupting, idea!!? :))
Saturday, 11 September 2010
Crossword card
This was just a bit of a fiddle around yesterday when there was a brief lull between builders coming and going. A few weeks back I found a box of 're-usable crossword cards' in our local Hospice shop. The kind that come with a non-permanent marker... and a little idea formed in my head as I'm sure we all know a crossword addict!
Making this card was so 'simples', and this just shows the idea as it would be better to have more of a mix of down and across words - and better spaced and different little gems, puffy flowers/hearts or whatever. Apart from all that, which is pretty much everything, here it is for what it's worth as a prototype :)
The crossword grids are on beermat sized, rounded corner, wipeable card. I just matted one onto slightly larger silver mirri card also with rounded off corners, then added it to a glossy black card (from The Works and a snip of a bargain, but the shop is no longer there!). The lettering, my writing is grim but then who does a crossword all neat and tidy anyhow, was done with a permanent pen - which does dry indelible given enough time, providing you resist the urge to keep checking it :)). Then I added a few KanBan gems from my stash....as I said, simples!! :)
Di
x
Sunday, 5 September 2010
Birthday card for a Pearly Queen!
The other weekend I had a great time with a couple of school friends - we go back more years than I dare to admit :)
This card is for one of my favourite girlies - Moira - whose birthday is today. We're only a week apart in age so her birthday is easy to remember.
I used one of the House Mouse Bathtime decoupage sets to make this card - appropriate as Moira was wearing some gorgeous freshwater pearls last weekend. I used a pretty mauve patterned card which came in a pack from QVC - not a bad match huh?! Then, after assembling the little fellas onto the image I tickled here and there with a bit of Anita's glaze - the drawer knob centres, some of the perfume bottle and bits of the lipstick. Then, tongue firmly clamped between teeth, I added teeny little individual pearl embellies to the strand of pearls - not as glamourous as Moira's freshwater ones but the thought is there! Final touch was a double layer of organza ribbon - blue and mauve - tied into a bow and stuck through with a couple of pearl hatpin thingies. I know they must have a proper name but that's my name for them! All pearls and the ribbon were from my stash. Aren't they cute little meece - I esp. love the one on the right pulling faces!!
Happy Birthday Mo, I'll be catching you up in a weeks time :))........as if you ever let me forget that!
Di
x
This card is for one of my favourite girlies - Moira - whose birthday is today. We're only a week apart in age so her birthday is easy to remember.
I used one of the House Mouse Bathtime decoupage sets to make this card - appropriate as Moira was wearing some gorgeous freshwater pearls last weekend. I used a pretty mauve patterned card which came in a pack from QVC - not a bad match huh?! Then, after assembling the little fellas onto the image I tickled here and there with a bit of Anita's glaze - the drawer knob centres, some of the perfume bottle and bits of the lipstick. Then, tongue firmly clamped between teeth, I added teeny little individual pearl embellies to the strand of pearls - not as glamourous as Moira's freshwater ones but the thought is there! Final touch was a double layer of organza ribbon - blue and mauve - tied into a bow and stuck through with a couple of pearl hatpin thingies. I know they must have a proper name but that's my name for them! All pearls and the ribbon were from my stash. Aren't they cute little meece - I esp. love the one on the right pulling faces!!
Happy Birthday Mo, I'll be catching you up in a weeks time :))........as if you ever let me forget that!
Di
x
Friday, 3 September 2010
Stamping Bellas
The SD card on my camera let me down badly this week and I lost quite a few photos - boo, hoo!! Undeterred, I resorted to a free file recovery facility called 'Pirifrom Recuva'. I've had to use it in the past (we never learn do we!) and although I def. have lost some recent photos, all sorts of previously deleted ones popped up! Tee, hee!! Amongst them I found these, taken a couple of years ago just after I discovered 'Stamping Bella'.
The stamps are very simple, I love loads of the images and there are some cute sentiment stamps too, so I duly sent off to the States for some goodies - err, and Mr Import Duty in the UK alsoloved stung me! Can't remember the duty I paid now but it hurt a bit at the time :( I haven't found a place in the UK that stocks the whole range so had to place my fate in the hands of our nice chaps in UK Customs!
I'm sure I sent the Retail Therapy card to my sort of daughter-in-law - Kai is a lady who loves to shop!
I know for sure that I sent my friend Joy the 'Spa' card as we'd been for a half day's indulgence at Nirvana Spa - we came out so totally chilled out we were almost unconscious! The flotation pool was literally out of this world - once you got the hang of gently floating on your back rather than floundering face down as I did at first :( Anyone ever tasted the 'soothing' minerals they put into those pools?? Yeuch!
To make the cards I used white square card stock with sticky ribbon behind the coloured layer of card (being mean I usually just add little strips to each side taken a little way underneath the coloured card, rather than take it right across the card...just make sure they line up OK!). The images were stamped onto white card and coloured using Whispers pens, the sentiments were stamped in co-ordinating colours onto white card and layered onto the same colour card as the image then added at an angle. Then just a few little touches of co-ordinating Bellas Baubles in the top left hand corner - if you go to the Bella website, take a look at the delicious names all the different colours are given! My favourite image is the Bella in the bath (BubbleBella) - love the bubbles made using lots of baubles, which conveniently come in a packet of mixed shades of aqua. Bit of a labour of love though, sticking all the baubles on :)
Thanks for calling by!
Di
x
The stamps are very simple, I love loads of the images and there are some cute sentiment stamps too, so I duly sent off to the States for some goodies - err, and Mr Import Duty in the UK also
I'm sure I sent the Retail Therapy card to my sort of daughter-in-law - Kai is a lady who loves to shop!
I know for sure that I sent my friend Joy the 'Spa' card as we'd been for a half day's indulgence at Nirvana Spa - we came out so totally chilled out we were almost unconscious! The flotation pool was literally out of this world - once you got the hang of gently floating on your back rather than floundering face down as I did at first :( Anyone ever tasted the 'soothing' minerals they put into those pools?? Yeuch!
To make the cards I used white square card stock with sticky ribbon behind the coloured layer of card (being mean I usually just add little strips to each side taken a little way underneath the coloured card, rather than take it right across the card...just make sure they line up OK!). The images were stamped onto white card and coloured using Whispers pens, the sentiments were stamped in co-ordinating colours onto white card and layered onto the same colour card as the image then added at an angle. Then just a few little touches of co-ordinating Bellas Baubles in the top left hand corner - if you go to the Bella website, take a look at the delicious names all the different colours are given! My favourite image is the Bella in the bath (BubbleBella) - love the bubbles made using lots of baubles, which conveniently come in a packet of mixed shades of aqua. Bit of a labour of love though, sticking all the baubles on :)
Thanks for calling by!
Di
x
Thursday, 2 September 2010
2nd birthday card for a little chap!
I made this, in difficult conditions, for a friend's little boy who was two years old a little while back. The difficult conditions were having to work on a picnic table surrounded by boxes and bits and pieces whilst patiently waiting for my craft room to be decorated, carpetted and kitted out. It's now all done and I love it - but I also know how fortunate I am, so hopefully I don't take it for granted...after almost 16 years wait it's worth it:) That's all I have to say about that!
Again, it's an easel card (did I hear a yawn?) and really a bit of choosing, positioning and sticking down so not a masterpiece by any means. Mandy, Harvey's Mum, and I share a love of all things Disney so I thought Pooh Bear would go down well as I just bet Harvey is being brought up on AA Milne stories.
The cardboard Pooh Bear Disney images were from QVC, the background papers from my stash (Making Memories Cosmopolitan Collection - which is great as one side is patterned and the other is plain in toning colours so you can mix and match without rootling through tons of card and paper). I used the 'Little bit of rubber missing Happy, Happy Birthday stamp' (I wonder if you can see where I have to do a little bit of touching up?!). Harvey's name was spelt out using gold letters in clear dome squares which don't show up well in the photo - from my stash and the button and ribbon also came from my stash.
Thanks for calling by! :)
Di
x
Subscribe to:
Posts (Atom)