Sunday 30 April 2017

Pixie's Snippets Playground - Week 279 and 280

Where did the last fortnight go to? Here we are, into May tomorrow (it's May Day Bank Holiday here in the UK so a long weekend off work for a few folk). Despite it being almost May, we've had a real drop in temperatures here during the week - and snow in a few Northern parts of the country. So we're not out of the woods just yet - and my woolly vest and warm bloomers are staying put for now!

As always, a huge thank you to everyone who came to play this past fortnight - loads of gorgeous entries.

This is my snippets card for the coming fortnight:
I used:

- 4.25" x 5.5" white card blank, tent style

- snippet of dark rose pink card, trimmed to slightly smaller than the card front and set aside for later

- piece of white card stock for the front panel, die cut using a NBUS MFT 'Diagonal Strip Sentiment Cover Up' die

- then die cut the sentiment out of the plain wide strip, using a Memory Box 'Sketchbook Imagine' die - making sure to keep the little pieces of 'waste' from inside the letters

- next, cut a piece of double sided self adhesive sheet to a teensy bit smaller than the die cut panel and popped it onto a snippet of white card which I then trimmed down to the edges of the adhesive sheet.

- peeled off the remaining piece of protective sheet and carefully applied the sticky card to the back of the die cut panel so that the apertures were now backed with sticky. (TIP - keep the piece of waxed protective paper from the sticky sheet to cover up the panel in between working on the next stages)

- die cut the 'Sketchbook Imagine' die again, using more of the deep rose card and stuck it into the apertures on the card front - followed by those little pieces of white waste I'd set aside earlier

- selected a variety of little strips of coloured card stock from the snippets folder and die cut a set of strips, inlaying them onto the card as I went 

- ran the completed panel through the Cuttlebug to press everything down

- then glued the striped panel to the piece of deep rose card I'd set aside earlier

- glued both layers onto the card front - and called it done

This really is a fun way to use up snippets, I always seem to have a lot of little strips that I can't bear to throw away. Just think of all the colour combinations, a dark or black background would look fabulous, red and green for Christmas, and maybe silver and gold perhaps for a touch of luxury? Another way to use the die would be to stamp a sentiment onto the plain panel, either a really bold, wide one or perhaps a shorter one with a die cut flower beside it. And of course, the strip cover up die itself can be used the other way up - so that the plain panel runs across the top third of the card. Very versatile IMHO.

Probably don't need to spell out what this fortnight's prize is made up of:
Oops, got my reflection again :)

The prize is two dies, exactly the same as the ones I used today - MFT 'Diagonal Strip Sentiment Cover Up' and Memory Box 'Sketchbook Imagine'.

I will split the prize if necessary, both dies work beautifully together but would also work very well apart. I've seen a few really pretty floral cards using the 'Imagine' die as the sentiment. But, as always - both items are one complete prize if you wish to play for them as a pair.

The Snippets Challenge will run for two weeks from now on and the Playground gates will close at 11am UK time on Saturday 13th May. The gates will open again at midnight UK time on the same day.

It's still a maximum of ONE entry and please say in a comment if you wish to play and be a possible winner of the prize. The prize is both items together as a single prize, unless you really do only want to try for a 'split' - in which case I'd do a further draw for the other item. Please also link back to the Playground in your blog post to be eligible for the draw.

Remember, if you link into the Playground and don't say clearly that you're wanting to be in the draw then you will be bypassed if your name comes out of Mr Linky. I'm sure you all know I ask for a positive 'yes' just in case you're playing only for fun. Thanks!

Mr Linky is below - please let me know if you have any problems linking, it's easy for me to sort out so don't struggle on alone :)

Be sure to call back next week to see the winner of last fortnight's prize plus my picks from the past two weeks - as well as another lovely guest designer too!

Love from Parsnip and of course from me,

Friday 28 April 2017

Should have gone to Specs***rs

Just recently, I got a couple of pairs of new specs from a well known UK chain of opticians shops. One pair is 'recreational' as they now call it, which is close work combined with computer distance varifocals. Plus my first ever pair for distance/driving, with the bottom part tuned into being able to focus on the important things on the dashboard, like the speedometer for instance.

When I got home, was about to pop the cream paper carrier bag they came in straight into recycling - until I had a look at the pattern on the bag. It was rows and rows of black outline spectacles - not unlike the whole sea of spectacle frames you get when you walk into one of their stores.

Then, an idea popped straight into my head for a card. I wonder how many of you will groan at the link I forged using pieces cut from the bag and the (admittedly purposely bought) sentiment?

Take a 'peep' at this - snigger:
I used:

- 5" x 5" square light cream card blank (picked to match the specs bag!)

- backing layers of black and SU's 'Real Red' card stock - glued in place using Collall All Purpose glue

- then a layer of the same light cream card stock, trimmed down and put to one side whilst I worked on the 'toppers'. I say topperS as the bag had a repetitive 'spectacles' pattern on it and I managed to make three cards all the same on this run and still have a further five trimmed down panels (approx. 1.5" x 2.4" in size) left to play with. Am keeping those on the desk here in a little container, for a day when inspiration eludes me and I just want to cut, stamp and stick :)

- for the 'toppers' I had to get the best I could out of the dinky carrier bag and worked out that four pairs of specs on top of one another would work - there were a few combinations to play with. So, I trimmed three panels of specs the same for this little run of cards

- backed those panels with snippets of SU's 'Real Red' card stock as frames

- played around with the sentiment and the topper on the Misti to see where I wanted it to be stamped

- stamped the sentiment(s) using a sweet little cling stamp by Stampendous called 'Favorite Peeps' and Memento 'Tuxedo Black' ink (I confess again to finding this on line after I realised none of my sentiment stamps were really right - super fast delivery from The Stampman as well!)

- added the cream panel to the card front(s) then glued the specs layer in place 

- final touch, a pair of googly eyes added with Collall All Purpose glue - only on one pair though, let's not go for overkill!

However, I certainly don't suggest it's worth spending a whole load of pennies, just to get your hands on a sweet little carrier bag to chop up :)


Tuesday 25 April 2017

Hug in a Mug - times six

Needing to catch up with the Christmas card monthly target/total, I played with a NBUS set of MFT dies and stamps - did a batch bake and came up with six quite similar cards:
Just to prove there are six in total :)
I used:

- 4.25" x 5.5" white card blanks, tent style

- then cut blue pearlescent card for a layer on the front  of the cards - three in baby blue and three in dark blue and set them to one side, not added to the cards as yet

- die cut six three mugs, again baby blue and dark blue, using a couple of mug dies from the MFT 'Hug in a Mug' set

- added the surface of the chocolate to the mug using dark beige  snippets and a die from the MFT 'Hug in a Mug' set

- furtled around in the snippets folder and backed some teeny contrasting snippets with Stick-It adhesive sheet

- then die cut little motifs to go onto the front of the mugs. Stitched red heart - MFT's 'Hug in a Mug'. Stocking, snowflake and mittens - Creative Expressions 'Christmas Shadow Box'. Holly leaves and berry - Poppy Stamps 'Stitched Holly Leaves and Berries'. Tree - Impression Obsession 'Evergreen Trees'

- popped the motifs onto the mugs and ran them through the Cuttlebug to press firmly in place (my new found trick!)

- then decided to add whirls of whipped cream on top of the hot chocolate, which almost hides the chocolate but there is a teeny smidgen showing so that step hadn't been pointless after all (die from the MFT set), and tickled the cream with clear Wink of Stella

- die cut circles from Neenah 'Desert Storm' card stock (the best kraft card around I think) with a Tonic Studios circle die

- glued the mugs in place on the circles

- the sentiment comes from a co-ordinating MFT set of stamps called 'Hot Cocoa Cups', stamped onto white card using the Misti and Memento 'Tuxedo Black' ink

- then die cut the sentiments using a die from the MFT 'Stitched Fishtail Flag STAX' set and chopped the straight end to fit on the card, using a guillotine

- glued the sentiments onto the blue card front panels and only then glued the panels onto the card blanks

- finally glued the circles onto the card front, above the sentiment

Six more for the box, but I must confess that not all of the cards in that box have inserts in ...... yet. A rainy day job before it gets too out of hand I think!

This is the first time I've used a 'Happy Holiday' sentiment on a card, ever. In the UK we tend to stick to Christmas and/or 'Seasonal' Greetings - so I was a little out of 'ye olde comfort zone'. The warmest wishes bit did it for me - and I think these will be winging their way to dear friends across the pond come Christmas.

I'd like to enter this card (my favourite of the bunch) into two challenges that I love:

Rudolph Days for April, over at ScrappyMo's - anything goes (open until the end of April)

Merry Monday - use kraft card stock (Neenah 'Desert Storm' in my case). This is a pure fluke as I'd already just finished making these cards and was typing this when the Merry Monday challenge popped up! 

Now all that remains is to put all those fiddly little dies back into their storage - without losing any in the process!


Sunday 23 April 2017

Pixie's Snippets Playground - Week 275 and 276 - results

Hello once again! Time for the fortnightly round up of  the Playground which includes our latest Guest Designer, some 'picks' of the fortnight and of course the prize draw.

First of all, here's our Guest Designer and this fortnight we have Liz of 'Crafty Sunflower'. Liz made a gorgeous snippets card, in her quite distinctive clean and crisp style - always so fresh looking:
See what I mean about the lovely clean look? I love this card and Liz has used snippets perfectly to create a really super design. See those sweet little paw prints on the embossed background - it's details like that which really make a card special. I also know, from first hand experience, just how precisely and perfectly Liz's card are made :) A brilliant Good Luck card!

This is what Liz said:

My good luck card is made entirely from snippets, except for the card blank and sentiment panel.  The white embossed paw print background was even a snippet, although a fairly large one.  Does anyone else have an overflowing drawer of white snippets???  I’m sure they just multiply when I’m not looking!  The black cat is a very old Sizzix die, matted and layered on MB ‘Stitched Octagon’ die cuts. The four leaf clover ‘Clippunch’ punches I used come as a pack of two, one punching out the shape and one punching out a ‘u’ shape in the middle of the leaf, so it can be ‘clipped’ onto a separate piece of card.  I know these two punches are at least 10 years old as I bought them on one of several visits to ‘Nellie Snellen’s’ shop in the Netherlands.  Did you notice that I did a bit of name dropping there?  If ever you get the chance to visit her shop in Sevenum, it’s well worth a detour. If you’re lucky, you may even get to meet Nellie serving behind the counter and discover what a friendly and delightful crafter she is. There is even a lovely coffee shop nearby, where you can deposit an uncrafty OH with their newspaper while you shop!

And, here's a photo of Liz - I bet lots of you are familiar with this happy, smiling face:
Liz started her blog in 2012, although looking back it's quite clear that she'd been card making for some while before then!  Some wonderful cards straight away and already the signs of the lovely clean style I love so much.

Liz is a big fan of Bristol Rovers and you'll often see cards on her blog made around a blue and white footballing theme. Or even incorporating blue and white, such as this fun card:
I do so love that Santa's Washing Line die set - and apparently I 'forced' Liz to buy one for herself! I've lost count of the dies I've bought after being forced inspired by Liz!

I've eased back on buying loads of craft magazines but I frequently used to see our Liz featured with one of her lovely cards, she's won tons of prizes and is a really prolific card maker. Do go and have a good browse around her blog - loads of great ideas there! 

Thank you so much Liz for making such a stunning snippets card as our Guest Designer this fortnight. And for emailing to and fro when you were away from a decent signal strength too!

So, let's move onto my picks from this past fortnight - so, so hard! I had eight of you as final, final picks that I really didn't want to reduce down to three - but, common sense, plus a back yelping at me, forced it down to three in the end:

 
I picked this absolutely fabulous bag charm, made by Jane (who I privately refer to as Jane J to differentiate between her and Jane W!) as it ticks so many boxes. In fact, I do truly think ****it's worthy of a gold star****! Jane has carefully documented every step of making the bag charms, with lots of advice as the snippets are the shrink plastic she used! I love using shrink plastic, but also know it can be very unforgiving - so top marks to Jane I say! It's the worded flower, eyes AND lips in case you're wondering - do hop over to see how it was done! Jane, please take your gold star from the side bar - for your outstanding snippets make!

If you haven't ventured into playing with shrink plastic yet - give it a whirl! I made some phone charms for a couple of friends a few years ago and they went down a real treat!

I absolutely adore this wonderful card, made by Maura. The snippets were mostly white to begin with - beautifully stamped, embossed, die cut and sponged. It's just so perfect - a real delight for the eyes.

Ruth brought a 'magic slider' card to share with us - and her blog post is so entertaining! It wasn't without little problems along the way - but Ruth kindly took photos, added a little video of her own (which cracked me up!) and also there's a link to a video by Kristina Werner which shows the whole process. I've wanted to make a card like this for ages and now it's on my 'to do' list! Thanks Ruth for the inspiration.

That's my three picks - I do hope they will inspire you as well girls.

We had 67 of you joining in this past fortnight - and three were new Playmates:

Bunny
Sheila H
Sandi P
These are three lovely ladies and I would be so happy if you hopped over to say hello. Remember, they took the time and trouble to make a snippets project, take a photo, write a blog post and then venture into the Playground girls! Spread the love a little - as you always do! xx
 
Welcome to all of you new Playmates, we hope you come back and play with us again soon.

Prize draw time now and our winner of the Lawn Fawn 'Stinkin' Cute' set of stamps plus a set of matching dies and the MFT Rectangle 'Peek-a-boo Window' die is:

Well done Heidi - can you please drop me an email with your address in and I'll post your prize off as soon as possible! I can't work out fully where you live but, wild guess maybe, could be USA. Plus you were playing for the whole bundle - so well done indeed! My email address is on the right hand side bar.

That peek-a-boo window die is so, so popular (also hard to get hold of I believe) and I really did think that this could be a week when I had to split the prize. I hate to tease but there is another one of those dies waiting in the toy box here ...... for further down the line.

Anyway, keep those snippets entries coming girls, you still have a week left to play HERE remember!

And it's almost Rudolph Days once again over at Scrappymo's - a chance for you to use up some snippets for the Playground and also make a Christmas card at the same time perhaps? It runs from 25th April until the end of the month, as usual. And Mo always has lovely prizes to be won as well.

Love from the little white peril - and of course from me too


Friday 21 April 2017

Upcycled robin for Christmas

The other week I was totally uninspired for what to make in the hour or so I had spare. I rootled around in the 'shop bought' Christmas cards box and whilst doing so my eye was caught by one card in particular and also some card stock lying to the right of me, waiting to be put away.  Suddenly the beginnings of a card began to appear in my minds eye:
There's an A4 piece of matt gold card stock, a snippet of SU 'Wild Wasabi' left over from a previous card I'd finished making - and a long slim Christmas card.

And this was the end result - shame the fact that greens are such a perfect match isn't obvious, I hate it when the camera tells fibs, SU's'Wild Wasabi' is brighter and doesn't have such a blue tinge about it:
I used:

- 4.25" x 5.5" white card blank

- piece of matt gold slightly sparkly card stock as an outer 'frame', glued to the card front

- slightly smaller snippet of SU 'Wild Wasabi' card stock, with an aperture die cut using MFT's 'Rectangle Peek-a-boo Window' die

- then trimmed the piece of the card with the robin on and stuck the image panel behind the die cut aperture

- added the image panel to the card blank, having backed it with white fun foam just to lift it a bit - using Collall All Purpose glue

- finally added a sentiment using a couple of tiny gold peel off stickers

Oh I do so love that Peek-a-boo Window die. I've also seen it used for shaker cards around blogland - it's just perfect for that of course!


Tuesday 18 April 2017

Cuttlebug Mania Challenge - 'A nice cuppa''

It's time for a new challenge over at Cuttlebug Mania and this fortnight's theme is 'A nice cuppa' - it can be coffee or tea.

Details of our sponsor/the prize to be won can be found over on the Cuttlebug Mania Challenge blog.

You do have to use a manual die cutting/embossing machine for Cuttlebug Mania entries (it doesn't need to be a Cuttlebug but it must be manual, not electronic). And, you can't mix the two, it must be all manual please. Then make your entry, link into the challenge, link to the challenge in your own blog post and and make sure that you also say what products you used for any die cutting/embossing.

This is what I made:
I used:

- 4.25" x 5.5" white card blank, tent style

- snippet of black card, trimmed down and glued onto the card front

- snippet of red card, die cut using a Lil' Inkers 'Stitched Rectangle' die and glued on top of the black panel

- had fun cutting out the tea cups, choosing stripes perhaps wasn't such an easy/good idea but I wanted a slightly 'retro' look to the card

- first of all I die cut the whole stack of cups from a snippet of white card - the die is all in one piece and it's the Apple Blossom 'Teacups' die

- then jiggled about with the die to cut three white, grey and black striped cups from a snippet of LOTV 'Mr and Mrs' paper (plus a bit extra top and bottom to allow for trimming) so that the stripes lined up across the top edge of each cup

- glued the striped paper cups one at a time (working from the top) on top of the white card layer - with more than a few adjustments along the way of course

- added a black saucer  using a little snippet of black card and the same die and put the stack of cups to one side for now

- shame on me, this is the first outing for NBUS sentiment stamp set I bought literally years ago! Made by Personal Impressions it's called 'Keep Calm and'

- swiped an anti static bag across a piece of black card, stamped the words I wanted in VersaMark and then heat embossed them using 'Stamp Stuff' white embossing powder

- trimmed words to the size I wanted, adhered the stack of cups to the card front using thin sticky pads and did the same with the sentiment/words to add dimension

- voila, finished!

Apart from the jiggling about with the stripy snippets and the cups, this was a really easy card to make.

Love the Personal Impressions 'keep calm' set - there's a huge range of options to choose from to go with 'Keep Calm and' - 'Keep Crafting', 'Eat Chocolate', 'Buy Shoes' - and of course 'Drink Wine' - along with about 10 others. One that really tickles me as a punchline is 'Run Away'! :)

The background to the black and white 'retro' cups and red theme goes back to when I returned to the UK after being incarcerated at boarding school. Bit of a culture shock for me but I recall that my Mum was so very excited and really looking forward to finally settling into my parents 'much longed for after a lifetime of travelling' new (and their very own) house that was being built whilst we did our last stint in Army accommodation.

Knowing they wouldn't be moving very far ever again, my Mum certainly did some nest building and one dinner set 'for every day use' she bought was quite daringly black and white - and the teacups had black saucers as a contrast. Super modern at the time of course and before the days when we just used mugs. The kitchen in the Army house had red and white cupboards - hence my colour scheme today!


Sunday 16 April 2017

Pixie's Snippets Playground - Week 277 and 278

Happy Easter Sunday everyone! Whatever you have planned for today, I hope you have a lovely time. I'm just hoping we have some sunshine - last week was glorious, for a few days!

As always, a huge thank you to everyone who came to play this past fortnight - loads of gorgeous entries.

This is my snippets card for this next fortnight:

I used:

- 4.25" x 5.5" white card blank, opening on the short side for a change

- snippet of pale rose pink card, trimmed to just slightly smaller than the card front and glued in place

- piece of white card stock for the front panel, trimmed to just slightly smaller than the pink layer

- found a little snippet of true rose pink card, backed it with Stick-It adhesive sheet and die cut it using a Crealies rings die - the die has no name but is reference number 'CLDR11'. Elizabeth sent me this die a while ago - with a challenge to see how I could use it, I can see it being a really useful embellishment die for all sorts of cards including Christmas! 

- then I used the Misti to arrange the stamps I wanted to use - with the ring die cut in place but not stuck down. Removed the ring die cut for now and stamped my selection using Memento 'Tuxedo Black' ink

- the butterflies are by Kaisercraft from their 'Butterflies' set and they're a smidgen thicker than the sentiment stamp I used so, as they had stamped well, before repeating the sentiment stamping I removed the butterfly stamps from the Misti

- the sentiment (from an Inkylicious set called 'Friend') had slightly stamped onto the card anyhow. Held in place as it was by the Misti it was just a quick re-ink, re-stamp and it was done!  

- then I coloured the butterflies using Faber Castell Polychromos pencils in just two muted shades of green and blended very slightly using a Derwent dry blender pencil

- punched each corner of the image panel using a fancy corner punch by Woodware

- glued the image panel to the card front, on top of the pink layer

- added the set of die cut rings to the panel - finished!

So I learned something new about the Misti when making this card. It's fine to position all the stamps you want to use at one time, even if some are thinner than others. You just peel away the thicker ones as they stamp and then the next thinner ones will make proper contact with the card - and so on I guess.

I also used an L-shape from the new Misti 'Creative Corners' set for the first time - yay! It allows you to push a piece of card away from the edge of the Misti (I knew my stamps were close to the edges and that can sometimes cause issues with getting enough pressure), yet you still keep perfect positioning.

Need to play a lot more to try out all the additional things the Creative Corners set can be used for - repeat stamping and diagonal placement of sentiments for one! Jennifer McGuire has some great tips and there are lots of others to be found on line as well. The one thing I would say is that it's best suited to the standard sized Misti rather than the mini Misti (the L shape piece is too big for a mini Misti I understand) although some pieces will fit. And, at £16 or so, which isn't much more than the cost of some polymer stamp sets, I think it's a good investment!

I was really pleased how this card came together in the end as I picked the items I wanted to use and only then worked out the design - rather than the other way round. I was driven by the fact that there were three items that had been in the toy box for quite a while and two of those had been kindly donated. I hate to take forever offering donations as prizes (my record was goodies from our lovely Darnell, and still feel bad that it took me so long for 'the muse' to be right). In fact, right now there's just one donated item left (really cute as well). I have plans for it ASAP Val!

But never fear, the toy box is looking healthy with quite an assortment of goodies that I've bought lately. Watch this space!

Probably don't need to spell out what this fortnight's prize is made up of:

I will split the prize three ways if necessary, the Kaisercraft 'Butterflies' stamp set kindly donated by Megan, the Crealies 'rings' die, kindly donated by Elizabeth ....... and the Inkylicious 'Friend' sentiment stamp set from me. But, as always - all items are one complete prize if you wish to play for all of them together.

In truth, it isn't often I end up splitting a prize but that's absolutely the luck of the draw - not me saving on postage!

The Snippets Challenge will run for two weeks from now on and the Playground gates will close at 11am UK time on Saturday 29th April. The gates will open again at midnight UK time on the same day.

It's still a maximum of ONE entry and please say in a comment if you wish to play and be a possible winner of the prize. The prize is all items together as a single prize, unless you really do only want to try for a 'split' as I explained above - in which case I'd do a further draw for the other item(s). Please also link back to the Playground in your blog post to be eligible for the draw.

Remember, if you link into the Playground and don't say clearly that you're wanting to be in the draw then you will be bypassed if your name comes out of Mr Linky. I'm sure you all know I ask for a positive 'yes' just in case you're playing only for fun. Thanks!

Mr Linky is below - please let me know if you have any problems linking, it's easy for me to sort out so don't struggle on alone :)

Be sure to call back next week to see the winner of last fortnight's prize plus my picks from the past two weeks - as well as a lovely guest designer too!

Love from Parsnip (busily gobbling Easter eggs - little does he know it's the bath for him later, due to choklit on his chops!) and also love from me,

Friday 14 April 2017

Catching up on Christmas cards

Sigh, I've slipped on my '12 per month Christmas card target', so the other day I set to and made a batch of six identical cards. I know, boring for some people but once the 'production line' is set up it really is a time saver in the long run.

The plan was for 'simple' - yet it ended up with a good few steps to get there! This is one I made:
I used:

- 4" x 5.5" forest green card blank, tent style

- piece of white card stock, trimmed to an eight of an inch smaller all round than the card blank

- then I drew a fine line right across, three quarters of an inch from the top of the piece of white card (using a soft pencil) for placement of the window die I was going to use next

- die cut the window aperture out of the white panel using MFT's 'Rectangle Peek-a-boo Window' die and rubbed out the pencil line

- used a sentiment from the Personal Impression 'Many Greetings' stamp set and Memento 'Tuxedo Black' ink to stamp 'Merry Christmas' on the white panel. As I was making six at once, this stage was a breeze using the Misti!

- backed the aperture with a small piece of white card - I wanted the extra feature of the 'window' but still wanted the whole panel to be white :)

- die cut the mittens using little Stick-It backed snippets of SU's 'Real Red' card stock and a sweet Frantic Stamper 'Hanging Mittens' die

- peeled off the Stick-It backing and stuck the mittens in place in the window area

- adhered the white panel to the card front with a sandwich of white fun foam to add dimension

- something was missing and I messed about for ages trying options. In the end I plumped for Josy Rose shiny silver star hot fix nail heads just to 'lift' the mittens a bit

Ha! My in-house critic just couldn't 'get' the mittens on a Christmas card (he's so behind with trends at times, bit like me really) but at least he didn't ask if they belonged to the Lone Ranger!

Snow flakes would have been better but my punches, dies and little sequins are all too large - or so I thought! I could possibly have used the 'fall out' from my Martha Stewart snowflake border punch - but of course that only occurred to me when it was too late. Those hot fix nail heads can't be prised off - not that I tried. So, Lone Ranger mittens it is - note to self for next time though!

Almost half way through the month and certainly need to get a wiggle on to start my 12 Christmas cards for April - for some reason, much less enthusiasm this year and if it becomes a chore then I'd rather not play.

Speaking of chores and playing - I can't say often enough just how much easier it is running the Snippets Playground. The easing of pressure is phenomenal and I'm so grateful you all went along with the new format.

Oooer, almost forgot, I'd like to enter this card into a couple of challenges run by Hazel. I used to play every single week but have been a bit naughty lately:

Craftyhazelnut's Christmas Challenge 328 and

Craftyhazelnut's Christmas Challenge Extra for April 2017

Two of my favourite challenges, no pressure and you can always just go for the 'Anything goes' option as well! Hazel works really hard on these challenges so it would be lovely if you could join in - when you're in the mood for making Christmas cards of course!


Tuesday 11 April 2017

Easter Egg card

I've written on here before about a beautiful Easter Egg I was given as a child, made from sparkly sugar paste. It was beautifully moulded in sparkly white with little piped pink roses - and through a little window you could see a scene inside. I think it was possibly Cinderella's coach - I know, not really Easter but sure to delight a little girl who believed in magic! It was far too pretty to eat and I kept it until it eventually went yellow and a bit sticky, sigh.

I had that lovely egg in mind when I set out to make this card - didn't quite capture the delicacy but I had fun playing:
I used:

- 4.25" x 5.5" white card blank

- piece of SU 'Certainly Celery' card stock, embossed using a favourite Cuttlebug folder called 'Scrollwork' and then trimmed down on all four sides

- glued the green panel to the card front

- then die cut the Easter egg shape using a pair of Spellbinders 'Filigree Egg' dies and a snippet of white Centura pearl card stock

- next, I covered a snippet of the same white card stock with 'medium sticky' double sided adhesive sheet and, using the solid die from the same set, cut a plain egg - with the sticky sheet uppermost 

- peeled off the adhesive sheet backing from the 'solid' egg piece and mounted the 'filigree cut' egg on top - pressing it in place using the piece of wax paper I'd just peeled off the die cut. That left the apertures nice and sticky for the next step

- poured iridescent glitter all over the egg front and patted it into place in the sticky apertures to emulate the sugar sparkle. Sheesh, glitter sparkling everywhere ........ as well as on the card of course - that stuff travels!

- glued the egg onto the card front

- had a rootle through my long-neglected floral embellishments and found one that reminded me so much of the pretty roses on that egg I had as a child - so I stuck one in place using the hot glue gun

- still needed a sentiment and stamped 'Happy Easter' onto a white card snippet (left over from when I made the card blank) using Memento 'Grey Flannel' ink and a Stamping All Day 'Happy Easter' stamp

- punched the sentiment out using SU's 'Modern Label' punch and popped it onto the card front using snipped up thin sticky pads

- added a little Mei Flower white pearl to either end of the sentiment label - finished!

The other memory was when I rummaged through the (several) RUB boxes of flowers in the craft room. I really thought those little ribbon rose and bead embellishments were the height of sophistication for card making ........... a long time ago! Time for a bit of a blitz here I think!


Sunday 9 April 2017

Pixie's Snippets Playground - Week 273 and 274 - results

Again, we're halfway through the fortnightly challenge in the Snippets Playground and it's time for our Guest Designer, some 'picks' of the fortnight and of course the prize draw.

Hedgie update - we know for sure that at least two hedgies are feeding each night, they move around so fast it can be hard when checking out CCTV footage but a few times we've spotted two of them feeding together. Aw, so cute :)

Let's begin with our Guest Designer for this fortnight, and it's Helen of 'Helen's Craft Haven', who made this lovely Easter gift bag - it's absolutely delightful and the sweet image is just so perfectly echoed in the sentiment of 'Have a cracking day this Easter time':
Isn't it fabulous?! Such a great idea, wonderful use of snippets and I totally love the image plus super sentiment! I also love how the faux stitching almost convinces you that the bag is made from fabric pieces!

This is what Helen said:

My snippets project is a decorated Easter treat bag (plain bag from Hobbycraft). I raided my My Mind’s Eye ‘Now & Then’ paper pad for snippets...and found lots of thin-ish strips (the kind you get when you trim  a full sheet down), so used those to make my background...distressing the edges & adding some faux stitching. I coloured the bunny image (‘Spring Chick’ by Penny Black) using watercolour pencils, then cut it out using a Nestie die...I cut the scalloped mat for the image from the pink card behind the paper strips. I also used a tiny snippet of patterned paper to paper piece the egg shell...adding a little shading with a pencil. I stamped my sentiment on to a snippet of white card and matted that with a snippet too, then added a couple of co-ordinating paper flowers.

And, here's a photo of our lovely Helen - I detect a mischievous twinkle in her eyes!
Looking back through Helen's blog, there's some fabulous work to be seen - and Helen has been a 'pick' several times in the Playground needless to say.

She started her blog way back in 2008 and way back then Helen's work was already stunning - started off with amazing cards right from the word go. Helen is a real lover of Penny Black stamps and it's such fun to just do a search on 'Penny Black' and see how beautifully she uses their products. Here's one example which might make Helen raise her eyebrows:
I did a little bit of detective work and discovered that Helen was a runner-up in the Penny Black category of the 2011 'Card Maker of the Year' competition with the above
card - yay for Helen! No wonder she's on a few top design teams, with a following of over 500+.

Whilst I was 'furtling around' on the internet (I love that expression Sarn/Sarah!!) I came across something else - which cracked me up! Anyone remember the 'ALS Ice Bucket challenge' a while back? Just go to this link if you want to see Helen being soaked! She'll probably kill me for publishing it - but it does show just what a few searches will turn up on social media and such!

One lovely tradition Helen has is to make a few calendars each year, for close family I think. For UK gals who might want to do the same, the blanks come from Papermill Direct HERE (they only seem to have 2017 calendar blanks at a reduced price at the moment) - it's something I would love to do for 2018 so will be keeping watch on the website.

Thank you Helen for making such a stunning snippets project as our Guest Designer this fortnight! And for emailing to and fro when you were struggling with internet problems as well - what a star!

Remember girls, you can always let me know if you would like to be a Guest Designer - I have a list and would be delighted to add your name.

So, let's move onto my picks from this past fortnight - gold star alert!
 
Now this is a tricky one - Heather already has one gold star in the short time they've been featured here) but this card absolutely leapt out at me as being such a brilliant way to use up snippets! Check out Heather's blog and there are some really good step by step instructions how to do this yourself. Very well deserved second gold star Heather! There's a badge on the RH sidebar if you wish to take it for your blog - no offence if you don't though.
Loads of you know our Kathleen (Kath for short, but as we have two Kath's it's generally Kathleen) - and this card above just made my jaw drop. It's stunning but the next bit will stun you even more - Kath inlaid every single one of those little pink 'fallout' pieces! I read her blog post several times but sure enough - that's what she did 'cos here's the other piece as proof that Kath used to make a second card (without any inlaying I think):
I still stare at the first card shaking my head slightly and thinking what an incredibly determined lot you all are!

I absolutely adore the soft peach tones of this fabulous card, made by Glennis. It really is so elegant, beautifully made and of course used up some white snippets for those lovely flowers!

That's my three picks and once again I focused very much on some interesting ways to use snippets - which hopefully will inspire you.

We had 71 Playmates joining in this past fortnight - one of whom is new to us:
Iona - aka Gail or ionabunny (you choose!)
Welcome 'Little Miss Lotsanames' - who I think we'll call Iona as we do have another Bunny following the blog and she may well come to play soon! Hope you come back and play with us again - looking at the prize draw result I sure hope so!

Prize draw time now and our winner of the the two Inkylicious stamps (A), the Lavinia 'Flower Fairy' stamp (B and the cricket stamp (C) is:
This stunned me - it's only happened once or twice at most that a new Playmate wins straight away on their first visit! Having said that, I guess the odds will be similar whether it's a first visit or not - depending on the number of entries....... it's all the luck of the draw. Well done Iona - can you please drop me an email with your address in and I'll post your prize off as soon as possible! My email address is on the right hand side bar.

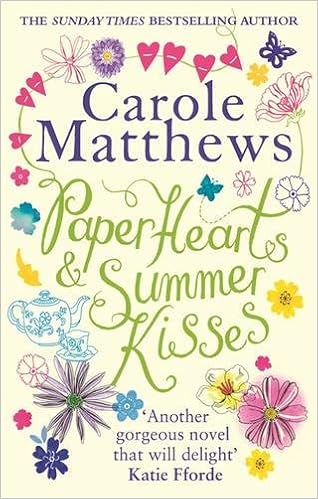
And here's a little 'heads up' as published by our lovely Linby on her blog. Carole Matthews is an author who I really like, and she has a new paperback book out called 'Paper Hearts and Summer Kisses'. It's also available on Kindle and I just finished reading it. It's a novel but also based on the real life story of Christine Emberson, a well known UK crafter - and I truly recommend it!


Anyway, keep those snippets entries coming girls, you still have a week left to play HERE remember! Next week is Easter Sunday so I expect you all to be wearing brand new clothes, shoes, white socks, a little hat and white lace gloves. I know that was the tradition when I was a child at least :) Talk about dipping into the past!

Love from the little white peril - and of course from me too


Friday 7 April 2017

Leaving card

We have a lovely little 'beauty and health' centre close by - and for a while now I've been treating myself to a regular pedicure session, just to have my tootsie nails trimmed and a foot massage. Sadly, Shirley, the lady I see, isn't in great health herself (she has a back problem just for starters!) and she's decided that it's time she retired. I'll miss her loads as we're very similar in outlook, sigh.

So I made this card to take along for my final appointment with her:
I used:

- 6" x 6" square white card blank

- panels across the top and bottom of the card made using plain navy snippets and patterned card from the DCWV 'Juniper Berry' stack - glued in place using Collall All Purpose glue

- the sentiment was stamped using the Misti, SU's 'Marina Mist' ink and a sentiment stamp from Kaisercraft's 'Bon Voyage' set

- the three shoes were die cut and embossed using the Marianne Design Creatables - Shoe die (LR0291) and little snippets of blue card to pick out the colours in the patterned panels. One of the snippets is SU's 'Marina Mist', according to my comparison swatch - hence the colour of the sentiment :)

- then each shoe was glued in place, using Colall All Purpose glue in a fine line applicator bottle

- final touch, a little pearl in the centre of each embossed flower

Trying to keep a bit to the theme of her work, I suddenly found a use for the lovely little shoe die and they do look a little bit as if they heading off somewhere :)