Friday, 31 January 2014

Upcycling - agaaaaaain

The current challenge over at Craftyhazelnut's Christmas Challenge is 'trees - one or more'. Flicking through the box of saved Christmas cards from 2013, I found a very stark and striking card - black background, black trees and one single silver sparkly tree. It had been a bit creased in the post but I discarded well over half of it and salvaged enough to make this card:
I used:

- a red pearlescent narrow DL card

- the upcycled image, trimmed and mounted onto a piece of the very sparkly silver card I bought in Hobbycraft - and yup, it was everywhere once again :(

- the sentiment is an 'Anita's Dimensions' silver sticker. A little bit different to normal stickers/peel offs as the top part doesn't stick down so that the actual words stand up away from the card

Am also entering this card into Craftyhazelnut's Christmas Challenge Extra for January, which is always 'anything goes'.

A super fast make, which means I just managed to hit the target of making 12 Christmas cards a month :) Cut it a bit fine - we're into February tomorrow, and it's a short month, so will have to pedal a bit faster methinks!

Di
x

Thursday, 30 January 2014

Revisiting triple layer cards, without the stamping

Flicking through quite heavily patterned papers here yesterday, and prompted by the little flurry of triple stamping in Blogland (notably Karen P and Elizabeth), I decided to revisit a twist on triple stamping. This way you use patterned papers instead of actually stamping the backgrounds - I wrote how to do it in a blog post here a while back.

This was my first go yesterday:
I used:

- 6.25" x 4.25" card blank, made using SU's 'Crisp Cantaloupe' card stock

- papers from a Kaisercraft pad, free with Quick Cards Made Easy magazine called 'Sweet Pea'

- plain SU 'Pistachio Pudding' card stock

- a couple of toppers which also came free with the paper pad

- lots of cutting and sticking for the layers

BUT, as soon as it was finished, I looked long and hard, scratched my head and then slapped my forehead - really hard, several times! See what you think of the next one:
See any difference between the two - apart from needing sunshades for the second one, snort?

WHAT a Dumbo, I'd only written the measurements down wrongly on the how-to post which I mentioned in the link above! Basically, I didn't have enough of a difference in the size of the layers which meant that the patterned paper on the first card isn't as noticeable in the outer layers. However, the measurements have now been changed and the how-to passes muster if you fancy having a go - it's a great way to use up bold papers:)

For the second card I used:

- 6.25" x 4.25" white card blank

- papers from a Kate Knight 'Totally Tropical' paper pad - free with Cardmaking and Papercraft magazine quite a while ago

- plain SU 'Coastal Cabana' card stock

- the flower is from the SU'Secret Garden' set, stamped using Memento 'Elderberry' ink onto a snippet of 'Coastal Cabana' card stock and then die cut using the matching SU 'Secret Garden' framelits die - just gently rounded with flower shaping tool and popped onto the card with a sticky pad

-teeny Mei Flower white pearls added to the flower, just 'cos it looked too 'flat'

Having said that about wrong measurements, I still quite like the first card so it hasn't ended up in the bin - phew.

Edit: as suggested by Karen, I'm adding this into Technique Time Tuesday's current challenge :)

Di
x

Wednesday, 29 January 2014

Christmas ornaments


I did make this card with one challenge firmly in mind 'Merry Monday', where you have to use an ornament or ornaments on your card. And, later I also spied that  the new challenge over at 'Jolly Holly' is to use blue and silver on your card. My blue is a very soft baby blue, even though it does veer towards pale turquoise, so I was on track!

I used:

- A5 card blank which is from a pile I bought ages ago, they came already edged with silver

- snippets of pale pearlescent blue card stock to die cut the bows using a Memory Box die from the 'Crisp Bows' set

- snippets of matching pale pearlescent blue patterned card to die cut the ornaments/baubles using a Memory Box die called 'Classic Ornament'. Before cutting the baubles I covered the patterned snippets with double sided adhesive and then, once cut, the top layer of film was peeled off and the bauble sprinkled with Cosmic Shimmer's Glitter Jewels 'Diamond Sprinkles'. The 'caps' for the baubles were cut from a teeny snippet of silver card

- the sentiment is silver script on a white oval, made by Craftwork Cards and layered onto an oval punched snippet of pale blue pearlescent card

- final touch was just some little clear sparkly gems on the bows and one on each bauble in the centre of the biggest snowflake

Di
x

Tuesday, 28 January 2014

'Chloe' Sympathy card

I made this card with a heavy heart recently, after the passing of a really wonderful 93 year-old lady who was a much loved Mum, Grandmother and Great Grandmother. One of life's treasures who will be sadly missed, we didn't knew 'Nanny' very well but she was absolutely delightful and as bright as a button. RIP.

I knew I had some lovely Memory Box die cuts (using the 'Chloe Stem' and sent to me a good while ago by a very special crafting buddy). And I'd also seen a really memorable card made by Lynne of Cards from Lynne's Loft almost a year ago which had stuck in my mind. Hope you don't mind me CASEing your beautiful card Lynne!

I used:

- 6" x 6" square white card blank

- white Centura card and papers from the 'Sweet Afternoon' pad by Teresa Collins - sent to me a while ago by another lovely blogging buddy

- a single white Chloe die cut stem

- turquoise bakers twine, wrapped round the 'topper' and tied with a bow

- pale turquoise pearls, in varying sizes, on the flower head

- sentiment by SU from the 'Sincere Salutations' set, stamped in SU's 'Baja Breeze' 

Di
x

Monday, 27 January 2014

Less is More - Sketch Time

One way to 'kick start' the old mojo is to follow a sketch - so when I spotted that it was Sketch Time over at Less is More I had a quick play:
 And here's the sketch:
 

I used:

- 7" x 5" white tent style card

- snippets of pink and white card

- the heart was die cut using a Memory Box 'Serafina Heart' die (a present from Mo last year) in white card and a matching Memory Box 'Cupid Heat' in pink for the backing

- a strip of pink card, topped with a strip of white card which has embossed lines top and bottom, used the Hougie board for those

- sentiment used a stray SU stamp (pre-loved I think) and VersaMagic 'Pink Petunia' ink pad

BTW, the card isn't barrel shaped - the light here yesterday was almost non-existent so I took this lying flat on the desk - snigger, the card silly, not ME :))

I really enjoyed making this CAS card and will be looking out for more sketches for inspiration - as well as a light box/tent at this rate.

Di
x

Sunday, 26 January 2014

Pixies Snippets Playground - Week 109

Crumbs, another really busy week in the Playground with 72 entries - great to see so many of you playing along :)

My snippets card for this week is for my 'in-house critic', to be hidden away until Valentine's Day:

I used:

- 7" x 5" white card blank

- the stamped image is by Penny Black called 'hot pants', coloured with Pro Markers and Polychromos pencils blended with Sansodor. Die cut with a Nesties oval die and then pierced round the edge with my much loved Tim Holtz piercing tool (thank you Sam, I love it loads) - the piercing is made easier 'cos you just set the depth using the little ratchet mechanism for holes the same size. Then the image was mounted onto a snippet of navy card, hand cut in the usual way

- a snippet of pearlescent navy blue card for the first layer, topped with a snippet of white card which was run through the Cuttlebug using Cuttlebug's 'Swiss Dots' embossing folder. Had to do three passes, carefully moving the folder and making sure I didn't get edge lines running across the card - one row of dots did get flattened but I just gently popped those back out by using an embossing tool on the reverse

- a fish tail was cut by hand from heart patterned paper from the Forever Friends 'Best of British' paper pad, then layered onto more navy card

- the final touch was to add Glossy Accents to the balloon

No sentiment, I thought the little hedgie in his patterned 'kecks' and holding his heart shaped balloon said enough. For our non-British playmates, 'kecks' is Northern slang for trousers or underpants :) And anyhow, I'm bound to write something soppy inside the card.

I'd like to add this into into the following challenges:

Freshly Made Sketches #120, love this sketch and had such fun following it
Penny Black and More 'Love is in the air'

Penny Black Saturday Challenge 'New' - the stamp is new

And moving swiftly on, here are my picks for this week:
I love this card, made by Elizabeth, lots of lovely little bits and pieces making for a gorgeous creation.

Another beautiful snippets card, made by Viv - a baby card to treasure for sure!

And another baby card, this time made by Cathy - don't you love how the swirls make those beautiful butterflies look as if they're just about to fly right off the card :)

This card was made by Greta, using the shaving foam marbling technique for the wonderful flower. Do go and see, the post did make me giggle (you know how shaving foam will suddenly burst into life like a mini volcano) plus there's a link on how to play and have a go yourself.

More baby cards, from our Sam. Lovely use of snippets and I just love the images Sam used - how clever to use the little fairies and their washing line :) 

Tammy has been back playing with us and this gorgeous Christmas card uses lots of snippets - right down to a little piece of doily peeking out at the bottom. Lovely!

After a little absence, Jean came back to play with two amazing upcycled Christmas cards - they truly do look as if they belong on the 'best cards' shelf in a card shop! Do go and take a peek at the other one featuring a robin, it's also lovely.

And almost at the last minute, Greta came back with another card I had to show - see the red die cut sentiment (Joy) - what a clever idea to layer it onto the white one underneath!

Coo, we have a few baby and Christmas cards this week :)

And we have four new playmates this week - yay, welcome ladies! Please say hello to:
Susan(rainy) brought this absolutely fabulous Christmas card - so much lovely detail.

This fabulous brooch was made by Jenny of Jens Inky Adventures.

Patricia made this gorgeous card, loads of lovely detail right down to the little drops of dew on the roses and leaves.

This adorable stepper card was made by Teresa - love it and those huge eyes would melt a heart of stone :)

I ought to mention here that, like a few other blogging friends, I'm having problems following and also commenting on people using Google+. I'm not ignoring you girls!

Also, a couple of girls have verification turned on, which always takes more time when people are trying to comment. I've found that the safest way to stop spam is simply not to allow anonymous comments - since I did that I don't even have to moderate comments. Ha, having said that some chap did sneak through the other day offering something for sale :( But, it's the first piece of spam for months - she says, thereby unleashing a flood. Sigh.

The winner of the Woodware 'Patchwork Boat' stamp from last week is:

Congratulations Greta - this seems to be your week! Can you please drop me an email with your address in and I'll post the stamp off to you ASAP (di_wray@hotmail.com)

And this coming week's prize, hopefully still in enough time for Valentine's Day cards is of course:

Yup, a Penny Black stamp the same as the one I used on today's card - called 'hot kecks pants' :)

Plus, a Tim Holtz 'Craft Pick' piercing tool as well - the toy box is very full here right now, to the point I can hardly get the lid on it. And that makes life fun 'cos my big expanding snippets folder, which is so full it won't close, sits on top - if that wobbles off I dread to think of having to re-sort all those snippets into colours!

The snippets challenge will run for one week and the Playground gates will close at 11am UK time on Saturday 1st February January and will open again at midnight UK time on the same day. Maximum of three entries and please say 'No thank you' in a comment if you wish to still play but not be the winner of the prize.

Both items are one prize but can you please say if you aren't playing for either of the items in this week's prize 'cos then I could do a second draw for whatever it is the first prize winner doesn't want.

Please NEVER be afraid to say you're just playing for fun - it doesn't offend me at all, and the Playground is first and foremost for us to have fun, the prizes are just a thank you for playing :)

Mr Linky is below - please let me know if you have any problems linking, I can sort it out for you quite quickly and am always happy to do so.

Have a great week, hang onto your hats in the UK today as more gales are forecast,  and hope to see you in the Playground.

Di (and a wave from Parsnip)

Saturday, 25 January 2014

Sarn's Rudolph Day - January 2014

Yay, it's here again! Plus, Sarn has changed the rules a bit - you have to make (at least) TWO Christmas cards for your entry, in the same post. At first I wondered if I could manage that but it really was a bit of a walk in the park - I ended up making three very similar little cards and it really was loads easier to 'batch bake' them whilst all the ingredients were to hand :)
And here's a closer peek at one:
 I used:

- 4" x 3" card blanks, made from SU 'Sahara Sand' card stock

- a single card from Christmas 2012, which came with three different trees side by side already with a strip of red glitter across

- some red glitter card to make the 'frames' - from a big pack of assorted A6 glitter sheets, bought in Hobbycraft's sale for coppers last week. A perfect match to the already existing red glitter strips, you can't really see the join, wahoo :)

- sentiment by Personal Impressions from the 'Many Greetings' set, stamped with VersaMagic 'Hint of Pesto' and punched with SU's 'Word Window' punch

Three super fast little cards for the box - it took me a lot longer to clear up all the red sparkly bits of glitter here!

I love Sarn's new rule - and found 'batch baking' fun (unless you're making absolutely tons all the same I suspect - she says, recalling making Wedding invitations a while back). Why not join in - if you start now you'd have at least 22 Christmas cards made by the end of November. They don't have to be the same, plus Sarn now allows folk to link into as many other challenges as they like.

So, these cards are for:

Rudolph Day over at Sarn's

Craftyhazelnut's Christmas Challenge Extra for January where it's always anything goes.

And that makes a total of 10 in the box here already :)

Di
x

Friday, 24 January 2014

If the shoes fits

.............then wear it. I can't see me tottering round in a pair of shoes like this, although there was such a time when the higher the heels the more you felt you could stand up for yourself in the office :) It's another card made for a friend's Birthday next month so the New Year resolution to stay ahead of the game is still in my mind - so far!

I used:

- 6" x 6" square black card blank

- butterfly backing paper from First Edition's 'Noir et Chic' paper pad

- plain black and cream card

- all stamps are from SU's 'Fabulous You' set, stamped in Memento 'Tuxedo Black'

- the shoe was going to be left plain but my 'in-house critic' thought the card looked too sombre, so I coloured the shoe and butterflies with Whispers pens - with heart in mouth as the card was all finished by then! Then I added some black gems to add a bit of dimension to the shoe and the butterflies

- the sentiment was popped onto a black die cut, I used a Spellbinders Fancy Tag 2 die

The layout (ie. putting the shoe into a triangle) is similar to one I found on the internet - but of course now I can't find it again to give credit where it's due :(

I thought the shoe looked OK without any colouring and am absolutely certain it would look divine stamped in other colours or embossed in gold or silver, maybe on a Wedding card.

More food for thought!

Di
x

Thursday, 23 January 2014

Shades of blue

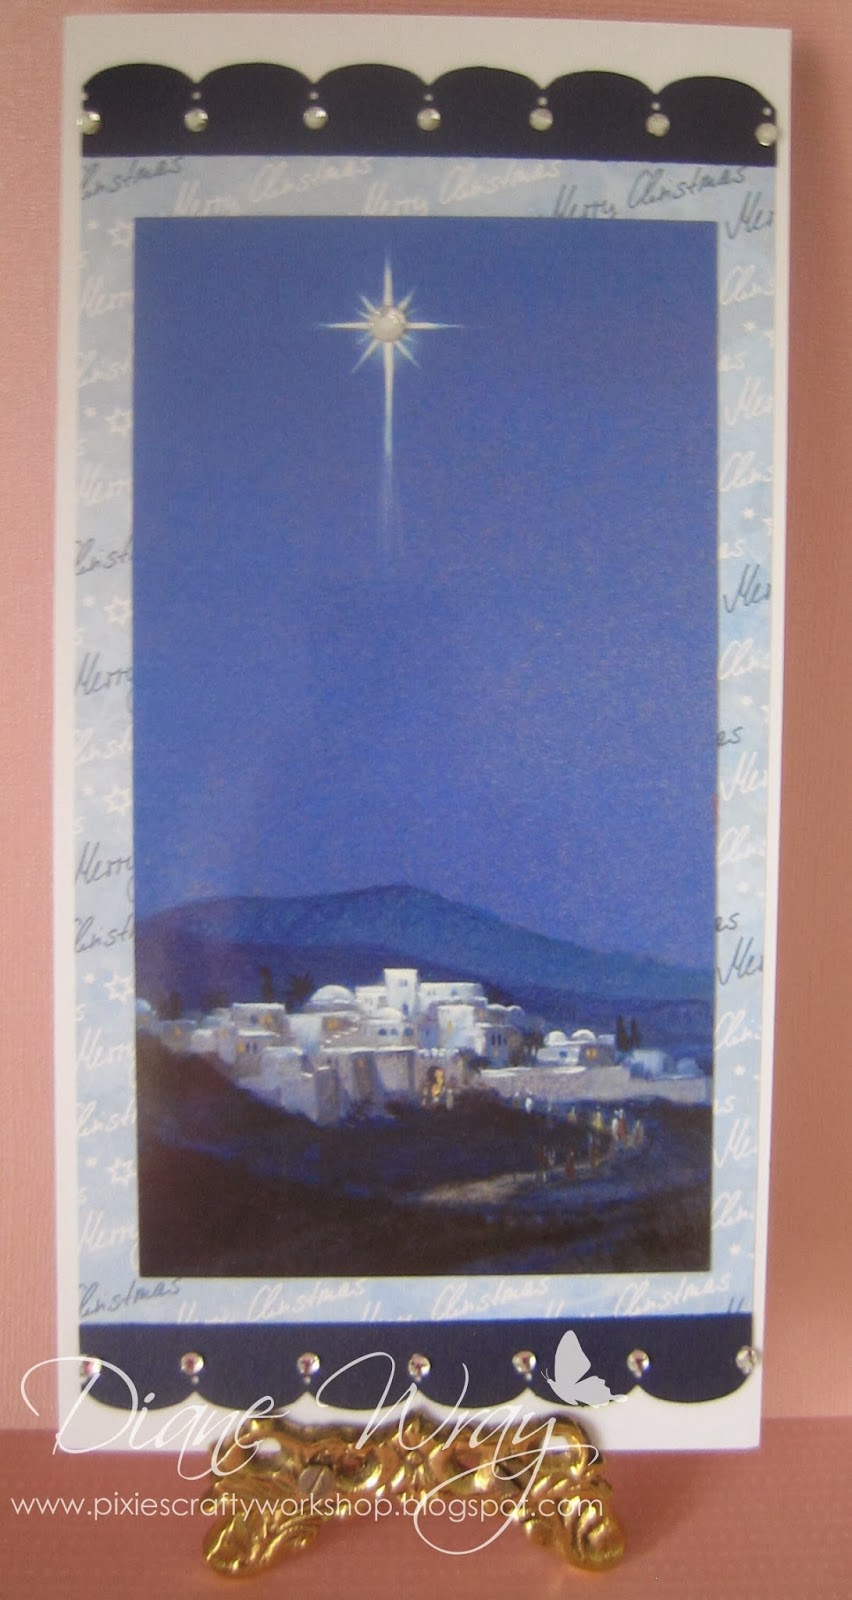
Over at Craftyhazelnut's Christmas Challenge the theme for this week is 'shades of blue':

I used:

- white DL card blank

- the upcycled front of a Christmas card, from 2012, (who says I'm a hoarder)

- a snippet of backing paper from LOTV's 'Frosty Christmas' paper pad

- snippets of navy blue pearlescent card, punched with Martha Stewart 'Traditional Scallop' edge punch

- a clear gem at the centre of the star and smaller ones along the scalloped edging

- no sentiment, I think this beautiful upcycled card front, for which I take absolutely no credit, says it all

Am also entering this into Crafthazelnut's Christmas Challenge Extra for January where it's always 'anything goes'.

Di
x

Wednesday, 22 January 2014

Just mucking around

I decided to have a play with some stamps that I bought at the NEC last November - they had been languishing, still in their unopened packets, due to various other things going on here.

I turned to my buddy Sarn's fabulous work for inspiration - see here and here for some of Sarn's examples. My result certainly isn't anywhere near as balanced and eye pleasing as Sarn's are, but here's one I made anyhow:

I used:

- 6" x 6" square cream card blank

- SU's 'Old Olive' backing card

- SU's ' So Saffron' backing card

- Kaisercraft's 'Grunge' stamp, stamped using SU's 'Pumpkin Pie'

- Visible Image's 'Ink Splats' set, stamped using Memento 'Gray Flannel', although it looks dark blue in the piccie :(

- the lid of a fat glue pen for the circles, using SU's 'Old Olive'

- sentiment is from the Creative Expressions set called ''Art Phrases', stamped using SU's  'Old Olive'

Had a lot of fun, but Sarn (and Andy Warhol fans) don't need to hold their breath! :)

Di
x

Tuesday, 21 January 2014

Love Grafitti

I made this card for a couple of challenges - Penny Black and More 'Love is in the air' and Penny Black Saturday Challenge 'New' - the adorable stamp is new, from Santa:
I was inspired by Sue's great use of hexagons, shown on her blog here - and her card was one of my Playground Picks on Sunday. So, instead of doing my all too often used 'backing paper across the whole card' theme, I played with hexagons :)

I used:

- 6" x 6" square tent style card, using SU's 'So Saffron' card stock

- the image is by Penny Black, called 'Love Grafitti', coloured with Pro Markers and Polychromos pencils, blended with Sansodor

- the image was die cut using a Spellbinders Nestie from the hexagon set, and layered onto a snippet of dark blue pearlescent card, hand cut in the usual way by drawing round the outside of the die to keep a narrow border

- the panel of hexagons was made with a snippet of dark blue card, a snippet of white card and snippets of paper from the Forever Friends 'Best of British' paper pad - die cut with a smaller die from the same hexagon set as the image

- right hand corners were cut on a slant and then some red Josy Rose nail heads added

Grinning here, that's about the amount of fence still standing/undamaged in the Playground :) Needless to say, it's going to be weeks before a new one can be erected - the local fencing contractors are quids in right now!

This card is also for Cuttlebug Mania's challenge which is 'All you need is love' - I used my Cuttlebug and a hexagonal set of Spellbinders Nesties. 

Di
x

Sunday, 19 January 2014

Pixies Snippets Playground - Week 108

One of my New Years Resolutions is to make sure I have Birthday cards already made the month before they're needed - so long as I remember to check my 'Birthday Book' of course :) So this card was made well in advance - for four weeks time. Just spotted over at Sentimental Sundays that the current challenge is 'More than three layers - plus a sentiment' so I'm entering this card as it has six layers if you count the 2 on the little sail:

I used:

- 6" x 6" square white card blank

- all papers, a lot of them snippets, came from the Forever Friends 'Best of British' paper pad - I just tuck my snippets inside the front cover of the relevant paper pad

- the stamp is made by Woodware, called 'Patchwork Boat', paper pieced with snippets. I then rounded the corners of the piece of white card using Woodware's 'Corner Rounder' - and the little boat also comes with three stamps very suitable as names, I used 'Petit Bateau'

- the number 2 was in my little box of die cuts (thanks Sarn!), and I just coloured it with a red Pro Marker

- sentiment was computer produced and then hand cut into a pennant/fishtail shape and mounted onto a snippet of dark blue paper. There's a little 'how-to' which I posted yesterday afternoon here if you have trouble hand cutting even sized fishtails - it works for me :)

- red Josy Rose nail heads to finish off

Onto this week's picks, as always sooooo hard to choose:
I chose Greta's card because not only does it use loads of snippets but the design just jumped out of the screen at me - absolutely beautiful!

This layout, brought by Sam to show, has so, so much lovely detail - lots of layers and snippets too.
 
This was another card that jumped out at me - love those hexagons and Sue also used up quite a few snippets too.

This card, made by Maggie, is a lovely example of how you can use a snippet of Nature to create a fabulous card - have you guessed yet? It's a piece of silver birch bark die cut to make the two hearts! Very clever.

I think this card, made by Sue J, is absolutely divine! Beautiful colouring, plenty of snippets used and Sue's 'little pearl dots trademark' as well :)

Do please remember that these are just my picks, although I often notice when you girls are really enthusiastic about snippets makes in your comments too - which sort of confirms my own thoughts :)

Moving on, as am still limiting my time sitting over the laptop, here's the winner of the little brass easel:
 
Well done Mary! I have your address and will pop it in the post to you as soon as I get to the Post Office.

This week's prize is a little something the same as  I used on today's card:

Yup, it's the Woodware 'Patchwork Boat' stamp set. So cute and perfect for cards for little chaps - or even older ones maybe :)

The snippets challenge will run for one week and the Playground gates will close at 11am UK time on Saturday 25th January and will open again at midnight UK time on the same day. Maximum of three entries and please say 'No thank you' in a comment if you wish to still play but not be the winner of the prize. Please NEVER be afraid to say you're just playing for fun - it doesn't offend me at all, and the Playground is first and foremost for us to have fun, the prizes are just a thank you for playing :)

Mr Linky is below - please let me know if you have any problems linking, I can sort it out for you quite quickly and am always happy to do so.

Ahem, and anyone thinking of building a rollercoaster at the end of the Playground can think again. Since we had a gardener in to clear stuff ready for a new fence there have been a few scurryings in the extra space behind the bushes - I'm onto you! :)

Di - and of course Parsnip
x

Saturday, 18 January 2014

Fishtails - a little 'how-to'

Reading a blog earlier today, I saw that the writer had been having trouble cutting 'fishtails' into the end of a sentiment strip without the use of a safety net die. In fact her card looked fabulous with just straight ends to the sentiment strip but at the risk of seeming like granny and sucking eggs it took me until about six months ago to think of doing this. Musing here, I thought of geometry at school - you know, right angles and such. So this is how I cut my fishtails now - taking any guesswork out of the process:

1. Stamp your sentiment onto a piece of card, as straight as possible to make trimming in the next step easier.


2. Cut the sentiment strip to the width you want - if possible make it an even number of millimetres (or fractions of an inch) wide, I cut mine to 20 mm wide ie. top to bottom.


3. Decide how close you want to cut to the actual sentiment at each end and draw vertical pencil lines across the strip. Then, measuring carefully draw another vertical line outside of the measured strip- half the width of the strip away. So, my strip is 20mm wide and so the right hand line here is 10mm outside the lines I first drew. Then, measuring carefully again, bisect the panel you have pencilled inhorizontally - ie, exactly in half - which was 10mm again for me.


4.Draw, still using a ruler, lines diagonally across the two sections you just created in the photo above. Due to the wonders of maths, I now have a 90 degree angle in the inner part of the fishtail.


5. Trim off the straight ends (I do use a trimmer for this bit) and then carefully snip with small scissors along those diagonal lines you just drew.


6. All that's left is to use an eraser to rub away any pencil lines - and I coloured in the flower :)


OK, maybe it was really obvious and most of you do it already :( Of course, for more elongated fishtails, at step 3. you would just draw your vertical outside line further away. But you would still bisect the panel precisely in half across the middle of course.

A couple of other things, I just grabbed a quite hard pencil to draw the lines so the camera would pick them up - a soft pencil and a light touch rubs out much better! Plus, you could always do the pencilling and cutting on the reverse of the strip - I like to see what's going on though and a soft pencil and light touch works for me :)

If I want to layer the sentiment onto a background piece of contrasting card I just cut a slightly longer and wider strip, stick the fishtail on leaving a border round the three straight edges and then cut a V, usually without measuring. If you want to measure you only need the centre of the V in the fishtail - draw a line outwards from there and cut even snips on either side to the line.


Class closed for today - now go and play on the swings whilst muttering 'Silly old bat, we all do that trick!'

Edit: Am giggling here at comments already made about just eyeballing and snipping or even using a square or hexagonal punch - trust me, I have problems sticking a stamp on an envelope straight - plus I suffer from OCD :)

Di
x

Friday, 17 January 2014

Fuchsia, black and white

.............one of my favourite colour combinations. I remember, when I was a teenager, my Mum had a dress very similar to this card. She made it herself in a plain 'shift style' using material that you bought by the patterned panel - and it looked terribly elegant too!

Back to today's card, I was lucky enough to win some goodies from Nessa in those very colours,and a similar pattern, so this is what I made:
I used:

- 5" x 5" square black card blank

- SU 'Melon Mambo' backing card

- a piece of the paper from Nessa along with a glossy rose embellishment which covers one of the centre roses, lovely fluffy fuchsia and black twine with a rose charm - also from Nessa

- the sentiment was stamped with SU's 'Melon Mambo' onto a snippet of white card - first with the 'dotty' stamp from SU's 'Four Frames' set which I then punched out using SU's matching 'Decorative Label' punch. Sigh, in the process I smudged where I wanted to stamp the Elzybells sentiment so I stamped that onto another snippet of white card using Memento 'Tuxedo Black' and punched it using SU's 'Large Oval' punch. I know I'm being picky but it's such a shame that the oval on the frame stamp is just a bit larger than the 'Large Oval' punch - a missed trick by SU there I think :(

Thank you again Nessa - I love my prize and might send this card to myself as it reminds me sooooo much of my Mum :)

Di
x

Thursday, 16 January 2014

The Sample


I went to the Doctors, after ages you know,
to see if any light on me 'back' they could throw.

The place was stacked with patients galore,
any more and we'd have been sat on the floor.

This place is new, fancy and state of the art,
the best thing that happened was a baby did f*rt.

He grinned sweetly and his nappy did fill,
but to be honest I felt even more ill.

We also smiled sweetly, whilst not breathing in,
but even in pain I was hiding a grin.

Ages later my name was called and off I did go,
unto a hallowed sanctuary I didn't quite know.

I was poked quite quickly and not listened to,
and then I was asked 'do you need the loo?'

'Not likely Doc' I smartly replied
and so got sent home - with a 'bottle' to hide.

I looked at this small thing for a couple of days
then realised it had me totally amazed.

In all of my life I've never had to w**
in a little container - between you and me.

I looked on the 'net for hints and clips
and almost cried at the lack of wise tips.

Someone used a Ribena bottle in her quest,
then it came back as 'high sugar test' :(

At that point I really laughed out loud,
she was funny, crazy and amazingly proud.

So I looked round here for a container and funnel,
all sanitised of course - it were never dull!

The big day came and I locked the loo door
and did acrobatics - you needn't know more.

So off to the surgery I went the 'swag',
 all tucked safely away, in me shoulder bag.

The ground was covered in sheer black ice, a sight to be seen,
as I skated into the place like Torvill and Dean.

And all the while I had this thought in me head,
'if I fall right now I might as well be dead'.

If the bottle breaks on me way down -  oh no, poor me -
they'll say to themselves 'Another old lady smelling of wee'.

Sigh :( Still waiting for results BTW but feeling loads better.

Di
x