Showing posts with label josy rose. Show all posts

Friday, 15 October 2021

Len's Birthday - 2021

Today is Len's Birthday and boy was I stumped for a card idea! I have a few in the 'everyday' box of cards and one of those was perfect from Dudley - but I wanted something he hadn't seen before from me.

Eventually, Vicky's brilliant card that she made HERE popped into my mind and that was the starting point. She used a die set, won in the Snippets Playground, so I took it from there as I've had the same set of dies waiting since May to be used. I would have loved to do a total CASE of her card but that seemed like a step too far, so I came up with this:

 I used:

- 5.5" x 4.25" white card blank, side opening

- a snippet of Tonic 'Red Vellum' pearlescent card, trimmed to leave just a narrow border

- a snippet of Neenah 'Desert Storm' card, die cut using Poppy Stamps 'Fading Dot Border' die the trimmed to create a sort of 'tool peg holder board' along the top and bottom

- adhered that strip to a strip of the 'Red Vellum' card (which I'd cut in one swoop to the same width as the backing panel) and then trimmed it top and bottom to leave just a small margin. I did this step to allow me to move stuff around rather than adhere the 'peg' board straight onto the red panel

- then die cut a selection of woodworking tools from a snippet of silver mirri card, using the Sweet Dixie 'DIY Tools' set of dies and the Altenew 'Mini Blossom' baby die cutting machine - ready to work out the positioning of the whole card front

- checked the positioning and glued the 'tool peg board' to the Red Vellum' front panel and trimmed off both sides (from the back)

- die cut the sentiment from another snippet of silver mirri card using the Altenew 'baby' die cutting machine and an IO die from the 'Birthday Top Edgers' set Impressions and trimmed the bottom off to just leave a narrow border

- glued the whole front panel to the card front

- glued the sentiment just above the 'peg board' , using a glue pen

- added the die cut tools to hang down from the 'peg board'

- added a hot fix silver Josy Rose nail head to each corner

It's a super-appropriate card really as one of 'Handyman Len's' Birthday presents is yet another type of electric saw to play with.

I'd like to add this card into Darnell's NBUS Challenge #31 as it was a first outing for the set of DIY Tool dies.


Wednesday, 23 September 2020

Frog on a mono-cycle

Not very often you see a frog (a juggling one at that) on a mono-cycle! I recently thought I'd make a fun Birthday card for Joe, one of Len's great nephews, and this is the result:

I used:

- 5.5" x 4.25" white card blank

- slightly smaller (5.25" x 4") piece of plain green card stock - glued onto the card front

- then a very slightly smaller piece of white card which I set to one side for the moment

- stamped a 'cycling frog' onto a snippet of white card - using Memento 'Tuxedo Black' ink and a stamp from a (pre-loved but NBUS by the first owner and yours truly) set of Stampin' Up 'So Hoppy Together' stamps

- coloured the image using Pro Markers and then trimmed it down before mounting onto another piece of the same plain green card

- I'd already chosen the striped paper from an ancient Capsule Collection pad by Papermania (called Verde) and carefully matched the plain green card as well as the Promarkers to the greens (NB once again the camera lies and his tummy is the same lime green as one of the paper stripes!!)

- from the striped paper, die cut a flag using one of  MFT's 'Stitched Fishtail Flag Stax' dies

- at that point I could work out where to place the sentiment, using the Misti and also just placing the image panel in place without adhering it

- then stamped the sentiment using a stamp from Clearly Besotted's 'Say What?' set of sentiments, the Misti and Memento's 'Tuxedo Black' ink onto the piece of white card I'd set aside earlier

- adhered the fishtail die cut and then the image panel onto the white panel

- glued the white panel onto the green panel 

- final touch - added Josy Rose Hot Nailheads so the frog was now a 'juggling frog on a mono-cycle' (try saying that fast three times), plus three more nail heads just scattered here and there on the card front

Finished!

I'd like to add this into Darnell's current NBUS Challenge #18 as it was a first outing for the frog stamp.


Friday, 26 July 2019

Rudolph Days Challenge - July 2019

So here we  are in a heatwave - making Christmas cards! And of course. they're for a challenge I don't like to miss - it's ScrappyMo's Rudolph Days challenge, which you can find HERE.

And this is my entry:
I used:

- 5.5" x 4.25" white card blank, side opening

- piece of red mirri card, which is an eighth of an inch smaller on all sides (ie. 5.25" x 4"), glued onto the card front

- then I did the image panels using a really lovely stencil which a very sweet friend recently sent to me - it's by Kaisercraft and is called 'Flourish Tree'

- used white card stock, trimmed to 5" x 3.75" and placed the tree stencil onto the panel using purple tape - leaving room for a sentiment at the bottom of the panel

- used a Brilliance Dewdrop ink pad (Pearlescent Ivy) and an Inkylicious 'mini smoothie' foam pad to add the ink through the stencil 

- next I die cut the sentiment using a Tonic Studios 'Mini Moments Merry Christmas' die and Stick-It backed gold mirri card

- popped the sentiment in place and then ran the panel through the Cuttlebug again just using the die cutting plates but without the die - to adhere the sentiment properly to the panel (works a treat!)

- then glued the image panel on top of the red mirri card panel

- finishing touches are hot fix Josy Rose nail heads, gold stars and red round ones for 'berries' - and to pick up the red of the mirri card frame

Not a great photo - had to turn the card slightly to one side to pick up the mirri card shine, plus the camera was fighting bright sunshine so it's slightly out of focus.

Whilst at it I made four cards all the same. There were a good few bits and pieces to get out to make this card so (to me) it made sense to make four. 

The stencil is so lovely, thank you again my lovely friend! And, I spotted the sentiment die over at Elizabeth's blog the other week - and instantly knew I had to have it! So many people are to blame/thank for my ever-increasing craft stash.

It's sweltering here in Hampshire - thank goodness we got Dudley a puppy cut the other week!


Friday, 19 January 2018

Twofer Card Challenge #1

I was going to leave my entry for Darnell's new 'Twofer' card challenge until my usual Wednesday post. But, that's really very last minute, the cards are made already, and I'd cry if someone comes up with one of my ideas.

We have to use a 'feather' stamp and/or die on two different cards, for two different occasions - and you need a stamped or die cut sentiment to emphasise which occasion the card is for - easy huh?

After much pondering about just how to achieve what I wanted for the Christmas card I found a neglected set of feather stamps lurking here. And away I went with these cards as a result:

This is the stamp set I used - just the the smallest feather stamp on the bottom right:
Here are the cards on their own, with how I made them:
I used:

- 5.5" x 4.25" white card blank, tent style

- snippet of SU 'Certainly Celery' card for the backing layer, topped by a piece of paper from the 'Sweet Wishes' paper stack (free with a magazine ages ago) - glued together and set aside

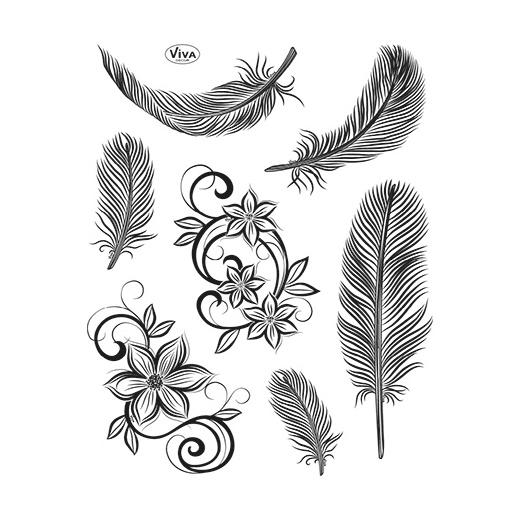
- then stamped the blue and pink feather onto a snippet of white card using a slightly curved feather from the Viva Decor stamp set, which has loads of lovely feathers in. Made in Germany but also available over here in the UK. The inks for the feather are Memento 'Summer Sky' and VersaMagic 'Pink Petunia' - chosen to match the patterned paper

- next, stamped the sentiment using stamps from the 'Hot Stuff' stamp set made by Clearly Besotted and SU 'Wild Wasabi' ink pad

- die cut the 'banner' using a die from the MFT 'Stitched Fish Tail Flag' Stax set

- then drew around the same die and cut it even bigger than the pencil lines using more 'Certainly Celery' card - the dies cut really close to the edge of the metal so I had to create my own wider border

- glued the two layers together, trimmed the top and added it to the layered green and patterned paper before then gluing them to the card front

Loved making this card, lining up the patterned paper was a challenge - and there's no way I could have stamped the sentiment without the Misti!

I thought about Darnell and her lovely little (not so little now) twin grandsons whilst making this - even though the card is for a 'one of each variety' :)

My Christmas card is next, and that's the one I'm really happy with as I stretched the Misti a little bit further. I've never seen this done before but someone will already have 'sussed' it I'm certain:
I used:

- 6" x 6" square white card blank, side opening

- then cut a piece of white card to an exact square - I think mine was 5" x 5" - just make sure you have it big enough to either die cut or trim down later as placing the feathers was a bit of an unknown in terms of the final size I confess

- I marked the centre and then lightly drew around a circular die using a soft pencil

- selected the same smallest feather stamp along with three different SU green ink pads and it was time to play

- set the card in place in one corner of the Misti (for some reason I tend to go for the bottom left corner but the principle is the same however you prefer to position your card for stamping)

- then placed the 'softly curled' feather stamp in place at 12 o'clock on the pencilled circle. A slightly curled or curved feather is likely to work best for this technique

- picked the feather up with the lid of the Misti and then stamped it onto the card using SU's 'Certainly Celery' - the lightest of the green ink pads I'd chosen to use

- to be honest, at this point I could already see enough about where this was going so I carefully erased the pencilled circle and 'winged it'

- leaving the stamp in place, I rotated the piece of card by 90 degrees to the left, inked up the stamp again and stamped another feather. I did this twice more for the other two stampings, rotating by 90 degrees each time (I went to the left but either way would work I'm sure)

- now I had a piece of white card with light green feathers stamped at North, South, East and West - or, 12, 3, 6 and 9 on a clock face

- let's stick with the clock face descriptions (sheesh photos would be easier but all the photo editing is crazy!)

- next I cleaned the stamp using my Shammy and placed it onto the card in the Misti, at 11 o'clock this time, so it was overlapping the first feather by about half and also following the curve in my mind. One could argue that I have a VERY curved mind to be honest!

- stamped the feather four times, as before, this time using SU's 'Wild Wasabi' ink and of course rotating the card by 90 degrees each time

- last of the stamping was to clean the stamp and replace it at 10 o'clock on the happily forming circle. Then stamped as before, four times using SU's 'Old Olive' ink and rotating the piece of card by 90 degrees each time - so the circle was complete

- and there we have it, one feather wreath, all thanks to the Misti

- I die cut the wreath panel using a die from the 'Stitched Squares' set by The Works, and mounted it onto a slightly larger square of red satin mirri card 

- using more of the snippet of red satin mirri card, I backed it with Stick-It and die cut a sentiment using the Presscut 'Merry Christmas' die and a bow using one of the Memory Box 'Crisp Bows' dies

- snipped the long string off the bow and added that to the bottom of the wreath and then popped the sentiment in place

- did my usual trick next of running the panel through the Cuttlebug using the embossing plates on either side of the panel and an embossing  folder (left folded) on top to give the right pressure without leaving any indentations on the panel

- glued the panel in place on the card front

- added a few Josy Rose shiny gold star shaped nail heads here and there on the wreath and also on the 'knot' of the red bow 

I think this could work well using gold/ silver stamping inks as well - of course, if you're really wanting to 'sit and peel grapes' then you could possibly emboss each set of four feathers as you go.

I did read a few folks saying how much fun they had being able to use stuff for both cards whilst it was all out on the desk. The only thing I used more than once was the feather stamp - and I guess the Misti, guillotine and die cutting machine!

It was fun to play and after such a long absence I did spot my mojo peeking round the corner of the craft room door - almost ready to return!

Thanks Darnell for the swift kick in the rear end! I hope to be back to play again - once I recover from this first marathon!


Sunday, 27 November 2016

Pixie's Snippets Playground - Week 257

OK, so that was a much easier week with the back issues and so long as I still rest when it tells me off (and cuddle up to the heat pad, which is my new best friend) am feeling loads better! Yay 😍

So, I made a snippets card, but nothing on it is on offer this week - due to a very generous prize donation from Viv which I can't wait to share with you. I do still have some wonderful donated prizes in the Toy Box, so please be patient if you sent goodies and I haven't yet offered them.

It was a bit weird to have a totally free hand with my Sunday Snippets card rather than be guided by the prize on offer, and this is what I made:
I used:

- 4.25" x 5.5" white card blank, tent style

- a panel of white card, die cut using a Lil' Inkers 'Stitched Rectangle' die and glued to the card front, with a snippet of white fun foam backing to whole panel to keep it evenly raised

- a selection of Christmas trees, punched using SU's 'Tree' punch and little snippets which were stored in the back of my favourite LOTV ''Frosty Christmas' paper pad

- glued the trees in place on the card front - tip, I arranged them first and then just popped a little pencil dot above the top of each tree to help to position them when I glued them in place - then rubbed the dots off of course!

- pink metallic Josy Rose nail heads on top of each tree

- stamped the word 'joy' using Brilliance 'Mediterranean Blue' ink pad and a stamp from the Personal Impressions 'Many Greetings' set

- final touch, just three pearlescent sequins

I'd like to enter this card for the current challenge over at Merry Monday #223 - Dark Blue, Light Blue & Pink.

Now for the weekly peek at the picks:
Preety showed the journal she's been working on, made using an up cycled diary. There are loads of wonderful photos and lots more detail over at Preety's blog - love it!

I think this is such a lovely card, made by Sue (Zouave Cards). Love the bold butterfly against such a pretty embossed background Sue!

This marvellous Christmas tag really caught my eye this week. Made by Pat - and aren't the wonderful citrus colours fabulous with the gold? So different and really striking.

Isn't this card adorable? I love the Memory Box 'Piestra Tile' die (don't use mine enough!) and those darling little pups - just so cute! Andrea skipped into the Playground waving this lovely card.

I love this card, made by Janice. It's so elegant and really eye catching - a great example of using white with navy and a touch of silver. Great for 'batch baking' too!

This is a great card, made by Kath. Wonderful papers for the blue backing and such a lovely image as well - all pulled together in Kath's very distinctive clean and fresh style.

Gloria came to visit this week, with this card and tag set. Isn't it brilliant? Love the tea set theme and stamping the deer and tree design onto each piece is so clever!

This is the sweetest Christmas card, made by Sandra. The little dancing poppet is just so cute and Sandra added lots of lovely embellishments and pretty paper as well - love it!

And last, but not least, here's another Christmas card with a fabulous image. Made by Hazel (Kbrandy4) and beautifully coloured then co-ordinated as well. 

That's my picks for this week - again, nine in total but as always I could have gone on for a lot longer.

We had 49 Playmates playing along last week (doubtless Thanksgiving kept quite a few of you occupied) and no new little friends joining us.

I did giggle a little while ago at something I spotted on line:
Anyone relate to this after their Thanksgiving turkey dinner? 😃😃😃

Prize draw time now and our winner of the Creative Expressions Sue Wilson Festive Collection 'Silent Night' die set is:
It's about 14 months since Liz last won a prize according to my records. She's almost always the first person to comment on my blog posts (Playground and any others that appear during the week) and rarely, if ever, misses a week in the Playground. Plus, I often choose Liz's fabulous work as a weekly pick - she's one of our die cutting queens and has been responsible for a lot of my 'must rush off and buy that' moments! So this win is well due and very much deserved.

Well done Liz! Can you please drop me an email with your address in and I'll post your prize off as soon as possible! My email address is on the right hand side bar.

As am sure you girls know, I always ask for confirmation of your addresses now - ever since I made a wrong assumption and we almost lost a prize!

This coming week's prize is:

A package arrived here out of the blue recently, containing the above items, very kindly donated by the lovely Viv - it's a single prize consisting of three parts. All from the Creative Expressions Sue Wilson Caribbean Island Collection, there's a St Kitts die set and two co-ordinating stamps called 'Tumbling Leaves' and 'Butterfly Trellis'. The lovely thing about this set, from me peering at the stamps and dies through their packets, is that the co-ordinating stamped images will be beautifully die cut using the largest die in the set. Or you can use the set to layer up the die cuts of course, just like Sue Wilson does. A really super prize - and Sue Wilson again I see!

The Snippets Challenge will run for one week and the Playground gates will close at 11am UK time on Saturday 3rd December. The gates will open again at midnight UK time on the same day.

A maximum of ONE entry and please say in a comment if you wish to play and be a possible winner of the prize. It's so much a 'set' that it will not be split up at all folks! Please also link back to the Playground in your blog post to be eligible for the draw.

Mr Linky is below - please let me know if you have any problems linking, it's easy for me to sort out so don't struggle on alone :)

Here's an important piece of news girls - our Playmate Brenda is having a fabulous Christmas giveaway of a Tattered Lace Crossover Machine over on her blog HERE.

I'm certainly entering into the draw as my beloved Cuttlebug is not working at full steam and I suspect it might be a bit worn out - bit like me really 😞

Have a lovely week! I'll still be rationing time at the desk - plus, I really need to get my rear end in gear for the Big Fat Man in the Red Suit! It's December soon, it's just four weeks to go until Christmas Day when this post appears - help!

Big hugs from Parsnip, and of course me -

Friday, 5 August 2016

Get your skates on - more Christmas cards

I know, with a further heatwave forecast, there I am making more Christmas cards in August! But, I wanted to enter some Christmas challenges, as well as make this card:
I used:

- A6 white card blank

- silver mirri card, trimmed to slightly smaller than the card front and glued in place

- turquoise, white and silver 'snowflakes' paper next - am sure this was a free gift with a magazine - trimmed and glued in place

- white Centura pearlescent card stock, die cut using Marianne's 'Ice Skates' die. It's really important to also emboss this die using a rubber mat so that all the details on the boots and skates show up properly - which they do in real life, I promise!

- glued the die cut in place onto the card front and added a shiny silver Josy Rose nail head in the centre of the bow

- the sentiment is by Craftwork Cards, layered onto a silver oval, punched using SU's 'Large Oval' punch then glued onto the card front

Given more time it would have been fun to add little laces and a bow to the boots, as well as silver 'blades' - next time maybe!

Made three cards practically the same whilst at it and would like to enter the following challenges:

Merry Monday 'Christmas In Summer' - I chose #120's theme of 'Skis, skates or sleds'

Craftyhazelnut's Christmas Challenge #292 - 'Anything goes'

Craftyhazelnut's Christmas Challenge Extra for August - 'Always anything goes'

Winter Wonderland for August - 'Gold/silver and/or embossed background' - I chose silver.

Di
x

Sunday, 5 June 2016

Pixie's Snippets Playground - Week 232

This is a scheduled post with my snippets card, a new Mr Linky for the coming week - and a new prize for the coming week as well.

As already said last week, I'm at 'teacher training' right now and will be doing a grand 'peek at the picks' round-up of last week (and this coming week) next Sunday, 12th June. At the same time, I'll also do the prize draws for last week and this coming week, so next week will be a bit of a bumper post!

I'll be around well before then but thought it best to keep to the routine of publishing the Playground results on a Sunday. Please note though, there's a new Mr Linky today and also a fresh prize to be won - so I hope you will find time to come and play on the swings. Parsnip is in charge and for a token fee is prepared to give you a push as well as turn a blind eye to any hooch etc. As Lynn (Linby) rightly said the other week - he really is a mercenary little bear! Which reminds me, I caught a few minutes of Lynn on Hochanda TV on Thursday and she's a blinkin' natural! Well done Lynn :)

So, here's my snippets card:
I used:

- 5.75" x 5.75" square white card blank, tent style

- patterned backing paper from LOTV's 'Up,Up and Away' paper pad, I cut into a fresh sheet for that layer - whimper! Trimmed it to just a smidgen smaller than the card front but didn't glue it in place just yet

- next I used a snippet strip of bright pink card to make a slightly wider band for across the centre of the main patterned sheet and punched one edge using a Martha Stewart 'Cherish' punch before gluing a snippet strip of gingham patterned paper across the band

- then I glued the band in place across the patterned paper and trimmed it flush at either side once dry, just using scissors and cutting from the back to ensure a straight edge. Only then did I glue the whole panel onto the card front

- next I die cut the 'Love' word using a snippet of bright pink card and an Impressions Obsession's 'Love' die

- that gave me a guide for whereabouts on the snippet of the clouds backing paper I needed to stamp the image - which I stamped using Ranger 'Archival Black' ink and an Impression Obsession stamp called 'Girl Swinging'. That cloud paper is so precious now that LOTV no longer produce paper pads, I wasn't gonna take any chances!

- then trimmed the cloud/image layer and stuck the 'Love' die cut along the top and the left hand side

- stuck the image layer onto a backing of bright pink card and added it to the card front using thin sticky pads. Probably stating the obvious here but when doing this, if you have a thicker layer such as the punched band I have across the card, make sure you don't add sticky pads where they will sit on the slightly raised layer, otherwise your image could look a bit 'bulged'

- added three round black Josy Rose nail heads to the image panel and bright pink round and heart shaped Josy Rose nail heads at opposite corners of the card front

I really love this stamp, it sums up the Playground perfectly and is very likely to feature on some of the little cards I enclose with prizes. Best to whisper that really as Parsnip is likely to be a touch sensitive if he feels he's been supplanted in any way!

And the 'Love' die is likely to be a favourite here too, I really do love it! I've seen the girl swinging stamp used with trees and branches but (partly as I wanted this week's prize to have two items in it) I thought the little girl swinging underneath the heart shaped letter 'O' would fit nicely - as if she's swinging from it :)

Quelle surprise! This week's prize is, as usual, linked to my snippets make - it's an Impression Obsession 'Girl Swinging' wood mounted stamp and an Impression Obsession 'Love' die - just like I used above:

The Snippets Challenge will run for one week as usual and the Playground gates will close at 11am UK time on Saturday 11th June. The gates will open again at midnight UK time on the same day.

A maximum of ONE entry and please say in a comment if you wish to play and be a possible winner of the prize. If you're only interested in either the stamp or the die then please feel free to say so and if you win I'd do a further draw for whichever item you don't want. Please also link back to the Playground in your blog post to be eligible for the draw.

Mr Linky is below - please let me know if you have any problems linking, it's easy for me to sort out so don't struggle on alone :)

Wishing you all a lovely week, I hope you haven't run too wild and I'll be around to see your entries very soon!

Di and, of course, Parsnip the 'Super Hero', guarding things for me - as well as selling Linby's autograph on the sly!!

x

Sunday, 6 December 2015

Pixie's Snippets Playground - Week 206

We're into December now - and it's also less than three weeks until Christmas Day. Bet you really needed to hear that didn't you?

This is my snippets card, deliberately kept clean and fresh:
I used:

- 5" x 7" white card blank, tent style

- a snippet of silver holographic card for the backing 'frame'

- a snippet of white card (and my white snippets just seem to grow rather than decrease in volume!), stamped using Memento 'Tuxedo Black' ink and a favourite wood mounted Penny Black stamp called 'Santa's hat'

- coloured the image using Pro markers

- embossed the image panel using a new die by Sheena Douglass called 'Frosty Ice Border', bought after seeing it on Liz's blog and also featuring it as a weekly pick 

- added the word 'joy' using Memento 'Tuxedo Black' ink and a stamp from the Personal Impressions 'Many Greetings' set

- trimmed the embossed image to size and adhered it to the silver layer

- tickled here and there using a clear Wink of Stella brush pen - the fur, the area that the hedgie is standing on and a few touches around the embossed border

- final touch - shiny silver Josy Rose round nail heads in each corner

Let's move straight onto the weekly picks:

I know that loads of you have already been over to Sarn's to comment on this fabulous card - such a beautiful scene, snowy hills, trees and falling snow - just perfect and I love it!

Despite being so busy, Jules found time to hop into the Playground with this stunning Christmas card - so rich and very elegant, and isn't that stamp amazing?!

I just love this tuxedo shaped money holder, brought to the Playground by Sonia! I've seen cards made in a similar fashion but never a money holder - hop over to Sonia's to see what it looks like open! Another clever creation from Sonia :)

What a wonderful Autumn card Elizabeth made - using plenty of snippets too. I love all the different shapes and shades of the foliage - a great card!

Stepper cards are always special, and this one made by Hazel is a really lovely example. I love how the images are perfectly complimented by the music paper - clever touch!

And last but not least, this really is a wonderful wall hanging, brought to the Playground by Vinita not long before the gates clanged shut! I love all the blues, sparkle and those fabulous flowers!

We have one new playmate this week:
Just look at this stunning card, brought to show us by CraftDee Donna. It's stunning, so rich - but on top of all the beautiful red, green and gold - what amazing colouring!

Welcome to the playground Donna and I do hope you come back to play again soon.

Drum roll for this week's winner of a Memory Box 'Grand Merry Christmas Script' die and a Penny Black 'Snow Family' stamp:
Congratulations April! A last minute entry, once again showing that it's never too late to come and play. It's May since you last won and I do still have your address April and will post your prize off to you as soon as possible.

Time now for the prize for this coming week - it's a Penny Black 'Santa's hat' wood mounted stamp and/or a Sheena Douglass 'Frosty Ice Border' embossing folder of course. Rubbish photo of the prize, especially the folder as one side is black (makes it easier to spot the right way up though) and what's great is that it's a generous size, 5" x 7":

I'm very much aware that right now a good few of the prizes are Penny Black stamps. Whilst I, and many others, do love 'cute' - the Penny Black stamps won't appeal to everyone and that's why I'm sort of doubling up a bit and adding something else into the prize that you might just want anyhow.

The Snippets Challenge will run for one week and the Playground gates will close at 11am UK time on Saturday 12th December. The gates will open again at midnight UK time on the same day.

Maximum of three entries and please say in a comment if you wish to play and be a possible winner of the prize. Do say if you only want one or other part of the prize (the stamp or the embossing folder) but both are up for grabs as one prize of course and will only be split if the first name out only wants one or other of the items, in which case I'll do a second draw for the other part of the prize. And please also link back to the Playground in your blog post to be eligible for the draw.

Mr Linky is below - please let me know if you have any problems linking, it's easy for me to sort out so don't struggle on alone :)

I certainly wish it was a lot longer than three weeks until Christmas, have had a little setback here and rest, rest and more rest seems to be the best that can be offered right now.

Have a good week! I certainly hope mine improves - unable to craft at all so apart from Tuesday's Cuttlebug Mania DT card absolutely nothing is made or written up. Well, I lie, there is a card made which would be good for next Sunday's snippets post - even though that wasn't the initial plan. But, so long as I'm at home I'll be keeping tabs on the Playground so do come and play :-)

Di and of course, Parsnip!
x

Friday, 4 December 2015

Merry Monday Challenge #182 - 'Birds'

The current challenge over at Merry Monday is 'Birds' - and I really had fun making my entry:
I used:

- 4" x 5.25" white card blank, tent style

- image stamped onto white card using Memento 'Tuxedo Black' ink and Penny Black 'Greetings from the wise' stamp

- coloured the image using Whispers brush markers then added clear Wink of Stella to the fur on Mr Owl's hat and some Glossy Accents to his eyes

- next came some jiggery pokery selecting a round die from the set of Tonic Studio's 'Circle Layering' dies and cutting an aperture in another piece of white card stock

- took the card with the round aperture in and ran it through the Cuttlebug using the Tim Holtz 'Wood Grain' embossing folder, making sure the aperture was centred on where the embossed 'knot hole' is

- trimmed the embossed piece to size, just slightly smaller than the card front and making sure the round aperture was just a smidgen to the right hand side

- adhered the owl image to the back of the aperture and then stuck the whole piece to the card front

- sentiment was stamped onto a snippet of white card using Memento 'Tuxedo Black' ink and a stamp from the Personal Impressions 'Many Greetings' set

- then die cut the sentiment using a Spellbinders 'Nested pennant' die and stuck it in place using red line tape

- final touch, a platinum silver Josy Rose nail head at one end of the pennant

Am still adding any Christmas cards I make to this year's total. Had thought not to count them in and use them to kick start next year but decided that wouldn't be enough of a driver come 1st January when I begin the 12 per month target again. I know, it's all quite academic really :)

Di
x


Sunday, 9 August 2015

Pixie's Snippets Playground - Week 189

Well, that was a fun week! HUGE thanks to Eve for helping out by doing the commenting and also selecting the picks on her travels around your blogs. It did give me a lovely rest, for which I'm very grateful!

Eve has asked me to say this: 

I would love to thank everyone for their warm welcome and such kind comments. I have
really enjoyed seeing everyone's fabulous makes BUT my wish list has now got A LOT 
bigger!!! 
 
And then she added this, which made me giggle: 
It must be torture for you (ie, me, Di )each week to sit on your purse!!


Oh how true is that!! And how often do I spot something in the Playground and rush straight off to buy one for me and one for the toy box :)

Anyhow, here's my snippets make for this week:
I used:

- 5" x 7" white card blank - with about quarter of an inch trimmed off the height to fit the embossed layer on nicely 

- a snippet of SU 'Mossy Meadow' card stock as a backing layer

- a snippet of Neenah 'Desert Storm' card stock, which was embossed using a Couture Creations embossing folder called 'Compassionate' and then trimmed down just a smidgen

- the background for the flowers was created using a snippet of rose pink card stock, and another snippet of Neenah 'Desert Storm'

- using a couple of smaller snippets of SU 'Mossy Meadow' I cut two Memory Box 'Prim Poppy' die cuts, having first backed the card with Stick-It sheet

- next I die cut another two lots of 'Prim Poppy' flower heads using a rose pink snippet of SU 'newsprint' DP which was also lurking in the snippets folder

- trimmed and popped the poppy flower heads onto the die cuts, prior to adhering the stems/flowers to the panel

- wrapped a teeny snippet of pink organza ribbon around the panel and tied a knotted piece where the flower stems crossed

- adhered the panel to the card using thin sticky pads

- finally, added three Josy Rose nail heads in the bottom right hand corner

Right, now onto the weekly picks, chosen by Eve. I know that, like me, Eve went through quite a bit of angst when finalising her picks of the week. What really struck me was this - I'd been quietly doing my own picks alongside Eve and she had no idea which entries I'd picked - and when her list came through by email late yesterday morning I was astounded at how close we were in our final choices. Which, does reassure me that I must be doing something right!

OK, so here are Eve's picks and her comments:


Laurie. Wow! what a stunner, very elegant and stylish and that die is on said wish list now!!
 
 
Pat. Such a beautiful scene created with lots of different techniques and I love it!
 
 
Carol G. 'Smooshing' a fabulous technique but the colours are all in the right places - it 
looks just like a steamy bath!!
 
 
Diane H. Another fabulous scene created with such sweet images and coloured beautifully.
 
 
Kate P. All of those teeny tiny pieces - a work of art! I would lose a piece under the table!!
 
 
ScraPpamondo.  Another stunning creation but to use a box is taking the snippet level up a
notch! And those flowers are just gorgeous.

So, there you have six picks from Eve - and, once again, HUGE thanks from me for making my day to day work in the Playground so much easier this week!


And we also have two new Playmates:
Ruth brought us this card to show and I think it's great! So clever to use the white circular snippet fixed temporarily to the card front, then stamped with the lovely tapestry peg stamps before lifting the circle off and reattaching it using sticky pads. An idea certainly worth remembering for future use! Plus, Ruth is a friend of our Liz and this was her very first blog post - do please hop over to say hello.

This is such a super card for a chap - made by Zoe, I love the attention to detail, and such a neat trick to roll down one corner of the image layer. Isn't the stag magnificent too -  just perfect for a male card.

We do have another Prefect waiting in the sidelines for her turn in September - as she's one of a Playground scallywags I'm already beginning to doubt the wisdom of accepting her lovely offer :) I'm joking 'mystery Prefect!).

But, for now we're back to normal and we'll remain so over the coming few weeks - I already cleared up a load of choklit papers from the wheeling and dealing in contraband behind the bike shed and even had to wipe Parsnip's mouth, nose and ears. He'd found the hidden papers and had been having a good ole nose and lick around! Not a good look on a snowy white bear :)

It's time now to choose the winner of that gorgeous 'SU Painted Petals' stamps set, so kindly donated by Eve. And the winner is:
It's 38 weeks since your last win Pat, so I expect you'll be a happy bunny - one of the weekly picks and also the prizewinner :) I still have your address here so will post your package off ASAP!

Here's the prize for this coming week:
It's a Couture Creations embossing folder (5" x 6.75") called 'Compassion', plus a Memory Box 'Prim Poppies' die, both are just like I used on my snippets card today. Ha! If you look closely you'll see my reflection in the cellophane packaging :) I'd only recently come across folk using the 'Prim Poppy' die and hadn't realised it was around as far back as 2012, late to the party as usual! Plus, the 'Compassionate' folder had been languishing in the toy box as a prize for ages - I was so pleased to find how well the folder and the poppy die go together.

The Snippets Challenge will run for one week and the Playground gates will close at 11am UK time on Saturday 15th August. The gates will open again at midnight UK time on the same day.

Maximum of three entries and please say in a comment if you wish to play and be a possible winner of the prize. Also, if you already have or aren't really interested in either part of the prize but still would like to play for one of the items - please say so and if your number is picked as the winner then I'll do a second draw for the other part of the prize. However, the prize IS for both items unless I'm told otherwise in a comment. Do remember that you should also link back to the Playground in your blog post to be eligible for the draw.

Mr Linky is below - please let me know if you have any problems linking, it's easy for me to sort out so don't struggle on alone :)

Harrumph, my little break is over so it's back to commenting and picking for me this week - but I'm so grateful to Eve!

Di and of course, Parsnip!
x