Friday, 8 May 2015

Little notebooks

Around Easter time I finally sent a notebook (that I prettied up ages ago) to our DIL in Germany, covered with paper and decorated with ribbons down the spine. Of course, two little girls went wild over it so I dollied these very similar ones up to send:
I used:

- A6 sized, lined, paper mache note book - details of supplier are below

- papers from Craftwork Cards ''Kitsch Collection'

- owl and elephant toppers from the same collection - and a patchwork flower one on the back cover

- Papermania dome stickers for the girlies names (Mia and Livi)

- then I trotted off into Hobbycraft clutching the notebooks to find the best match of gingham ribbon I could to just knot around the spirals

The notebooks can be had from from eBay HERE. The original place I bought mine from on eBay is now out of stock so these are a tiny bit more expensive. I know that I was given a tipoff where else to find the little books to cover, needless to say I've lost the details!

No doubt they will be filled with scribbles in no time, but they're such fun to do anyhow :)


Di 
x

Wednesday, 6 May 2015

Get well soon

A buddy had an op recently (you know who you are chick!) and, once she was safely back home, I made this card to send:
I used:

- 5" x 5" square white card blank

- backing paper from Bo Bunny's 'et cetera' collection

- the image is SU's 'Too Kind' layered flowers set - which I struggle with a bit as they aren't clear like some of the newer sets, so there was much huffing, puffing and use of the SU Stamp-a-ma-jig! I stamped using SU's 'Old Olive', 'Pumpkin Pie' and 'Tangerine Tango' inks

- the sentiment is from the same set, stamped using Memento 'London Fog'

- then I die cut the image using a Spellbinders die from the 'Labels One' set and just ran a ball tool round the other side of the die cut before removing it from the die. Much quicker than setting up the tan mat if the die is fairly simple :)

- final touch is a little butterfly, die cut/embossed using SU's 'Beautiful Wings' embosslits, a snippet of SU 'Old Olive' card stock and three little pearls added down the body

Hope you're still improving - and doing those exercises :)

Di
x

Tuesday, 5 May 2015

Less is More - Week 222 - Colour

Yikes, the current challenge over at Less is More is based on the colour wheel:
And, the twist is that you have to use colours which are opposite to one another.
After lying awake in the early hours of Sunday morning, unable to sleep, I came up with an idea. Back in August 2011, I posted this photo on here:
It was a double poppy (also known as a Peony or Shirley poppy). Much more vibrant in real life and Len had rescued it from a sports club he was in at the time as it would have been destroyed in some ground work that was to be carried out. We nurtured it for ages and finally it bloomed - and that's a bee you can see - going totally scatty over the pollen :)

Sadly, Fickle Phoebe as we called her, didn't reappear the following year - nor did the seeds we collected come to fruition. But the fabulous plummy/purple flower has stayed in my memory ever since - much deeper and vibrantly coloured in real life as I already said.

So, I came up with the idea of veering away from red and green for the poppies on this card and instead went for the paler of the two greens and the plummy/purple opposite on the colour wheel:
I used:

- A6 white card blank, tent style

- white card stock, embossed using SU's Textured Impressions 'Square Lattice' embossing folder then adhered to the card blank using Collall All Purpose glue

- next I used a Spellbinders Shapeabilities Die D-Lites 'Poppy Patch' die - cut from a snippet of SU's 'Pistachio Pudding' a snippet of plummy/purple card with the poppy heads snipped off the purple die cut and added on top of the green die cut. Fiddly but made easier by using Stick-It adhesive sheet when die cutting the poppies

- the sentiment is from SU's 'A Word for You' set, stamped using Memento 'London Fog'

- then I just trimmed the image panel into a square and backed it with the same green and plummy/purple card stock before adding it to the card front using thin sticky pads

It's a wrap!

Di
x


Sunday, 3 May 2015

Pixie's Snippets Playground - Week 175 and 176

And it's now May in the Playground! Don't time fly when you're having fun?

Len's Uncle Charlie passed away recently and this is the card I made to send to his family:
I used:

- 5" x 5" square white card blank

- green backing card from the snippets folder

- Penny Black 'Poppy Poem' stamp, stamped using black Archival ink and coloured with Tim Holtz Distress inks ('festive berries', 'forest moss' and 'gathered twigs') plus the very fine end of a matching green Whispers marker. I just touched the distress markers here and there on the petals, buds and leaves then dragged the colour out using a water brush. Added a tickle of light grey Pro marker as shadow/grounding

- the sentiment was stamped using SU's 'Thinking of You' sentiment from their 'Sincere Salutations' set and black Archival ink

Although the 'Sincere Salutations' sentiments set is discontinued, and has been for some time,  SU's 'Wetlands' set (still available) has three sentiment stamps in it, which are of similar fonts (scroll and block capitals).

Given Uncle Charlie's Armed Forces background, which included years as a Prisoner of War in Poland, the poppy seemed so appropriate. He had a long (94 years), full and interesting life for sure!

Onto this week's picks now:

Kate was first into the Playground last week, and went straight onto my list of possible picks. I do whittle the list down a bit later in the week, but this gorgeous bauble card so deserves to remain a pick! I've had to sit on my hands to resist buying the stamp and co-ordinating die!

I truly think this is one of the very best male cards I've seen for a long time, brought to us by Eve (who is currently recovering from pneumonia!). The dogtooth paper is such a perfect background.

Kath almost caught me out here with this beautiful card - the background is DP, I thought Kath had stamped it until I read the list of materials properly. I wish there were more gorgeous papers like this one to be had!

Sarah (Craft Nerd) showed us a few cards in one blog post, with the most darling Easter scenes. What absolutely stunned me was the intricacy and smallness of the details she added - especially the fabulous little flowers. The flowers on this card actually have a micro bead in their centres - now that really IS working small! Do please hop over to look at the close-ups!

I just love this scene that Lynn (Linby) created! And, some of the die cutting was actually done using an old brochure - very imaginative and a great success too.

I totally adore this card, made by Carol L. Of course, it's pink for a start, uses those lovely stitched dies and the background is so beautifully water coloured. But, it's how Carol used the Memory Box 'Prim Poppy' die that really makes this card stand out for me - firstly using striped paper but also splitting up two die cuts and arranging them so well.

So those are my picks, I hope you like them and that they give you some inspiration. I do try to give everyone a little turn to be a weekly pick, but sometimes there are perhaps more appearances by some playmates - and that's because it would be a shame to leave them out :)

And, we have three new playmates this week:
Firstly, Joan W hopped in with this lovely Christmas card - using one of my all time favourite images. So pretty!

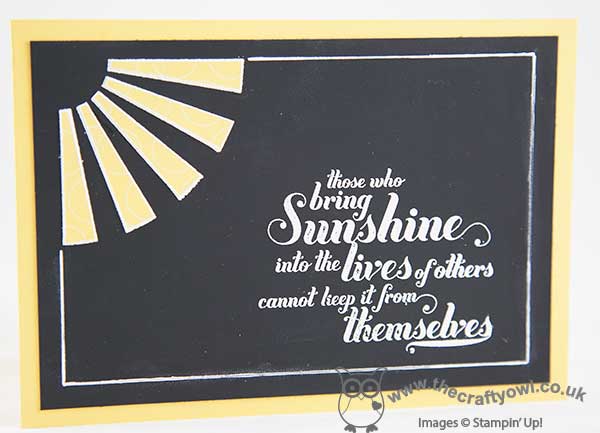
And then Joanne arrived, immediately after, waving this gorgeous sunshine card - I love the design and such a great sentiment too!

And, much later in the week, Kikka Cards brought this adorable trio to share - so cute!

Welcome to you all, and I hope you come back to play with us again!

Straight onto the draw for last week's prize of the Cuttlebug 'Pinking Stitch' embossing folder and the Joanna Sheen Signature 'Daffodils' die. Gosh this was a popular prize, one of you really wanted just the embossing folder and 27 of you would have loved both parts of the prize. And, drum roll, the winner is:
Well done Carol, it's quite ironic really as you use your dies and embossing folders so beautifully, plus once again (purely coincidence) a pick of the week got chosen by Mr Random too! I do have an address for you from a previous win, but can you please confirm that it's right? (di_wray@hotmail.com)
 
So here's this coming week's prize, which isn't connected to my snippets card for once. There are two chances to win a Sheena Douglass 'Simply Sweet' stamp set. Those of you who are familiar with Sheena's 'Paint Fusion' technique will know that the general idea is that you stamp the 'bones' of an image and then add the extra detail using brushwork techniques. The sets come with stamps, full instructions and a laminated practice sheet. A chance to get arty without having to start right from scratch :)

This time, the Snippets Challenge will run for two weeks and the Playground gates will close at 11am UK time on Saturday 16th May. The gates will open again at midnight UK time on the same day.

I'm sorry to mess folk about but we need to be away for Uncle Charlie's funeral for a couple of days at the end of this coming week as it's at the other end of the UK to where we live. That means I won't have time to do the write-up on Saturday as I usually do, and will have comment catching up to do as well. So it seems best to let this current challenge run over two weeks instead of just the one.

I'm leaving Parsnip in charge and he has my mobile number on speed dial! And Sarn will have her prefect's hat on - I hope :)

Maximum of three entries (over the two week period) and please say 'Yes please' (or similar) in a comment if you wish to play and be a possible winner of the prize. As I already pointed out, there are two of these Sheena Douglass stamp sets to be won (both the same) so there will be two winners.

Mr Linky is below - do please let me know if you have any problems linking, it's easy for me to sort out so don't struggle on alone :)


Di, and of course, Parsnip!
x

Friday, 1 May 2015

A Christmas card in 20 minutes or less

I'm one of the world's slowest crafters so my entry for this week challenge over at Crafty Hazelnut's Christmas Challenge (20 minutes or less) almost didn't happen.

I had no pre-stamped and coloured images, couldn't make my mind up when I looked at all the LOTV pre-coloured Christmas toppers I have and was in the process of just putting things away when I spied a sheet of Christmas Penny Black Stickeroos. Set the clock ticking and off I went - with this very simplistic looking card as a result:
I used:

- a piece of card stock with a very light background of snowflakes, trimmed, scored and folded to DL size

- three Penny Black Stickeroos from the 'Christmas Sparkle' sheet. Tip, I mounted each one onto spare card stock before trimming to size - and also re-rounding the corners of the main image with a corner punch

- stuck all the toppers in place using thin sticky pads

- added three sparkling diamante snowflakes as a finishing touch

Stopped the clock at 19 minutes. Told you I was slow :(

Ha! If I'd added in how long it took me to decide what to do and get everything out ready then you could probably add another 30 minutes that that time!

And this is another card to add to Craftyhazelnuts Christmas Challenge Extra, where it's always 'Anything goes'

Di
x

Thursday, 30 April 2015

Lili Of The Valley free Worldwide postage

I know a few of you girlies love Lili Of The Valley (LOTV) products, I just got this email from them:
It's Worldwide postage too :) This is their website link.

And no, I don't get paid for pointing anyone in their direction - shame though :(

Di
x

Wednesday, 29 April 2015

Less is More - Week 221 - include a tag

Over at Less is More, this week's challenge is to 'include a tag'. For once, inspiration struck almost immediately - although it took me a couple of days to get round to making this card:
I used:

- A6 white card blank, tent style

- a panel of white card, embossed using Cuttlebug's 'Swiss Dots' embossing folder and glued onto the card front using Collall All Purpose glue

- a snippet of white card, stamped using Memento 'Tuxedo Black' ink and an Elzybells stamp called 'Rose bunch'

- coloured the image using Whispers markers plus a very light grey Pro marker for the shadows

- then die cut the image using a die from the Lil' Inkers 'Stitched Rectangles' set

- stamped the tag using a tag stamp and wording from Elzybells 'Mini Tag Set'

- trimmed round the tag with small scissors then punched a hole in the top of the tag using Fiskars smallest hole punch

- threaded some thin twine through the top of the tag, carefully poked a couple of holes either side of the knot in the ribbon bow on image and tied the tag in place

- added the finished panel to the card with thin sticky pads for more dimension

I like the fact that the tag swings rather than being stuck down :)

And shame on me, that was a first outing for the discontinued 'Rose bunch' stamp by Elzybells.

Di
x

Tuesday, 28 April 2015

Cuttlebug Mania Challenge - Stamping

This fortnight's challenge over at Cuttlebug Mania is 'Stamping' - even just a stamped sentiment will do. We just ask that you use a manual die-cutting/embossing machine and also let us know which product(s) you used. The sponsor is Crafty Individuals, who are giving away two of their fabulous stamps, wahoo!

For my DT card I incorporated stamping, of both a sentiment and images, embossing and die cutting:
I used:

- 6" square white card blank

- a snippet of 'Desert Storm' Neenah card (this is a gnat's whisker from being identical to SU's 'Crumb Cake' BTW), embossed using an ancient Quickutz embossing folder called 'Flowers' and then adhered to the card

- next I die cut three layers using Spellbinders dies from the 'A2 Distressed Rectangles' set to form a frame, in which the sizes decrease from the outside in

- I adhered the green SU 'Mossy Meadow' frame straight onto the backing but then popped the other two layers (SU 'Hello Honey' and the orange layer which came from the Echo Park 'Hello Summer' paper pad, using thin sticky pads. I'd already stamped a few feathers round the orange frame, which was destined for the top layer, using SU's 'Mossy Meadow'

- the stamps I used are from SU's fabulous 'Four Feathers' set - stamped onto Neenah 'Desert Storm' using SU's 'Hello Honey', Tangelo Twist' and 'Mossy Meadow' ink pads

- they were then die cut using the matching dies before being popped into the frame with the quills crossed to form a point where I could then tie some twine in a bow

- the sentiment is from the Hero Arts 'Truly  Appreciated' set, stamped using SU 'Mossy Meadow' and then die cut with one of the smaller 'Distressed Rectangles' dies. The die set comes with frames which all fit nicely inside one another - plus two longer dies which are just perfect for sentiments, one quite long and the one I used here

So, it's a nice easy theme over at Cuttlebug Mania this week - why not come and play?

Di
x

Monday, 27 April 2015

Rudolph Day - April 2015

It's Rudolph Day again girls - and we're almost into May, so why not make a Christmas card (or a few) and pop over to Scrappy Mo's where you can join in the fun, get a start on your Christmas cards AND be in with a chance of winning a gorgeous Memory Box die. I made two the same of this one:
I used:

- 6" x 6" square white card blank

- Christmas Red paper as the first layer - this was such a bargain too. Down near where Julia of WOYWW lives there's a wonderful craft shop called Kraft Crazy, run by the lovely Tracy. When I've been to the shop my first priority is to stock up on plain A4 sized card stock - much of which is just 20p per sheet and it's also great quality :)

- I used snippets and a couple of almost full sheets of paper from the Marianne Design 'Merry Little Christmas' paper pad for all the patterned paper on this card

- first I shuffled all the papers and snippets until found a combination which I like and first of all added a square of the reindeer border paper to the backing layer of plain red

- next stamped, using Memento 'Tuxedo Black' ink and the word 'Noel' from Woodware's 'Huge Noel' stamp set, onto plain white card stock and at that point also added the extra little sentiment from the same set (me not as daft as I look!)

- then stamped the large letters I wanted onto various snippets of paper from the paper pad and cut them out. Little tip, I use very small Fiskars embroidery scissors for fussy cutting (kept just for this purpose) - plus, if you look at the letters themselves, a couple had fully 'enclosed' areas to snip out (in the bauble and also the letter 'e'. I learnt (the hard way, some time ago) that it's best not to try and poke a hole to start off by using the point of your scissors or (say) a pokey tool - that's a sure way to crinkle the paper or even slip to one side and cut where you don't mean to :( Instead I use a hole punch (the size might be a full 'file punch' size or maybe a smaller diameter one) just to punch a neat circle as a starting point and then trim from there outwards

- stuck the letters onto the whole word then trimmed it to size and backed it with more red card stock before I glued it onto the assembled card. This is where Collall All Purpose glue wins hands down for me as it gives you some 'wiggle' time - especially when dealing with a background which has straight printed lines of script!

Two more for the box here - and you can play until late on Thursday over at Rudolph Day - why not combine your snippets card with a Christmas card?

Di
x

Sunday, 26 April 2015

Pixie's Snippets Playground - Week 174

Well, that week zipped past at double speed! Possibly due to us having some sunshine and trying to make the most of it.

Let's crack straight on with my snippets card for this week:
I used:

- 4.5" x 6" cut to size white card blank

- a snippet of white card stock, embossed using Cuttlebug's fabulous embossing folder called 'Pinking Stitch'. I first spotted this folder over at Darnell's I think :)

- then I stamped the sentiment for fear of ruining the card when it was all done - used Memento 'London Fog' ink and a sentiment stamp from SU's 'Sincere Salutations' set (sadly discontinued)

- little snippets of card stock in two shades of yellow and one of green were then used to die cut the daffodils using Joanna Sheen's Signature die called 'Daffodils'

- then I added the entire green die cut to the card, snipped off the paler yellow flower heads and bud and just glued them carefully on top. Finally I snipped out the two 'trumpets' from the slightly darker yellow and added that as a third layer which gives some nice dimension. I think maybe I could have gone for a deeper yellow, although the difference is more obvious in real life (as is often the case with taking photos of cards, sigh)

- lastly I just added a little line of shadow/grounding underneath the daffodils using a light grey Pro marker

Bit late now for this year but I think this design (with a different sentiment) would make a good Easter card.

So, onto this week's picks:
Jane came up with this great card, perfect for Scrabble enthusiasts! I love it - and was even more tickled yesterday when I hopped over to copy this image from Jane's blog and read a comment that Liz C is looking for Scrabble tiles to print!

I made this 90th Birthday card a long while ago - the details can be found HERE - but the point of showing it is really the Scrabble tiles spelling out 'Nanny':
Downloaded the Scrabble tiles from the internet but didn't keep a note of where I found them. However, I just did a search and found what could be just the thing HERE - right down to the wooden effect.  I printed these tiles onto glossy photographic paper - way back in 2010! Hope this is useful girls!

And speaking of Liz C, this card above is one of my picks this week. I love the simplicity of the design (very Less is More) and so clever to make the background by die cutting cloud shapes out of blue card stock and then mounting it on top of white!

I'm focussing a bit on 'clever' this week - and there's a little detail on this great card made by Andrea (KandA) that certainly falls into that category. See the word 'star'? Well, those letters are from the leftovers of a Memory Box 'Grand Merry Christmas' die cut - what a bit of 'thinking outside the box'!

Darnell never fails to come up with a clever idea does she? Firstly I do love this snippets card - and the icing on the cake is how Darnell has shaped the top of the card to follow the curve of the embossed washing line. I like this idea - a LOT.

a2z April number 2 Now here's not only a gorgeous card, but also a really neat little trick - brought to the Playground by Greta. See those butterflies - I was so intrigued to know if they were pre-made ones but nope, Greta finished them off perfectly by wrapping hemp cord around the bodies with the ends used for antennae. How clever is that for creating a very realistic butterfly then?

I do so love this wonderful scene, created by Laurie. Really clever to create such an amazing scene, with so much depth, out of snippets and a variety of dies.
 
And finally, I wanted to show you this beautiful Wedding Anniversary card (and what looks like black is in fact silver), made by Pat. It's just perfection and great use of snippets too - the clever part for me is how Pat combined all those pretty dies to create such a gorgeous card.

Oh you girls really are all so very clever - I learn something new several times a week from you.

And now for the draw for the Woodware 'Bubble Bloom - Carol' stamp set - plus, a packet of white Card Candi. Our winner is:
Alison nipped in at almost the last minute - which goes to show that it's never too late if the Playground gates are still open :) Alison is one of our newer playmates, so, well done on your first win! Can you please let me have your address so I can post your stamp set and the card candi off to you (di_wray@hotmail.com)

And of course this coming week's prize, as often happens, is linked to my own snippets card:
Yup, it's a 'Pinking Stitch' embossing folder (plus it comes with a narrow straight row patterned embossing folder) - and a Joanna Sheen 'Daffodils' Signature die.

The Snippets Challenge will run for one week and the Playground gates will close at 11am UK time on Saturday 2nd May. The gates will open again at midnight UK time on the same day.

Maximum of three entries and please say 'Yes please' (or similar) in a comment if you wish to play and be a possible winner of the prize. As there are two items, you might only be interested in one of them (you may already have the embossing folder for example). If so then do say so in a comment and I'd do a second draw for the other item if you win - but, both items are up for grabs as one prize.

Mr Linky is below - do please let me know if you have any problems linking, it's easy for me to sort out so don't struggle on alone :)
 
Do remember that it's Rudolph Day right now over at Scrappy Mo's!  It runs until Thursday 30th April and is a great way to get a little head start on those Christmas cards..

Di, and of course, Parsnip!
x

Friday, 24 April 2015

Lace and a butterfly card

I used:

- 5" x 5" square white card blank

- snippet of raspberry coloured card stock for the backing layer

- a snippet of 'Cath Kidston style' (well, to me at least!) wrapping paper, bought from a local supermarket and leftover from wrapping a gift ages ago. Little tip, I mounted the square of patterned paper onto white card stock with adhesive sheet first of all, and then trimmed it to the size square I wanted 'cos the paper on its own is shiny, not very thick and it's easy to crease - I also thought that glue might show through

- a snippet of white card stock for the 'lace', punched using a Martha Stewart 'Deep Edger Doily Lace' punch then mounted onto the backing and trimmed to width with scissors before being added to the main card blank. It's much easier to do this than  to try and measure and position a strip accurately after the backing is stuck onto the card

- die cut the double layered butterfly using pink and raspberry snippets with Memory Box dies ('Isabella' and 'Pippi') and popped them onto the 'lace' band

- didn't even add a sentiment

Told you it was simple :)

Di
x

Wednesday, 22 April 2015

F is for........................

Over at Craftyhazelnut's Christmas Card Challenge the current theme is 'Something beginning with F'.

So, folks, I present to you - Flying Father Christmas and Fearless Furry Fido with Fairy lights in a Flurry of Frosty snow with a Foiled sentiment - snigger :)
I used:

- 5" x 7" white card blank, tent style

- a layer of SU's 'Real Red' card stock from the snippets folder

- a snippet of white card stock, embossed using Darice's 'Snowflake Background' embossing folder

- the front of a 2014 Christmas card from the up cycling box. The card was circular with a straight piece at the spine and a very narrow straight piece along the bottom edge. It was just a case of finding the right sized circular die in the Tonic Studios 'Circle Layering' die set. I totally love this set of dies, there are 14 in total ranging from the largest at 14cm in diameter down to the smallest at 2.5cm in diameter - plus they come in a durable plastic package with their own magnetic sheet as well

- final touch was just a red, foiled with gold, sentiment topper - which I'm sure dates back to when Lakeland Limited sold a few craft supplies!

And this card is also for Craftyhazelnut's Christmas Card Challenge Extra for April, where it's always 'Anything goes'.

And I just realised that it's right in line with the current challenge over at Merry Monday #125 - Use a cat or a dog. Wahoo, three challenges with one card!

Di
x

Tuesday, 21 April 2015

Less is More - Week 220 - 'Up, up and away!'

The current theme of 'Up, up and away' over at Less is More has loads of potential this week. I hauled out ordinary balloon stamps, hot air balloon stamps and dies, birds, butterflies, insects - you name it, I checked it out! Then I remembered a 'never before used' stamp - about four years old I think - and this was the result:
I used:

- 6" x 4" white card blank, tent style

- LOTV rubber stamp called 'Blowing Bubbles', stamped using Memento 'London Fog' ink pad and coloured using Pro markers

- the sentiment is also LOTV, from their ever so useful set called 'General Greetings - Small', stamped using Memento 'London Fog'. I did remember to stamp the sentiment before spending time colouring :)

- rounded the bottom left corner using We Are Memory Keepers Corner Chomper

- I did this card as a one layer card (how that would have scared me at one time before playing in Less is More) - and of course the Pro markers bled through the card a bit. I just cut a slightly smaller panel of white card, rounded one corner in keeping with the card front and stuck it inside the front

Simples! I like the idea of the bubbles blowing up, up and away, as a change from all the other things I first had in mind :)

Di
x

Sunday, 19 April 2015

Pixie's Snippets Playground - Week 173

Time for another weekly round up in the Snippets Playground - and a huge thank you to everyone who came along and played this week!

Straight into my snippets card:
I used:

- white DL card stock

- a snippet of black card for the backing layer

- snippets of Wild Rose Studio's 'Vintage Rose' paper with a band of minty green ribbon hiding the join, then a little know tied over the ribbon to one side

- image is from Woodware's 'Bubble Bloom - Carol' stamp set, and an unashamed steal from Kath's fabulous card which she showed HERE the other week. Stamped using Memento 'Tuxedo Black' ink then coloured with minty green and pink Pro Markers before being trimmed to size

- then, as Kath did, I topped each 'flower' with Craftwork Cards Card Candi using teeny sticky pads to pop them on with. I used white candi and coloured each one with the same pink Pro marker - my rationale for colouring flowers on the actual card beforehand with pink was to be sure that no white peeped out from under the candi. although the stamp is made with candi in mind of course :)

- added the completed image to the card using thin sticky pads

- stamped the sentiment from the same Woodware set using Memento 'Tuxedo Black' again then punched it out using SU's 'Extra Large Oval'

- punched SU's 'Modern Label' from a snippet of black card, chopped it apart down the centre and then added it to the card using extra strong sticky tape

- finally, popped the sentiment oval on using thin sticky pads

Now for this last week's picks, with the usual difficulty in not showing every single one here. My back is playing up right now so I'll have to keep the picks to a minimum (thankfully I'd already written the bones of this blog post earlier in the week):

I just fell in love with this beautiful vintage Christmas card, made by Mo. So many beautiful elements and a stunning design!

Again, I think that this card made by Diane H has a lovely vintage feel to it. What made me choose this was (quite apart from it being such a lovely card) - the dogwood roses have been die cut from crepe paper. Such a great idea!

And, sticking with lots of layers and a vintage flavour, how about this card made by Jackie T? Just beautiful!

I adore this tri-fold card, made by Sue. Wonderful way to use of lots of snippets :)

This lovely card was made by Jean - and beautifully explained on her blog. How clever to shape the sentiment to follow the curve of the music notes die too :)

Sorry but I need to move on before seizing up - and do the draw for last week's prize, the 'Baby' die set - and the winner is:

Congratulations Diane!  Gotta be your week, first being a pick and also your very first prize win in the Playground too. Can you please send me an email with your address and I'll post the die set off to you this week (di_wray@hotmail.com).

Here's this coming week's prize:

Of course, it's a Woodware 'Bubble Bloom - Carol' stamp set - plus, a packet of white Card Candi so you can make the flowers any colour you wish :)

The Snippets Challenge will run for one week and the Playground gates will close at 11am UK time on Saturday 25th April. The gates will open again at midnight UK time on the same day.

Maximum of three entries and please say 'Yes please' (or similar) in a comment if you wish to play and be a possible winner of the prize.

Mr Linky is below - do please let me know if you have any problems linking, it's easy for me to sort out so don't struggle on alone :)

Last, but not least I have some sad news about our friend Sandra (Hawes) of Nanagramps Craft Designs . Earlier this week, on 15th April, her beloved husband Dennis passed away. He had been ill since January, which explains why Sandra hadn't been commenting as much as she always did - and any posts appearing on her blog right now are ones already scheduled for her DT work. I know you'll all be thinking of Sandra and wanting to send your support at this difficult time. By now she should have received these, with love from all of us in the Playground:
Fairtrade® White Roses
Di and of course, Parsnip!
x