Sunday, 16 April 2023

Bunny is going on holiday

'cos he's tired out and demanding a rest from all this fancy posing stuff - so this is the last card with him on for now. No doubt, he'll pop up again at some point but meanwhile:

I used:

- 5.5" x 4.25" tent style card blank, cut from 'Syntegro White Linen Silkweave' textured card

assorted sizes of snippets of the same white card for the image panel and all the little die cuts

- cut the following die cuts: the flowery border/grass strip using the Charlie & Paulchen die called 'Flower and grass border', unbranded sitting bunny, window opening panes by The Greetery called 'Fresh Air Window Frame' and finally, all from Gummiapan, a nest and a couple of chicks from the 'rooster, hen and chickens' set plus three eggs from the 'Easter Branches' set

 - once again lots of little die cuts to colour in using Distress Oxide ink pads and a water brush

- then used a large ball ended embossing tool to slightly round/shape the bunny, nest, eggs and chicks to add some dimension

- rubbed some Ranger 'Micro Distress Glaze' onto each of the 'rounded' pieces

- the image panel was trimmed to 5" x 3.75"

- then die cut the window into the image panel using a die from The Greetery 'Fresh Air Window Frame' set and backed it with a snippet of yellow patterned paper (the camera is telling fibs and showing it as almost green!)

 - stuck the flower & grass border onto the front panel using red line tape across the bottom section and a glue pen for the blades of grass

- used a die from The Greetery's 'Brick Layer' set of dies to cut a stencil from 125 microns Mylar and stenciled the brick pattern in one corner of the window, using a mix of Distress Oxide inks on my glass mat, all mixed up with a squirt of water 

- glued the arched open windows in place using a glue pen

- built up the rest of the little scene using some teensy pieces of thin foam pad behind the nest, chicks and bunny. The eggs had already been stuck to the back of the nest using red line tape prior to me touching the Micro Distress Glaze BTW

- adhered the front panel onto the card front, using strips of narrow foam tape to raise it up a bit

- finally, using a pencil, I added the eye and little nose to the bunny's face

Didn't add a sentiment this time, it would have knocked the layout to pot.

I'd like to enter this into Darnell's NBUS Challenge #49 - the floral grassy border, nest and eggs, window and shutters plus the 'brick work' stencil were all having their first outing.

Dudley Pupdate: We've had such a mix of weather this past week - Dudley just loves to roll around on his back on the 'easy maintenance' grass in the back garden when it's sunny. I sat out with him for a while a couple of times and when I was then fussing him and stroking his back Len said - 'you DO know that he's probably been rolling on a worm?' Very nice trick Dudley. Been a few 'zoomies' of course - Spring is in the air even though it's teasing us a bit this year.


Sunday, 9 April 2023

Hop, hop, hop - he's back again!

The Easter bunny is back yet again - to wish you all a very Happy Easter:

I used:

- 5.5" x 4.25" tent style card blank, cut from 'Syntegro White Linen Silkweave' textured card

- assorted sizes of snippets of the same white card for the image panel and all the little die cuts (not worth taking a photo)

- cut the following die cuts: grass strip using an MFT die called 'Grassy Fields', unbranded sitting bunny, Charlie & Paulchen 'wheel barrow', plus the following Gummiapan dies: 'small tulips', 'tiny daffodils'  plus a hen and chick from the 'rooster, hen and chickens' set

 - once again lots of little die cuts to colour in using Distress Oxide ink pads and a water brush

- then used a large ball ended embossing tool to slightly round/shape the bunny, barrow, the flower heads, Mama and her chick to add some dimension

- rubbed some Ranger 'Micro Distress Glaze' onto each of the die cut and coloured pieces

- the image panel was die cut using a Lil'Inkers 'Stitched Rectangle' die

- stamped the Easter sentiment into the top right corner of the panel using a stamp from the Clearly Besotted 'Say What?' set of stamps and a VersaFine Clair 'Morning Mist' ink pad

- die cut the bottom edge and sides of the grass strip using the same 'stitched rectangle die for continuity - a small detail but worthwhile - then stuck it onto the front panel using red line tape across the bottom section and a glue pen for the blades of grass

- built up the little scene using a glue pen, red line tape, tweezers, pokey tool and some teensy pieces of thin foam pad behind the wheel barrow, bunny, flower heads and  Mama hen plus her baby. The flowers had already been stuck to the back of the wheelbarrow using red line tape

- adhered the front panel onto the card front, using strips of narrow foam tape to raise it up a bit

- finally, using a pencil, I added the eye and little nose to the bunny's face

I'd like to enter this into Darnell's NBUS Challenge #49 - the wheelbarrow, tulips, hen and chick dies were all having their first outing.

At last, after endless driving rain we had some wonderfully sunny and dry days in Hampshire! Hooray, we certainly feel all the better for it. It's good that the decent weather arrived in time for the kiddies Easter break from school as well. 

Dudley Pupdate: Dudley is absolutely loving the sunshine - he keeps wanting to go into the garden just to stand and sniff the sweet Spring air, play chase the ball for a while and then do a few celebratory zoomies around the garden! We have our very own Spring lamb! Ahem, although we now know that rain is forecast for the coming week, I spoke too soon. Sigh.

The results of challenge #450 are now published in the Snippets Playground HERE

Remember, Sarn is halfway through her current Snippets challenge - HERE

Hope you're having a pleasant Easter - those who gave up chocolate for Lent will be no doubt having a little feast! We just have some of the small 'hard icing coated' Easter eggs to share here (Dudley has his own doggy choccy drops) - ooer, plus an Easter egg which a sweet little friend brought here a a gift, well in advance of the day! IF Len hasn't scoffed it on the quiet of course.

 /) /)
 (-.-)
0_(“)(“)


Sunday, 2 April 2023

It's that Easter Bunny again!

Here's my Sunday snippets card - all using white linen snippets to start off with:

I used:

- 5.5" x 4.25" side opening card blank, cut from 'Syntegro White Linen Silkweave' textured card

- assorted sizes of snippets of the same white card for the image panel and all the little die cuts (not worth taking a photo)

- cut the following die cuts: unbranded sitting bunny with the stool he came with plus the following Gummiapan dies:  a vase from the 'set of vases', three 'Easter branches', and daffodils from the 'tiny daffodils' set of dies. Also, the bow for the bunny - from an unbranded set of seven different bows 

 - so, there I was once again with a lot of little die cuts to colour in - and out came the Distress Oxide ink pads and water brush. Even coloured the little green buds all ready to burst forth!

- after colouring all the pieces, I then used VersaFine Clair 'Morning Mist' ink and a small Indigo Blu stamp appropriately called 'Crackle' to add some interest to the stool. In order to be sure to position the stool so that it was all covered in the 'crackle' in one go, I popped the stamp onto my glass mat, then inked it facing up before positioning the ready 'die cut and coloured' stool on top - then pressed down with a large acrylic block - perfect!

- then used a large ball ended embossing tool to slightly round/shape the bunny and his bow tie, along with the vase and the flower heads, just to add some dimension

- rubbed some Ranger 'Micro Distress Glaze' onto each of the die cut and coloured pieces - word of caution, be sure to keep it away from the back of the pieces as you handle them otherwise sticking them down might prove tricky - ask me how I know this

- the image panel started out on a bigger snippet of white linen card - and to 'ground' the image I stenciled what might pass for a rug onto the bottom edge of the panel - using 'Lost Shadow' Distress Oxide and a stencil I'd cut myself using a die from the Memory Box 'Baptisia' set of dies

- stamped the Easter sentiment into the top right corner of the panel using a stamp from the Clearly Besotted 'Say What?' set of stamps and a VersaFine Clair 'Morning Mist' ink pad

- glued the front panel onto the card front, using strips of narrow foam tape to raise it up a bit

- built up the little scene using a glue pen, red line tape, tweezers, pokey tool and some teensy pieces of thin foam pad behind the vase, daffodil heads and the bunny. The flowers and Spring branches had already been stuck to the back of the vase using red line tape

- finally, using a pencil, I added the eye and little nose to the bunny's face

Cutting my own stencil was inspired by Chrissie Stokes of course. After a false start with 250 microns Mylar, I switched to 125 microns which cuts like a dream - even coping beautifully with the very tricky die I used on this card. In real life, the colours are stronger than in the photo - and there is a third daffodil hiding somewhere in my craft room - it did a runner just before I assembled the card and I certainly wasn't going to go through the whole process of making a replacement.

I'd like to enter this into Darnell's NBUS Challenge #49 - the stool, bunny bow, vase and Spring contents dies were all having their first outing. Oh, and the 'stencil making' was a first too!

I actually have two more 'Easter Bunny' cards to one side here. One is fully made and 'waiting in the 'wings' - a bit of the die cutting is done for the final one, but having been one degree under for a few days during the week I'll wait and see how things go.

I've been having problems with some of my blog commenting lately - when using Firefox it was often, but not always, only allowing me to comment as 'Anonymous'. I've been into Privacy and security in Firefox on my laptop and have changed a pop-up setting to allow them - it seems that the latest Firefox update made this an option and not the default. It's little things like that lurking to trip us up. So do keep an eye on your browser settings. BTW - Blogger works much better on Chrome (both Google products). Quelle surprise!

Dudley Pupdate: It's been a quieter week than usual here but Dudley has never been far away from my side - keeping watch and offering cuddles of course. 

Dudley is such a joy. His morning 'treat hunt' is so funny. He adores 'calcium bones wrapped in dried chicken by Pawsleys or similar. We're not up at the crack of dawn all/showered washed, dressed and on parade at our age (yay, I actually felt right saying that and not explaining to builders why 8am is not on our radar these days!). 

Once breakfast is over and he's 'ready' for the day, Len makes us a second cuppa - mug of coffee for him and one of peppermint tea for me. And that's when Dudley knows it's 'treat time'. No matter where we conceal or hide it - that boy is on the hunt. The only way we can confuse him is to handle the treat between ourselves - and then he's a bit confused. Hands, smell, WHO? HE always wins - and in pretty short time as well.

Sarn has a new Snippets Challenge up and running in the Snippets Playground! Do have a look at her lovely snippets homework and join in with the fun - HERE. Nice selection in the prize pot as well!


Sunday, 26 March 2023

Rudolph Days Challenge - and Snippets Playground Results!

First of all - did you remember to change your clocks. Spring 'forward' by one hour in a lot of countries! 

I found a second piece of card buried on my desk - abandoned after playing without much success with my long-neglected Brushos the other month. After the rather 'flat' looking turquoise blue Brushos result, I dry embossed then sprayed it with Glimmer Mist and added touches of Cadence Silver Gilding Wax here and there ....... before sighing and abandoning it as a lost cause. 

Found it the other day and thought it deserved a second chance. So, here's my Rudolph Days Challenge entry for March over at Scrappy Mo's, and it's also my Sunday Snippets card:


I used all of the snippets, apart from the long blue piece - which looks more purple thanks to the camera

I used:

- 5.5" x 4.25" white card blank, side opening

- the turquoise blue Brushos panel, for which I'd used Strathmore Mixed Media card, a Darice 'Snowflake Swirls' embossing folder, Glimmer Mist and some silver gilding wax was trimmed to 5.25" x 4"

- then layered the panel onto a slightly larger snippet of Tonic pearlescent 'Navy Dazzle' card 

- ran a silver Calligraphy pen around the edges of the navy card and adhered the whole panel to the card front using strips of very narrow foam tape

- used a snippet of vellum to die cut the back surround for the Memory Box 'Merry Christmas Posh Script' sentiment and set it to one side

- then die cut the top layer of the sentiment using the more detailed die from the same Memory Box set - twice from a snippet of pearlescent white card then glued them together using a glue pen, before attaching the vellum 'profile' layer to the back

- finally, used micro dots to attach the sentiment

I did dither a bit about possibly adding a few self-adhesive little clear sparkly gems but thought it might be too glitzy - plus, there was a very strong chance that the self adhesion on the gems wouldn't like the gilding wax and they would promptly drop off as I found when attaching the finished sentiment to the card front in the final step of making the card!Glue pen didn't work but, for now, micro dots seem to be doing the trick with the sentiment! The more I use them, the more I like them.

I would like to also enter this card into Darnell's latest NBUS Challenge #48 HERE as the silver gilding wax and the Christmas sentiment die were having a first outing.

Must admit, I'm a bit hooked on vellum backed die cut sentiments right now. I lifted the initial scroll of the white letter 'M in Merry' after taking the photo by the way - before storing it away in my growing box of Christmas 2023 cards as I noticed it had made a bid for freedom. ☺

The results of Snippets Playground Challenge #449 can be found HERE - and there is still one week to run on Challenge #450 HERE.

Dudley Pupdate: It's been a busy week and my snippets card was a bit of a rush. Dudley has spent a lot of time dodging the rain and then sleeping under my desk. It seems to be a cosy kennel for him now! He mislaid Honka Duck one morning during the week and the absolute panic on his face was heartbreaking. I spotted Honka out of Dudley's line of view - on our bed - and as soon as I pointed he leapt up to embrace Honka as if he'd just come back from an around World Cruise! 

Speaking of embracing, on Friday morning we missed the chance of an adorable photo of Dudley - fast asleep, lying on his side literally with both front legs wrapped around Honks in such a loving cuddle. But if we'd made a move to grab a phone or camera he would have woken up and the moment would have been lost - so we just made the most of watching him for a while. 


Sunday, 19 March 2023

Snowy Kisses

This is my snippets card to kick off challenge #450 in over in the Snippets Playground. Go HERE to join in the fun!

Bad 'lighting engineer' work means the right hand side of the card is a bit washed out - sorry, Dudley is still learning the ropes, wink!

Sizeable snippets, although I didn't use some of the white card or the piece of vellum in the end

I used:

- 6" x 6" white card blank, made using a sheet of Strathmore Mixed Media Vellum Finish card to match the image panel-  side opening

- used a snippet of the Strathmore card for the image panel (I keep every little scrap - it's not cheap stuff!) using a Sweet Dixie stamp called 'Snowy Kisses' and a VersaFine Clair 'Nocturne' ink pad 

- then coloured the image using Arteza Watercolour pencils and a water brush - trying to pick up the background paper colours as much as possible

- added clear 'Wink of Stella' - to the snow on the trees, the snowballs on the ground and also the little poinsettia flower head - so cute!

- die cut the image panel using a 4" square die from Clarity Stamps 'Nested Square Heart Doodle Aperture Frame-Its' set

- stamped the sentiment onto the image panel using a die from Uniko's 'Most Wonderful' set of Christmas sentiments and a Hero Hues 'Granite' ink pad - the Misti was invaluable!

- then slightly trimmed a rather large snippet of holly patterned paper from LOTV's 'Woodland Wishes' paper pad down to 5.75" square and glued it onto the card front

- die cut a snippet of almost plain green paper from the same LOTV paper pad, using a Presscut die from their huge set of square dies. I did this having tried on a totally unusable piece of card first - to make sure both sizes lined up perfectly

- glued the green piece of die cut paper to the back of the image panel to highlight the pretty die cut edging around the image panel, I used a glue pen - two in fact, with different sized nibs for fear of spoiling all the work thus far!

- used very narrow pre-cut strips of double sided foam (from Amazon a while ago and very useful for a little more 'lift' than my much loved thin sticky pads) to stick around the back of the image panel with a few more pieces inside the area to add extra support

- then used Chrissie Stokes' tip, after removing the protection layer from the foam strips, I ran a glue stick over all the exposed 'sticky' to give it some 'wiggle room' rather than immediately setting itself firmly in place

- and that was it, all finished and one more for the 'Christmas Card box' - which is looking fairly healthy already!

Some things I encountered along the way:

- Arteza watercolour pencils are truly great and the more one uses them, the easier and more variable it becomes. I generally apply water colour pencil to the image and then 'draw it away' using a water pen. It's also a good option to pick up the colour with a water pen - directly from the pencil itself and darker colours tend to work best when doing this.

The use of the set of dies came about thanks to a snippets playmate Pat - I'd all but forgotten I have a set of these dies and one of Pat's recent lovely cards prompted me to dig it out for a first outing.The packaging is huge and it didn't fit into a NBUS basket so was languishing to one side. Thanks for that reminder Pat!

As always, my LOTV pads papers are continuing to gradually diminish in size. I had the foresight to buy some in digital form when it was apparent that digital was the route they were taking. I'm not keen on digital papers or images - but needs must when the devil drives!

I'd like to enter this card into the following challenges:

Darnell's NBUS Challenge #48 - my NBUS is the Sweet Dixie stamp I used for the 'Snowy Kisses' image and the set of Clarity frame dies

Christmas Kickstart Challenge #72  - the theme is 'Wrapped Up For Christmas' and my 'snow people' are wrapped up in their scarves - as well as in one another judging by the carrot noses! Cute! x

Dudley Pupdate - he discovered blueberries during the week. I'd read that dogs rather liked them and so gave him one to try whilst preparing a little dessert for us humans - of fresh blueberries with strawberry kefir yoghurt. Of course, Dudley then ran away with his first one, as he does, to explore and try out his new 'single berry treat' in peace - thankfully on a tiled floor as am sure they will stain both him and anything else they come into contact with! After two return visits to ask for more, the novelty wore off - thankfully! 

As it is, Dudley flings his diced carrots all over the place with wild abandon - mostly as he sifts through his 'veggie dog-bowl' to make sure his much loved diced sweet peppers have all been eaten first. We're not particularly vegetarian but do try to supplement his breakfast of more traditional semi-dry dog foods with evening meals of steamed chicken, other cooked meats - 'preferably grilled steak' says Dudley, the treat of a boiled egg as well as fresh raw and safe veggies at least. 

Fat chance of grilled steak here - the country is in financial meltdown right now and Dudley has to knuckle down ......... and might even need to get a newspaper round at some point. Ha, just try telling HIM that one though! Truth be told - he actually gives SO much more than he ever asks for, just like all dogs do.


Sunday, 12 March 2023

Snowy Cabin Christmas cards

Well, my snippets cards are appropriate with all the snowfall most of the UK has had this past week! I made eight cards in one go, over a few days and here are a couple of examples:

I used:

- white A6 card blanks, both side opening and tent style

- then got out my LOTV much loved blue 'Frosty Christmas' and 'Krafty Christmas' paper pads and hauled a load of snippets from the 'halved envelopes' that I pop into the backs of all my paper pads to store snippets

- covered the fronts of all the cards with papers from one or other of the paper pads and, as I expected, most of them were snippets

- die cut the circular scene from a white snippet (I found a load of these whilst looking for the A6 cards) - using a Memory Box 'Snowy Cabin Circle' die

- backed the die cuts with 'snowy' patterned LOTV papers to tone with the background papers I'd added to the card fronts. I die cut them using a Tonic Studios circle die and then glued to the back of the circular scene before reinforcing with a further white card die cut circle

- some parts of the cabin had fully popped out when being die cut, so I added contrasting die cut snippets back into the outline - all still from the same two paper pads 

- coloured the cabin windows (which hadn't popped out - hooray!) with a yellow Polychromos pencil. I would NOT have fancied inlaying those - or even backing the window frames with half inch or less square yellow snippets

- the sentiments were both from a lovely set of NBUS stamps by Creative Expressions called 'Festive Wishes'. Some were stamped onto the 'snow' itself and some were stamped onto circles of white card which had been die cut using a The Works die from a set called 'Circle Stitches'. The inks I used are Brilliance Dewdrop 'Pearlescent Beige' and Hero Hues 'Granite'

- then added all the die cut and sentiment circles onto the card fronts using thin sticky pads

- final touch to the cards with the circular sentiments was to add a few self-adhesive clear Memory Box 'Fairy Drops' to the bottom left corner for a bit of balance

Would I make eight almost the same in one go using the Snowy Cabin die ever again? Probably yes - but I'd simplify the layers/design/process for sure!

One thing I did try for the first time was a tip I picked up from Jennifer McGuire which is to make a 'jig' when stamping repeatedly onto the same die cut shape - for both the cabin circle and the sentiment circle. It's hard to explain without a video but here goes:

- I wanted three sentiments all the same, using the same stamp on the small die cut circles and opted to die cut and then stamp afterwards - for a sentiment on a circle you can do it either way - but I was also facing stamping onto five of the circular scenes later on

- to make the 'jig' I hopped around from one foot to the other and did a merry dance took a piece of spare card (another snippet) and die cut then removed the stitched circle

- popped the spare piece of card with the die cut circular aperture into my small Misti, held it in place with a magnet, then slipped a snippet of copy paper underneath the hole before lining up the 'Cosy Christmas Wishes' sentiment stamp in the aperture, and picking it up with the Misti lid

- for reassurance I then did a test stamp onto the piece of paper - spot on as well!

- then, one by one, I just popped die cut circles into the aperture, re-inked the stamp on the lid, made sure the 'jig' was still seated into the corner (even with a magnet bar I now always double check) and stamped them - one after the other 

Here's the 'jig' set up with a die cut circle in place ready to stamp - using the stamp which is in position on the lid. Another time I would perhaps use a piece of contrasting card when creating the jig but the white obviously did the job:

Flushed with success - I then stamped the sentiments onto the die cut cabin scenes in the same way. Just used the plain die to cut the bigger aperture, popped the complete scene in place, lined the sentiment up where I wanted it and followed the same process as I did for the small circular sentiments. I added a little pencil mark to the outside of the aperture so I could line up the smoke every time to make sure the sentiment was stamped straight.  

I would like to enter the top one of the cards into Darnell's NBUS Challenge #48 as it was a first outing for both the 'Snowy Cabin' die and the 'Festive Wishes' sentiments stamp set. 

Dudley Pupdate: We had 'zoomies' from Dudley around the back garden mid-week, once he got used to 4" of snow. His little legs looked so short, no piccies or video sorry to say -  but he did race around in pure joy, as always.

We did have a laugh earlier this week, decided to try once again to hide the pretty gross (albeit not smelly, thank goodness) 'Honka Duck' ...... when Dudley was totally elsewhere in the house.

I was at my desk in the craft room when he bounded back upstairs - and both of us - Len in his study and me with one eye open for 'the wee beastie' - kept our heads down. Within less than a couple of minutes of him looking for that flipping duck, if that - I spotted Dudley out of the corner of my eye.

AND, I also saw the 'evil Havi look'! He was stood like a statue on a bottom corner of our bed rather like an angry 'moon gazing hare' - literally glaring upwards. At the exact place in a built in wardrobe, where horrible, chewed old Honka, his most loved treasure, was hidden on a high shelf! He truly was absolutely furious and he just KNEW where Honka was! Amazing sense of smell and I think this is one battle we've lost! 

Sometimes I wonder who is the 'boss' here - don't answer that, we already know that it has four legs and a fluffy tail!

Remember that we're halfway through Sarn's Challenge #449 and the latest picks and prize winner are over HERE on the Snippets Playground!

Love, as always, Dudley and yours truly xxx


Sunday, 5 March 2023

It started with a swing .......

...... and just grew from there:

I used:

- 5.5" x 4.25" tent style card blank, cut from 'Syntegro White Linen Silkweave' textured card

- assorted sizes of snippets of the same white card for the image panel and all the little die cuts

- the image panel was die cut from a snippet using a Penny Black set of dies called 'zig-zag stackers', then set aside

- out came my 'recently set up' dedicated storage folder for teeny dies and then the fun began!

- I cut, all from white card snippets, the following die cuts: Memory Box 'Woodland Branch' and a standard hanging swing from 'Set of Swings', unbranded sitting bunny (he also came with a stool). Plus the following Gummiapan dies: one bird from 'Seagulls', crocuses from 'Spring Flowers' and the biggest pot from 'Set with Pots' 

- so, there I was with a lot of little die cuts to colour in - and out came the Distress Oxide ink pads and water brush

- spend a lovely, relaxing time just rubbing a little of each colour in turn onto my glass mat and picking it up from there with the waterbrush to colour the die cut. For my own reference, I used: 'Walnut Stain' for the branch, 'Vintage Photo' for the swing, 'Tea Dye' for the bunny, 'Lost Shadow' for the bird, 'Villainous Poison' for the crocus flowers, 'Peeled Paint' for the crocus leaves and stems - and a mixture of 'Fired Brick' and 'Spiced Marmalade' to get a terracotta for the pot

- then used a large ball ended embossing tool to slightly round/shape the bunny, along with the pot and the flowers, just to add some dimension

- rubbed some Ranger 'Micro Distress Glaze' onto each of the die cut and coloured pieces - just using a finger then buffing it with a clean tissue. It doesn't add a shine but it does 'lift' the 'matt' look - if that makes sense

- stamped the sentiment into the lower left corner of the panel using a stamp from the Clearly Besotted 'Say What?' set of stamps and a SU 'Perfect Plum' ink pad cube. Obviously, I'd checked and double checked the layout and positioning of the other little elements  

- then glued the front panel onto the card front, with a layer of thin foam sheet backing to raise it up a bit

- heart in mouth I then built up the little scene using a glue pen, tweezers, pokey tool and some teensy pieces of thin foam pad behind the pot and the bunny. The trickiest part was adding the swing and piece of tree branch to make sure they were in the right place and trimmed as I wanted them

- finally, using a pencil I added the eye and little nose to the bunny's face

Phew - bit of a marathon and I do need practice using Distress Oxides to colour with but it was huge fun! I think this card might go to Germany for the grand daughters and their Mum.

The swing die set that started it all off was a little gift from a friend a while ago - you know who you are - mwah! x

I send very few Easter cards but do have plans for two different designs for a couple of friends from my school days. More 'scene building', more Gummiapan -  and more of the sitting bunny I suspect.

So grateful to Chrissie Stokes for her YouTube videos, I've learned loads since finding found her channel round about Christmas time.

Out of interest, the micro glaze I used to finish off the coloured die cuts could just work on top of Zig pen colouring - I need to have a play. To be honest, I bet good old fashioned petroleum jelly might work in much the same way - at a fraction of the price?!

I'd like to enter this into Darnell's NBUS Challenge #48 - all of the dies, apart from the 'Woodland Branch' and the 'Zig zag' edging die , were having their first outing.

Dudley Pupdate: It's been an exciting week for the little guy, we've had four different lots of people here doing various things - and once he's been introduced, and is certain that stealing Honka Duck isn't the reason for their visit, he thinks it's great fun. A couple of times he thought it might be a nice change to go home with them when they were leaving!

EDIT: Bad me, I just realised five days later that I didn't tell you that our Sarn has a new Snippets Challenge up and running in the Snippets Playground! Do have a look at her lovely card and join in with the fun - HERE. She's got a super prize on offer as well.


Tuesday, 28 February 2023

Rudolph Days Challenge - February 2023

Eek, Mo's February 2023 Rudolph Days Challenge is due to close - so I'm racing in with an upcycled Christmas card:

I used:

- 6.5" x 3.25" white mini slim card blank, tent style

- piece of Tonic 'Scarlet Organza' Tonic satin mirri card, die cut using a die from the Lawn Fawn stitched border 'Mini Slim Stackables' set and glued onto the card front

- I'd already chosen the card to upcycle, so I chopped it down to sit inside the red satin mirri 'frame'

- next I added a silver mirri card sentiment, backed with a white card die cut for dimension - cut using a Tonic Studios 'Mini Moments Merry Christmas' die

- then backed the image layer using thin white foam sheet and Collall All Purpose glue

- then glued it onto the red layer and called it done

I do so love the Tonic range of mirri, satin mirri and pearlescent card for Christmas cards. Their variety of red mirri shades is quite extensive and 'Scarlet Organza' is such a perfect match for the red car!

When cutting down the upcycled card I was pretty ruthless and cut off  the top half which was a background scene of a horse and cart, some hills, trees and a few houses in the distance. I like that the focus is now drawn to the tree with the cardinals - as well as the car - and furry passenger! The card is still quite busy but the original was over fussy, IMHO.

And I still have a good selection of 2022 bought card fronts from ones we've been sent, in reserve to play with!


Monday, 27 February 2023

Cheers!

I very recently discovered the 'Outside the Box' Memory Box challenge, where you need to use at least one Memory Box stamp or die. I have a ton of Memory Box products so this was exciting news. Sadly, they don't send prizes outside the USA/Domestic area - but it's great to get you thinking for sure!

It was such a recent discovery that I more or less decided to wait until March to play as the February #92 challenge closes late on 27th February. But the theme of 'I'll Drink to That' kept on swirling around in my head - and so I whipped up a card on Sunday to enter, here's the link to the Challenge.

I had a load of fun making my card:

I used:

- 5.5" x 4.25" card blank, made using 'Syntegro White Linen Silkweave' textured card, side opening

- a snippet of black card (from the fancy folders that Royal Mail post online postage supplies in) - die cut using the Memory Box 'Piestra Tile' die

- the cocktails are by Tattered Lace from the 'Cocktail Glasses' die set - gifted to me by a very kind friend a good while ago. I die cut them using snippets of the same white card, on the reverse smooth side 

- then spent a happy hour (ha, ha - see what I just said, totally without thinking!) colouring in the die cuts, using Zig pens and a waterbrush

- tickled the contents of the glasses with clear Wink of Stella - not playing game and showing up in the photo of course

- layered the little cocktails onto another layer of the same die cuts for rigidity

- then I could place things in place and work out where I wanted the sentiment to go, before they were actually glued down

- stamped the word 'Celebrate' using a Paper Smooches Stamp from the Sentiment Sampler' set of stamps and a VersaFine Clair 'Nocturne' ink pad - a lovely intense black

- then added the 'Piestra Tiles' panel using a glue pen before adding the cocktails, again with a glue pen ........ along the top of what I imagine to be a rather elegant bar in a swish hotel!

This was such fun to make - I didn't think to use my Arteza Watercolour pencils until I was popping the water brush away. Bad me, sorry Santa! I suspect they would be better for such small detailed areas but we live and we learn.

Apart from linking into the Memory Box challenge above, I'd like to enter this into Darnell's NBUS Challenge #47  - the cocktail glasses die set was having a first outing.

Also, the current Allsorts Week 717 Challenge - under the 'Anything Goes' option.

As to the contents of the cocktails - ask me another! No idea but from left to right I'd hazard a guess at a 'Limoncello Serenade', a 'Mojito' of sorts and finally a 'Peach or Strawberry Daiquiri or Bellini'. Yup, I've been round the cocktail menus in my time. Kept these names clean, you ought to see the ones listed in the menus in Covent Garden's cocktail bars. I used to meet up with a friend there pretty regularly after work before she and I tottered tootled off to find somewhere nice to have a meal - happy days!☺


Sunday, 26 February 2023

Uniko's 11th Birthday

Bev, over at Uniko, is currently celebrating 11 years since she started off her brilliant business. So I made a snippets card to join in with the fun:


My snippets, although I didn't use the black after all

I used:

- 5.5" x 4.25" 'Syntegro White Linen Silkweave' textured card, tent fold

- a piece of the leftover A4 sheet I used for the card card to cut the panel - sized at 5" x 3.75" - then set aside for a while

- stamped the flower head and the leaves onto snippets of bright pink and light green card, using stamps from Uniko's 'Gerbera' set and a  VersaFine Clair 'Nocturne' ink pad

- then die cut the flower head and leaves using the matching dies

 - next I pulled out a 'Happy Birthday' stamp from Uniko's 'Floral Vines' set of stamps and fiddled around working out placements of the flower and the sentiment

- I wanted to add something extra to the background and ideally would have used an embossing folder to partially emboss the panel where the flower would go. However, it was Uniko products only so I settled for using a score board to add a couple of sets of double lines above and below where the sentiment was to be stamped 

- stamped the sentiment using the same 'Nocturne' ink

- glued the panel onto the card front, raised up with a layer of foam sheet for dimension

- then glued the leaves in place, and added the flower head using thin sticky pads for more dimension

- stepped away and resisted the urge to add anything else!

I'd like to enter this card into the following challenge:

Uniko's 11th Birthday Celebrations - you must use only Uniko products (there are some links to freebies if you want to play along), end date is 28th February

Sarn's post for the picks and winner of Challenge # 447 can be found HERE in the Playground.

Dudley Pupdate - poor little guy was pooping for England during the week. He's fine again now thankfully. He's such a little trouper and just gets on with things - unless there's any risk at all of anyone, including Len and myself, stealing his beloved Honka Duck of course. If one of us is left alone with Honka Duck and then dares to move around, such as standing up to open a cupboard - he charges back into the room like a little rocket to carry out a rescue mission. At the same time almost squealing with indignation! I keep telling him that he's a 'big girl's blouse' - Northern expression for being a bit of a wimp. ☺


Sunday, 19 February 2023

Christmas 'Joy and Cheer'

This is my snippets card to kick off challenge #448 in over in the Snippets Playground. Go HERE to join in the fun!


It's a bit deceiving as the vellum on top of the mirri card makes it look as if there's some pale pink card as well!

I used:

- 5.75" x 5.75" white card blank, side opening

- first of all I wanted to cut and assemble the sentiment in order to confirm that the patterned paper I had in mind would work well - the NBUS die set I used is by Memory Box, called appropriately 'Joy and Cheer'

- die cut the actual sentiment once from white card and once from Tonic 'Rose Platinum' mirri card - both were snippets - then glued the mirri layer onto the white one for rigidity as well as dimension

- then die cut the background profile from a vellum snippet

- popped the mirri sentiment onto the vellum layer - using a glue pen 

- trimmed a piece of Tonic (Rose Platinum) mirri card to 5.5" x 5.5"

- I cut the middle out of the mirri card, in a moment of thrift, using a square die by Presscut measuring about 4.5" x 4.5" so I could save that piece for future use

- glued the mirri card 'frame' onto the card front and leveled out the centre by gluing in a piece of white card, die cut using the same square die to be a perfect fit **

- then trimmed my chosen piece of paper from the Crafter's Companion 'Frosty and Bright' paper pad - down to 5.25" x 5.25" and glued it onto the mirri edged layer

- finally, glued the vellum backed sentiment onto the card front - making sure the glue was only behind the actual lettering. The vellum is 150g so it's heatproof and quite thick but I wasn't taking any risks at that stage!

Whist at it, I made a second card exactly the same - of course. 

** The 'cutting out the centre' of the mirri card wasn't one of my better ideas to be honest. It did make gluing the mirri card frame onto the card front less easy to get straight than if it hadn't had so much of the middle removed, basically as it's not rigid of course. C'est la vie - we live and learn! It's still worth bearing in mind if you're desperately trying to get as much out of a particular piece of paper or card as possible of course. Perhaps I'll have a try at taping the 'filler insert' into the card 'frame' from behind before gluing it to the card front another time.

I'd like to enter this card into the following challenges:

Darnell's NBUS Challenge #47 - the Memory Box die set was having a first outing, certainly won't be the last though.

Dudley Pupdate - we think he's going through a 'spotty teenager phase' at the moment. Seeing how far he can push the boundaries - until he's forgets himself and still comes for cuddles of course! 

One example of him being a 'rebellious kid with his baseball cap on backwards' was him going on 'hunger strike' two evenings running - purely as he could smell our meal cooking and thought he might join in and have a share! Pizza one night and boeuf bourguignon the next? I don't think so young man. Nice try though!


Wednesday, 15 February 2023

And then, I met you

I wanted to make a CAS Valentine card for Len - nothing super-slushy - and came up with this:


I used:

- 5.5" x 4.25" side opening card blank, made using Syntego 'White Linen Silkweave' textured card stock, scored, folded and trimmed to size

- die cut a row of hearts from a snippet of plain red card stock, three times and glued them on top of one another for dimension before setting them aside - the die I used is from Positively Papercraft's 'Two Piece Heart set'. 

- then cut a panel measuring 5.25" x 4" from the same sheet of card and scored it on all four sides at .25" from the outer edges

- dug through my stamp sets and found the sentiment I used - from an Avery Elle set called 'And then'

- stamped the sentiment onto the panel, checking where I wanted the row of hearts to be placed, used a Hero Hues Core Inkpad called 'Granite' for a softer look then straight black

- then glued the panel onto the card front

- finally, added the row of triple layered hearts 

The card is a pure white in real life, I forgot once again to tap my lamp setting to the daylight setting when taking the photo. Dumbo!

It went down well with Len, he likes CAS style cards! The sentiment is quite special, I met Len through work in London when we'd both been through traumatic marriage break-ups. We were colleagues and just friends for a good while, I never really expected that he would be into making another commitment. The words 'And then, I met you' sums up that you just never know what's around the corner!

I picked up a great tip from Chrissie, which a lot of you might very well know already. When folding your own scored or even a bought scored card blank, lay the opened out blank onto your scoreboard, butting the top edge of the card and left hand side against the raised edges. Then fold the right hand half over the left, along the score line to butt up against the raised edges then run your bone folder down the fold line - and you should have a folded card blank with perfectly lined up front and back edges.

I'd like to enter this card into:

The current Allsorts Challenge Week 715,  where the theme is 'A/G with the option All About Hearts'. 

Darnell's NBUS Challenge #47. My NBUS items are the hearts die and also the Hero Arts 'Granite' ink pad (thanks to Jennifer McGuire for the tip).


Sunday, 12 February 2023

Playing around with Gummiapan dies

Chrissie Stokes on YouTube is a huge fan of the Swedish company 'Gummiapan' and I can absolutely see why. Their sweet and quirky little dies in particular are SO detailed, very reasonably priced - and postage to the UK is very fair as well.

So, I had a first play the other week and came up with this 'one-off' Christmas card, making up a story as I went along:

I used:

- 5" x 5" square white card blank, cut from Syntego 'White Linen Silkweave' textured card stock, scored, folded and trimmed to size

- then used the flat/plain side of the leftover snippets to make the die cuts for the card of the card - hence no photo of just a bunch of white snippets

- I did cut a piece of the same linen weave card for the image layer, just a bit smaller from another sheet - my middle name isn't Houdini!

- and then the fun began and I used the leftover snippets of white card to die cut a selection of Gummiapan dies - teeny and so sweet as well. I used the following sets, 'Sitting Gnome', 'Fluffy Trees', 'Gift Bags' and 'Lantern with Candles'

- coloured them with my Ziggy Pens and then whined to you lot about how 'flat' the colours looked, even after spraying them with some clear Glimmer Mist

- for the sake of not ruining my work, held off playing any further with coatings and sprays

- the little lantern was a late addition and such fun to make - die cut the lantern and candles from white card, same as all the rest. Coloured the lantern frame with a silver calligraphy pen then decided it would be fun to add some clear acetate (from a snippet of packaging) to look like glass. It looks so good in real life, with the candles stuck in place behind the acetate, using micro dots

- then added all the elements to create a little scene whilst trying to stick to a bit of CAS too

- before sticking things down - using a mix of glue and mini glue dots, I did run some grey Pro marker 'grounding' lines along the bottom of the image panel

- then stuck every little piece into place - even the gift bags are so detailed, one has a teeny lifting handle for goodness sake!

- once everything was in place - I added a spare layered sparkly silver die cut sentiment (another snippet?) that I found in a little pot, left over from my 2022 Christmas card making sessions 

- glued the whole panel onto the card front - finished!

My little story, woven around the card, is that Papa Gnome had been last minute Christmas shopping. Buying his personal gifts for his beloved wife, Mama Gnome. He was well on the way home, but was also really tired from all the other male Gnomes fighting and jostling in a panic just before Christmas. Then he, then spotted a little candle lantern in the woods beckoning to him, beside a tall tree - so he dropped his shopping and immediately leaned back for 40 winks! The gift bags are now leaning against the Gnome's leg! That's the thing with glue dots - they can move around a bit!

This did remind me of many years ago when I worked in Newcastle City Centre and we were rather cruelly made to wait on the 'whims of senior management' but usually did get 'let out' slightly early on Christmas Eve. I loved to walk up the 'main shopping street', all lit with Christmas lights, where the biggest department stores were, to the bus station, past the likes of Fenwicks etc. and quietly smile at the last minute 'male buyers' straight from the pub or an office party. 'Weebling into the stores' .... totally at the mercy of the awaiting and smiling perfume, jewellery and lingerie shop assistants! At that stage they truly didn't care what they spent! Memories!

This past week was kinda busy with this and that, including the optician for me on Tuesday just gone. Absolutely no change, which is really interesting given the cataracts panic button business three years ago by my previous optician. I have total trust in my current practice though - which is a good feeling. If you find a good optician then try to stick with them. Avoid the ones who are there purely to sell their latest frames.

Dudley was 'super-charged' from Monday morning onwards! As soon as we stirred he hopped back up onto the bed, licking, bouncing and generally trying to wake us up - PRONTO! It shows how down he must have felt after the vaccines - it was like having a Jack-in-a-Box in our bedroom!

We've had some warmer days lately so he's had loads of walkies this week and that too has given him some more 'bounce'. Won't be long before it's warm enough for me to go along as well - yay!

Remember that we're halfway through Sarn's Challenge #447 and the latest picks and prize winner are over HERE on the Snippets Playground!

Love, as always, Dudley and yours truly xxx


Sunday, 5 February 2023

More Arteza colouring

Sarn's post starting off Challenge #447 is up and running and can be found HERE in the Playground.

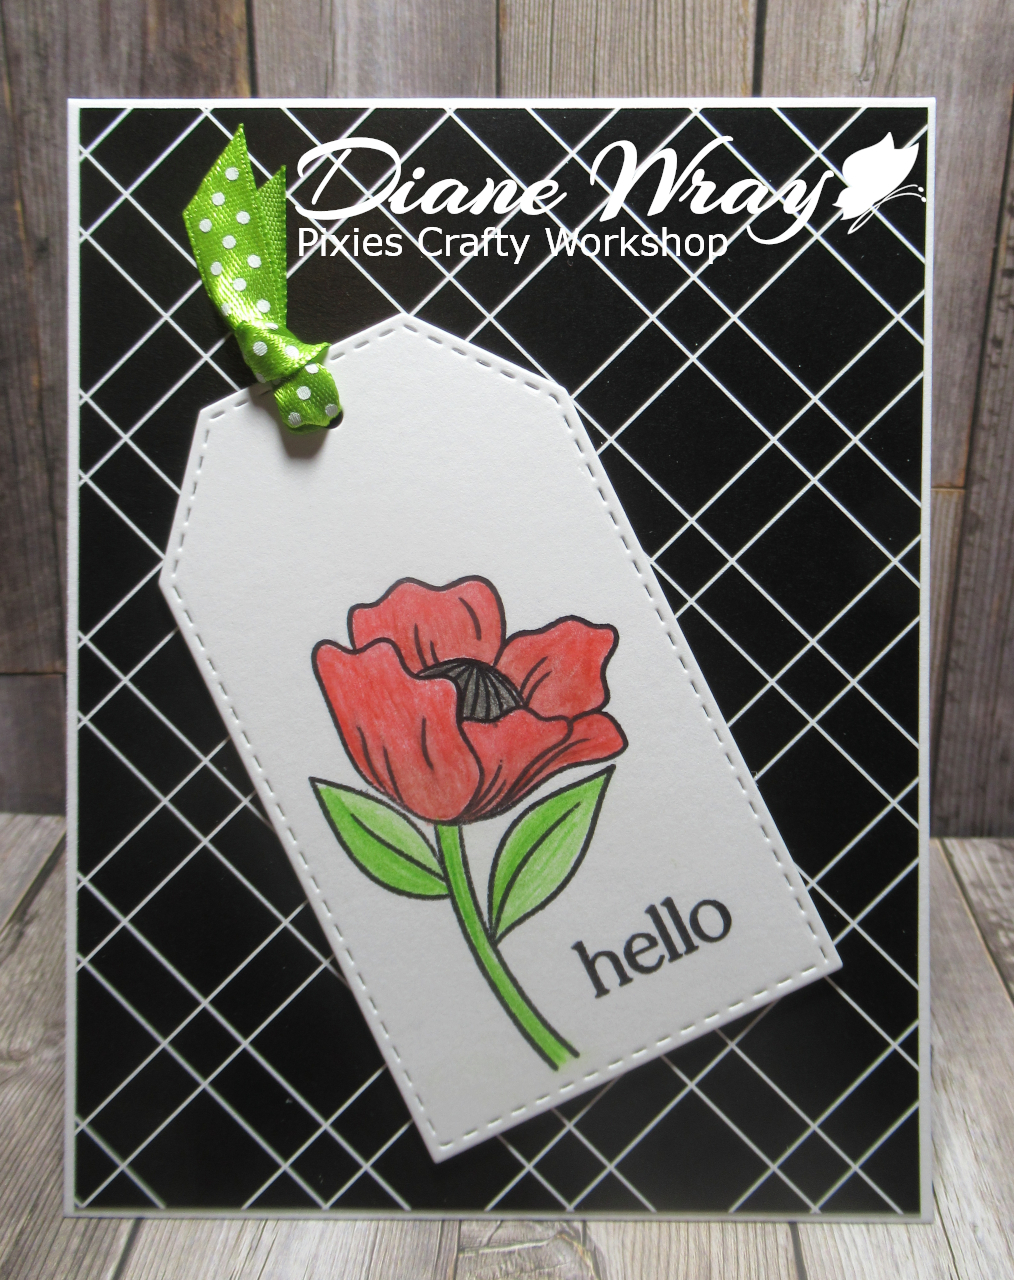
Whilst I had the pencils, waterbrushes, label die etc. out over a week ago, I stamped a second image using the same sweet little Altenew flower stamp onto a further snippet of Mixed Media card, added a snippet of green spotty ribbon - and, shock horror, used the best part of an entire sheet of background paper. This is the result:


My snippets!

I used:

- 5.5" x 4.25" 'Strathmore Mixed Media' card blank, tent fold, used the same card as for the water colouring to be sure of a matching shade of white

- stamped the flower image and the word Hello from the same set onto a snippet of 'Strathmore Mixed Media' card using black Archival ink and a stamp set by Altenew called 'Bold Floral'

- coloured the image using the Arteza pencils and a fine waterbrush - this time trying for the look of a poppy

- die cut the image with sentiment using a label die from an un-named set of dies

- trimmed a piece of paper from the Altenew 'Essential Black & White' paper pack to just smaller than the card front and glued it onto the card front

- threaded a snippet of spotted green satin ribbon through the top of the tag and fixed it to the card front using sticky pads

- finished!

The poppy reminds me that Spring and then Summer will surely be on the way. Let's hope so! The odd thing is, I read recently that this coming Summer might be even more of a scorcher here in the UK than last Summer. Can't we stop the clock at late Spring/early Summer and then skip the intense heat in the UK then begin ticking during Autumn?

Dudley Pupdate: it's been a fairly adventurous week with Dudley. We trimmed his claws, no mean feet feat which usually takes the two of us - me hugging a wriggling bath towel wrapped 'burrito' to my front - with just one paw at a time poking out - plus a rather cross little face glaring and rolling its eyes. Len then sits in front of me to do the 'deed'. The little monkey (Dudley) managed to get his other front paw out and clocked me right in the mouth at one point. Then, desperation set in and he buried his head under one of my arms in sheer surrender - for a few minutes until the fight kicked off again. It's such a shame he doesn't realise it's for his own well being, but the towel trick is a big help. Then later in the week it was tsunami time when we all he had his bath - followed on Friday by his annual trip to the vet. 

It's the first time Dudley has been fazed by going to the vet - even when he went back after his mole removal he was fine. He was really uneasy in the waiting room for some reason. But, he passed his checkup fine - although on the way home, reading his record card I realised that he'd been given his three yearly DHP jab in addition to the annual Lepto jab. He was unwell after the one three years ago so I just kept quiet and crossed my fingers

However, within just a few hours a reaction set in - nothing too serious but Dudley not eating his evening meal is a sure sign he's off colour! He lay around pretty listlessly for the whole evening - but perked up by midnight and allowed Len to hand feed him his favourite meal of steamed chicken breast. Then he slept beside the bed rather than in between us - I think hopping onto the footstool and thence onto the bed was just too much effort for him. Thankfully, by the morning he more or less was back to his usual self. So all in all he's been through the mill this past week - poor little sausage!


Thursday, 2 February 2023

Salvaging a Brushos disaster

I decided to have a go at using my long-neglected Brushos the other week. And, as usual, instead of the really pretty mottled results that others achieve - I ended up with a mess of very slightly variegated greens, partly from over-zealously using two shades of green ...... as well as too much water. So, I dumped it to one side and did something totally different. Brushos and I just do not work well together. Am sure I'm just too heavy handed - but c'est la vie as they say.

However, a day or so later I picked up the discarded Brushos panel, peered at it then gave it a few squirts of Glimmer Mist to add a slight sparkle - then suddenly it began to have possibilities - this is what I ended up making:

Bright mirri gold card, with my red top reflected!

I used:

- 5.5" x 4.125" white linen silk weave card blank, tent style (just slightly smaller than USA A2 size) - confession, due to the odd size Brushos panel I ended up with once I cut the grotty edges off!

- the green Brushos panel, for which I'd used Strathmore Mixed Media card and later I'd also sprayed with some ancient clear Glimmer Mist

- ran the panel through my Cuttlebug using a NBUS Gina K embossing folder called 'Holiday Flora' and hope began to rear its head - that is one fabulous folder!

- trimmed the panel and added some gold gilding wax using NBUS Cadence 'Inca Gold' Finger Wax, I need more practice, please be kind - although I used my right ring finger I suspect that a finger sponge would have less 'give' than the pad of my finger!

- then layered the panel onto a slightly larger snippet of Tonic 'Inca Gold' mirri card and glued it onto the card front

- used a snippet of vellum to die cut the back surround for the word 'Christmas' using a NBUS die from Julie Hickey's gorgeous 'Christmas Profile' die set and set it to one side

- then die cut the word 'Christmas' - using the same Julie Hickey die set - twice from a snippet of white card and once from a snippet of 'Inca Gold' card then glued them together using a glue pen, before attaching the vellum 'profile' layer to the back then setting it to one side

- die cut the word 'Merry' using a 'small Merry' die from years ago by Britannia Dies, two from snippets of white card and once from a snippet of 'Inca Gold' mirri card - glued the layers together using Stix2 'Micro Dots'

- then positioned the two parts of the sentiment die cuts where I wanted them, using some very small Stix2 craft dots to adhere the word 'Christmas' and the fine glue pen to adhere the word 'Merry'

And there it was, done! I used quite a few a lot of items from my NBUS (Never Been USed) baskets. I truly don't need to buy anything crafty for the rest of this year, apart from essential and basic items. Ha, define THAT one! ☺

I also used some items like Stix2 tiny glue dots as well as micro dots for the first time. What a revelation (thanks to Chrissie Stokes on her YouTube Channel). The micro dots are a right 'so and so' to get into if I'm honest - I sat for ages trying to separate the two layers. But, SO worth it! And, I was wise and popped a teeny tiny piece of paper in the corner where I'd worked the layers apart to make life easier in future.

I would like to enter this card into Darnell's latest NBUS Challenge HERE - so much NBUS I almost feel ashamed to admit it! The embossing folder, the gilding wax (in fairness my cheapo ones had solidified) and the lovely Christmas word die as well. I guess the tiny glue dots and the micro dots also count!? Man - me needs to put the spending brakes on!

I would also like to enter the Christmas Craft Creations Challenge HERE  The theme is snippets and you still have time to join in!